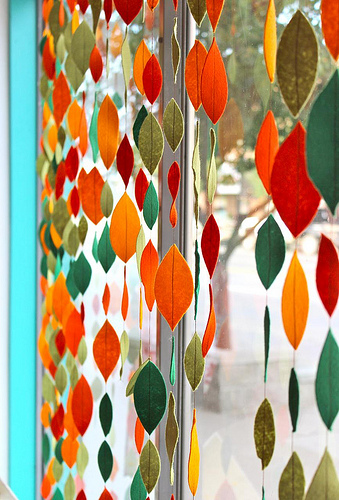
Original paper garlands. We make beautiful and festive garlands ourselves
How to decorate your house before the holiday, bring solemnity and taste to its atmosphere? The easiest and most creative way is DIY paper garlands. Today there is nothing easier than making jewelry yourself. Even a schoolboy can cope with this younger age. On this page you will find a variety of schemes for making themed garlands, as well as interesting templates with which you can cut out an innumerable number of decorations for home and office.
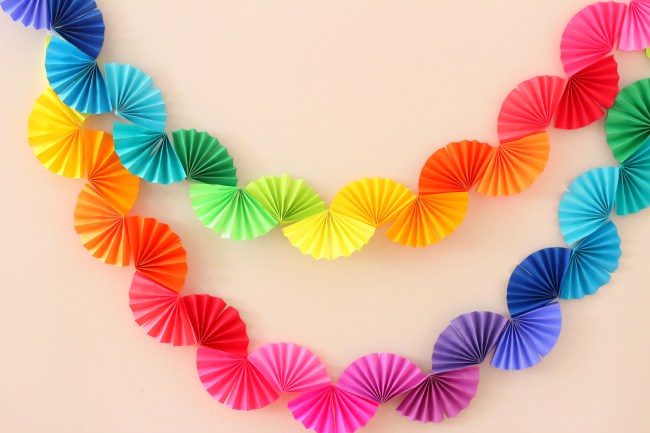
Paper garlands "Ribbon Rainbow"

You can hang this garland both vertically and horizontally. In the latter case, it is better to attach a weight, such as plasticine, to the end of the thread.
1. Fold up colored paper in half and cut in half.
2. Cut strips from colored paper.

3. Prepare the thread and fold your strips in the desired sequence.
4. Sew all the strips together using a sewing machine or thread with a needle.

* You can twist the ribbon to make the garland look "fluffy".
* Colored paper or cardboard can be replaced wrapping paper, which is usually packed with gifts.
* If you don't want to stitch, you can try sticking a thread to each strip - this will take longer and it is desirable that the thread is thicker.
Standard garland "Snake"
Even the smallest children, who have barely learned to hold scissors in their hands, will cope with the preparation of "snakes". So, if you have kids, take them with “snakes”, and start more difficult work yourself.
Manufacturing technique: Cut out a large circle from paper and, stepping back a centimeter - another from the edge, start cutting off the tape (see photo) until you reach the center. If you nevertheless entrust this simple task to a child, it is better to draw in advance with a pencil the lines along which he should cut - this will make it easier for the child to work.

Garland "And they dry on a rope ..."
How do you like this idea: in the middle of the room there is a clothesline, on which old Santa and his faithful deer hung their holiday clothes to dry: red caps, mittens, boots with bells, big pants, a bag ... First you have to sew miniature clothes (you can, of course, get similar in toy stores, but it will be more expensive), and then secure them with small clothespins (you can use large ones, of course). If you don’t want to fool around for a long time, hang your mittens or colorful socks to “dry”. And you can mix both. You can simply cut out multi-colored boots from felt or paper and string them on a thread.

How to make a garland "Christmas rings"

This method of making a garland is one of the most popular. This is not only because it is quite simple, but also because it allows you to make beautiful paper decoration for the home, and in particular for the Christmas tree.
1. Prepare colored paper and measure the same width for the strips you will cut out.
2. Start cutting strips. The length of each will be equal to the width of a sheet of paper (i.e. 21 cm) and the width will be approximately 3.5 cm.

* You can make a garland from shorter and narrower strips, then the rings will be smaller.
3. Glue the strips by threading one through the other (see picture).

* You can close the circuit.
Garland "Volumetric stars"
Such stars spin easily from paper tapes one or two centimeters wide. Carefully study the photo-instruction and go!


Paper Christmas garlands "Unusual chains"
Prepare colored paper, scissors and glue. It is easy to make such a garland.
1. To do unusual chain, you need to fold a sheet of paper in half and draw, for example, one of the shapes that are shown in the picture.

* In order not to waste a whole sheet of paper on one link, you can cut it into 2 or 4 identical parts, from which you will cut the links later.
* For convenience, you can make a link template.

2. Cut out the shapes and start gluing them together to make a chain by threading one link through the other.
* The longer you want to make the chain, the more links you will need.
* Can use a lot different colors to make the garland even more colorful.
How to make a garland "Chain" for decorating a house out of paper
You can use 2 or more colors.

1. First you need to make a preparation. Cut several strips of the same size. In the picture, the strips are 2 cm wide and 17 cm long.
* It is advisable that you observe next condition: width/length of strips = 1/8 + 1 cm spare.
2. Mark the center of the strip by folding it in half and straightening it.
3. Bend the ends of the strip to its middle and fold the strip in half again.
4. Prepare a few of these blanks to start assembling a garland. The picture shows how to fold the blanks together.

* This garland can be hung on the wall. Due to the fact that it does not bend much, it will be difficult to hang it on a Christmas tree, but it still looks spectacular.
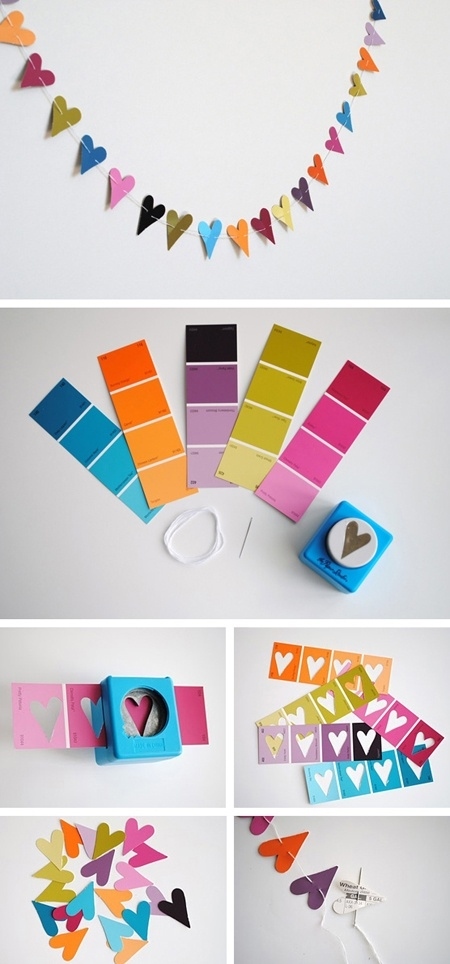
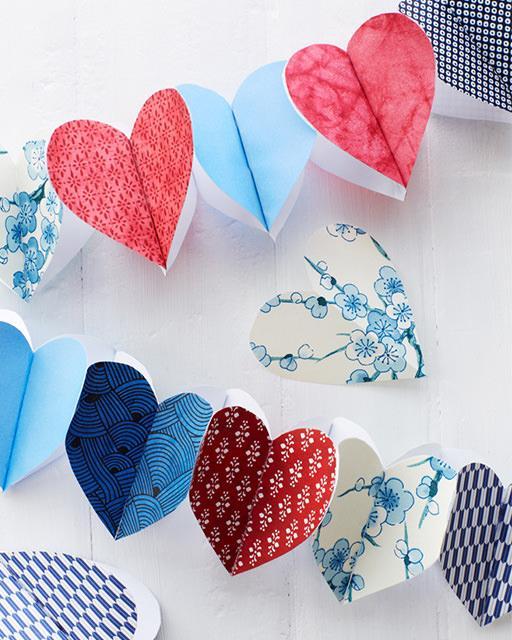
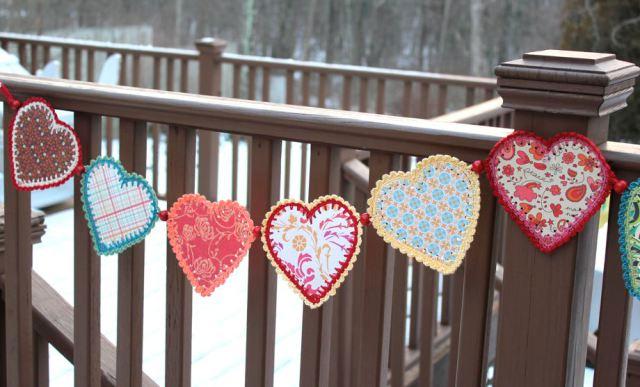
Garland of hearts

In pictures detailed instructions how to assemble a garland cordially.


This version of the garland can be complicated, and you get such a beautiful product.

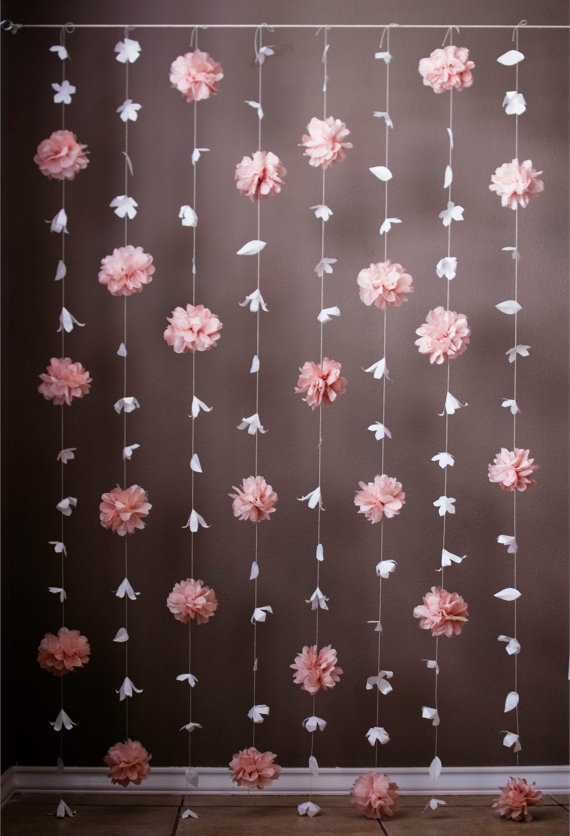
Garlands for the New Year "Colorful home decoration"

From colored paper, you can make such a colorful decoration for your home. It is suitable for the New Year, and for any children's holiday.
Prepare colored paper, scissors and glue (you can replace it with a stapler or tape).
The picture shows how to make blanks.
* It is desirable that the strips have the same width.

Use glue, a stapler, or tape to hold the pieces together.
Using the same technology, you can fold just such a garland. And you can learn how to do everything right from the video below the picture.

Volumetric New Year's garland

Here's a pretty simple but very original idea garlands that can be hung on the window or just anywhere in the house.
On the pictures step-by-step instruction how to make a garland.
* In the Christmas tree, the hole through which the thread is threaded is made with a hole punch.


Garland for the Christmas tree "Merry candy wrappers"

Very beautiful tinsel can be obtained from ordinary wrappers.
1. Cut the wrapper into several identical pieces.

* The pieces can be 2x4 or 3x5 in size, and depending on the size of the wrapper, there can be 3, 4 or 6 pieces.
* For convenience, you can make a template that will help make all parts of the tinsel the same size.
2. Start twisting each rectangle into a tube, but do not let go so that it does not unfold.

3. Prepare a dense thread with a needle and start stringing the tubes one by one. The edges of the tubes turn around - this is good, because. tinsel will turn out fluffy.

4. At the end of the thread, you can make a knot so that the tubes do not come off.
* After stringing all the tubes, turn them in different directions.

New Year's garlands made of paper using the "Origami" technique

1. We make blanks. For one step of the garland, you will need 2 strips of different shades.
* The length of one strip is 21 cm (which is the width of a regular A4 sheet), and the width is 3.5 cm.

2. Start folding the strips in sequence, as shown in the picture.

* The final goal is to make two long ribbons that will form a rainbow.
3. We connect the end of one tape to the other at an angle of 90 degrees.

4. Continue to fold the strips in sequence - vertical down, horizontal across.
* The circuit, if desired, can be closed.
Garlands for the New Year (a few examples)


Amazing paper garlands
Perhaps the simplest and most popular New Year's garlands that can be made at home, even with the involvement of a child, are paper garlands. For these purposes, it can be used the most diverse, ranging from ordinary colored sheets, ending openwork napkins and multi-colored adhesive tapes.

Such decorations are even made in kindergartens and elementary grades, so anyone can handle them. So, you will need paper, scissors and glue. Sheets of paper are cut into strips of the same width (to make this easier, divide the paper with a ruler and pencil in advance).

The cut strips are glued into one common garland according to the principle of an ordinary chain, which consists of links. To get something more original, try playing with the shape of the links: make them square or even voluminous, although this will be a little more difficult. You can make it even easier: colored paper is cut into thin strips, and then they need to be sewn in the center with each other, usually a machine is used for this purpose, but you can also do it manually.

The stripes can be replaced with circles, triangles, or any other shapes that come to your mind. By the way, instead of paper, you can use bright felt, such products will turn out to be more durable. Such decorations, by the way, look very impressive in door or window openings in an upright position.
Exquisite snowflake garlands
One of the main symbols of the New Year is, of course, snowflakes. So why not use them to decorate your own home? Probably, each of us remembers from childhood how to cut beautiful and openwork snowflakes. The more cutouts, the more sophisticated the snowflake will turn out, by the way, especially for this, you can find a whole lot of schemes on the Internet that will help you make a lot of diverse figures.

Next, we connect each snowflake with a regular thread or silver rain, and then hang it from the ceiling. By the way, such decorations will look more beautiful if there are a lot of them, so it is better to make 5-10 such garlands, depending on the purpose and place of use.

Garlands made from natural materials
Why throw away tangerine or orange peels when they can easily be used as a handy material? We cut out cute figures from the peel, for example, hearts, stars, faces, snowmen and so on.

Then, using a needle, we string them onto a thread and our decoration is ready! By the way, it will not only transform your home, but also spread a pleasant citrus aroma throughout it. Instead of skin, you can use apples and ordinary spruce cones, sometimes they are dyed in some extraordinary color, or simply put on a thread in their natural form.
The easiest ways to make paper garlands
 To decorate your apartment with intricate and whimsical paper decorations, it does not take much time and effort. Paper garlands are light, durable, beautiful and affordable. We will tell you about the most simple ways making garlands that will decorate your life and cheer you up.
- Templates. To facilitate the work, you can use blanks: simply print them out and cut them out of a simple landscape sheet of paper.
 Like these ones new year templates you can print and make your own garland.

2. Drawings. If you have basic artistic skills, you can fold a sheet of paper several times, and then draw on it the picture you need.

3. Snowflake garlands. Delicate lace decorations made of plain paper - it's easy! Use templates or make your own design.

 Use templates to make snowflakes or just turn on your imagination.

As you have already noticed, there are a lot of ideas, the main thing is to connect the desire to create and, of course, your imagination, which will help you create the most unusual and unique New Year's garlands!
2016-11-25Any handmade is now at the peak of popularity. Creating creative decorative elements for the home with your own hands is not only profitable, but also stylish, modern, in the spirit of the latest trends. At the same time, it is not necessary to have special skills, rare materials or special tools - most decor ideas are easy to perform and do not require large expenses. To implement some ideas, it will also be possible to get rid of unnecessary things or dispose of household items that only take up space on the shelves. One of the simplest, fastest, but at the same time effective ways home decoration is the manufacture of garlands. Here are 100 ideas for creating a wide variety of garlands for different occasions - get inspired!
paper garlands
Paper garlands are the easiest, cheapest and fastest way to transform a space. A paper garland can act as an accent element of the interior, zone the room into functional segments or highlight a particular place, indicate a certain theme or style of room design, or simply serve as a decorative element.


The easiest way to create a paper garland is flat. Paper blanks (of the shape you need) are simply sewn on a typewriter or glued to twine, thick thread or ribbon. If you carefully handle such a garland, then it can be used more than once.

Paper fringe is easy to make, but it looks very elegant, festive. Just use the double-sided fringe for more fluffiness.


Thin paper is perfect for simple and light decor options. Such garlands are literally weightless, they sway from any breath of air, creating an atmosphere of spaciousness, airiness, and lightness in the room. Thick paper is suitable for more complex products with a solid foundation.


Volumetric garlands with paper elements always have a very festive and even solemn look. To give the paper volume, of course, you have to work hard, but the result will be worth the effort. You can use both ordinary colored paper (most often double-sided), and corrugated, crepe, cardboard, foil. You can string volumetric elements on a thin ribbon, twine, any twine. The thicker the paper and the larger the decorative elements, the stronger the base for stringing should be.

The garland becomes voluminous if ordinary paper blanks are folded or folded.


Family photos can also be used for a paper garland. Such a decorative element can become both an exclusive gift and a wonderful decoration of a room (not only for a holiday).

Garlands of fabric and thread
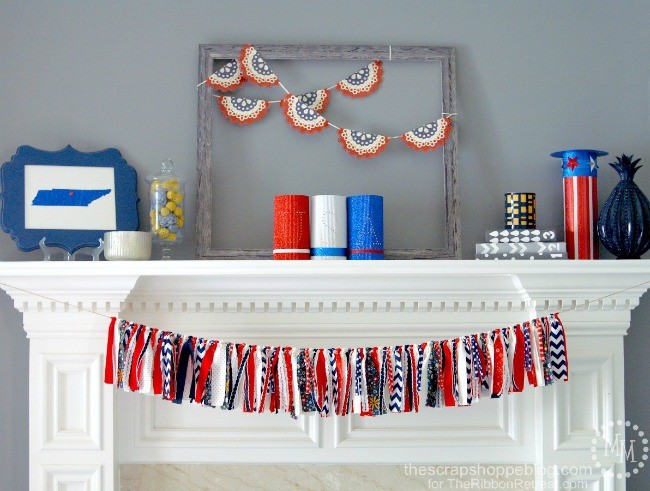
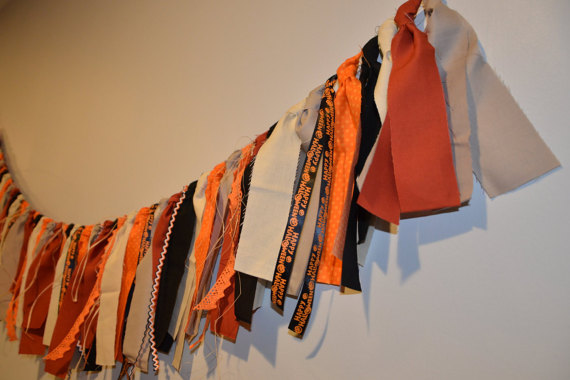
Garlands from different kind textiles are definitely more durable paper products. If you have shreds of unnecessary fabric of different colors preserved at home, then with some skills, patience and free time, you can create real masterpieces of decorative handmade.


For example, it has recently become very popular to make any decorative elements from colored felt. The advantage of this material is that it does not need to be processed, it is dense and keeps its shape well, it is sold in all needlework stores and even in stationery departments.


Not less popular is tulle. It holds its shape perfectly and is ideal for making volumetric decorative elements. The garlands are large-scale and even “fluffy”.


Ribbons are a separate type of material that is very often used to make a wide variety of garlands. The easiest way is to tie small pieces of ribbons of different colors on a rope or any other basis.

If you know how to knit and you still have threads of different colors, then The best way disposal of such residues - the manufacture of a durable garland. Not only the reusable use of durable garlands with knitted elements becomes an advantage of such handmade, but also the originality of the design, the variety of options.


Easy to make even for kids, colorful pompoms can be a great base for making a garland for those who have a lot of leftover knitting thread.


We create from improvised means
Who said that handmade classes require a lot of money? You can create beautiful decorative elements for your home from improvised means. There will still be some costs - for accompanying materials and, of course, your time. But the minutes and hours spent on an occupation that brings pleasure can not be attributed to items of expenditure. So, from what you can make original paper garlands:
- old newspapers;
- magazines;
- advertising posters;
- booklets;
- unnecessary maps and atlases;
- playing cards that have exhausted their service life;
- books that are suitable only for delivery for waste paper;
- buttons, beads, beads.


It is easy to turn plastic testicles from kinder surprises into birds or animals. All you need is colored paper and twine to make the original garland. It's easy to make garlands out of paper cupcake or cupcake coasters. They are sold in sets of a large number, they are inexpensive, but at the same time they can be bright, have an original pattern.


And plastic disposable plates easy to turn into an imitation of soccer balls.
Thematic decorations
The easiest way to decorate any room for any holiday is with the help of garlands. They can be made fairly quickly, used more than once, and repositioned depending on the desired effect. The garland takes up a lot of space, so any space is instantly transformed if you decorate it in such a simple way. The easiest way to organize a festive mood, a hint at a certain theme of a celebration or a particular event, is with the help of garlands. Well, why buy something that you can do with your own hands, and even from improvised means.


New Year's and Christmas
New Year's garlands are a decoration familiar from childhood, which many made, as soon as they learned how to wield scissors. Paper and fabric flags, chains made of cardboard or shiny foil, carved snowflakes and Christmas trees - any paraphernalia of the winter holidays will be used.


Cones collected in summer can be used to make garlands in winter. It is enough to clean your blanks (cones) or paint the tips of the “branches” of future Christmas trees with white or silver paint (you can use gouache, acrylic paints and even white glue).


For children's party
Perhaps the most common use of garlands to decorate a room is children's holiday. Not necessarily a birthday, any celebration at which children are present, I want to arrange it especially elegantly, festively, and variously. You can decorate with garlands the area of the so-called candy bar (a table with treats and drinks), the space above the table where children will sit or the place where gifts will be stacked. And just garlands stretched across the room or hand-made decorative elements decorating the walls will be a great occasion for a festive mood.


From small colored cylinders (thick colored paper or colored cardboard) you can make dynamite (a hint of the explosive nature of the party) or candles - this is already an association with cake candles.
 By combining paper with fabric or thread products, you can create original decor options. For example, paper rabbits with pom-pom tails, which are easy to make even for a child. Ponytails can be made from cotton wool by simply rolling it into lumps.

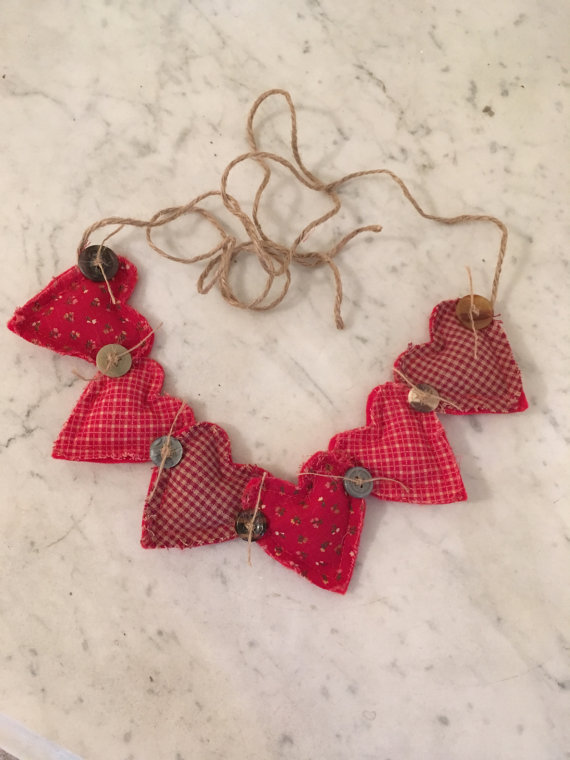
On Valentine's Day, it is customary to give handmade valentines. But you can go further and arrange a whole area for celebration, decorate a place near the table, behind which the romantic dinner, decorate the head of the bed or any other place in the house that is convenient for decorating. Of course, the main motif of garlands for the holiday of lovers will be the use of hearts and all shades of red. By the way, the use of love themes in decorating a room does not have to be tied to any holiday. Girls room interior romantic style similar decorative elements can decorate all year round.


From paper…


From felt...

Universal option
Regardless of what holiday you are going to celebrate - the birthday of a family member or pet, an anniversary or National holiday, or maybe just one of the relatives returned after a long absence and a party is being prepared in his honor - there are many universal options for the execution of garlands for any occasion. These can be medium-sized balls strung on a rope or a dense thread ...

Or flower composition relevant at any time of the year and on any holiday. Moreover, flowers can be made from various materials. Use twigs or twigs for the base and your composition will be closer to nature.


Garlands look great all year round, but are especially good for the holidays - New Year, Easter, Birthday or Halloween. You can decorate the walls, ceiling or windows of any room with a garland - from the kitchen to the children's room, as well as a Christmas tree or a mantelpiece. In this article, we will show you 10 ideas with step by step master classes how to make a garland with your own hands from improvised, natural and even junk materials.
Christmas garland of three-dimensional snowflakes
We present the first idea of making a garland for the New Year with our own hands - from snowflakes. Probably, we all remember how to cut a flat snowflake from a square sheet of paper. This method will help you out if you need to make a garland as soon as possible. However, if you want to make a more elegant decoration, then we suggest assembling it from volumetric snowflakes. They are made a little longer and more complicated, but the resulting garland will survive more than one holiday.
Instruction:
Prepare paper, such as plain office paper, a pencil, scissors, a stapler with staples, glue or double-sided tape, and thread.
- Divide a sheet of A4 paper into two equal strips.
- Now collect each strip into an accordion. You can do this in the following way: fold the strip in half, then fold the half in half again, then also bend the quarter in half and continue until the entire strip is folded. Next, focusing on the fold lines, assemble the accordion.

- Cut one small strip from your accordion, cut it in half, and then draw a template on it, according to which you will cut out the snowflake patterns. The template is drawn arbitrarily, but in such a way that the edges of the assembled accordion in two or three places remain uncut. An example of a template can be seen in the upper right photo.
- Bend the accordion in half and staple it in the middle.
- With a pencil, trace the outline of the template on one of the halves of your blank, and then cut off the corresponding parts of the pattern with scissors.
- Repeat Step #5 with the other half of the blank, using the same template.
- Fan out each half of your workpiece and glue their ends together.
- Hang medallion snowflakes on a beautiful thread, such as silver.

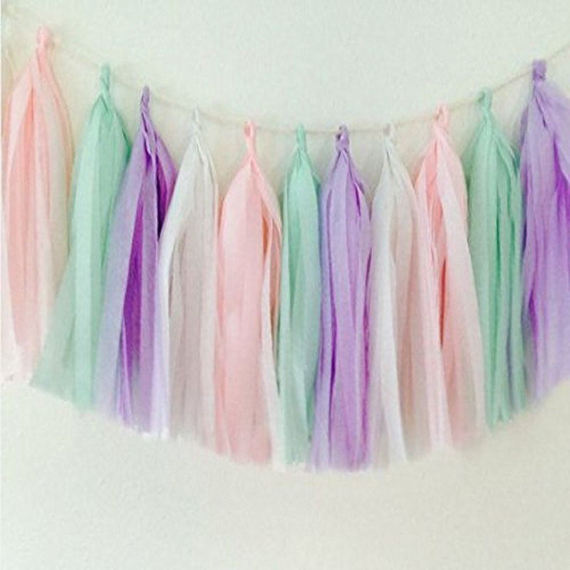
Tassels made of thread or paper
And now we present the idea of making a garland with our own hands, which is the most fashionable attribute of celebrating a birthday or wedding - a garland with tassels. In our tutorial you will learn how to make a large version of the decoration, but you can easily make mini tassels (for example, for decorating a Christmas tree) using smaller paper according to the same principle.

Instruction:
Prepare the following materials and tools:
- Sheets of tissue paper 50x50 cm or 50x60 cm (to make 2 brushes you need 1 sheet);
- Scissors;
- Ribbon.
- Fold a sheet of tissue paper in half, then in half again, but in the other direction, to make a quarter.
- To create a fringe, start cutting your workpiece into strips (no more than 1 cm wide) without reaching the fold line of about 2.5-3 cm.
- Now cut the fringed quarter into two halves along the fold line. You will get two blanks as in the photo below.

- Unfold one blank and begin to roll it tightly, as shown in the next photo.


- When you have completely folded the blank (see photo above), fold it in half, and then twist the two halves together to create a loop for hanging on the tape. Fix the loop with transparent glue (eg, PVA) or thread.

- Make a few more brushes in different colors and hang them on a ribbon.

In this video you can see detailed master class how to make a garland of tassels with your own hands.
In the next selection of photos, other ideas for tassel garlands are provided.

birthday garland idea


Garland of cones in the "snow"
A garland of cones is a natural and durable decoration, especially relevant in autumn, winter and, of course, on New Year's Eve. You can simply take dry and clean cones and tie them to, say, jute string. But in order for the garland to take on a truly festive look, try decorating the scales of cones with “snow” from any white paint. It's time to get the old white enamel out of stock!

Instruction:
- Pour no a large number of paint on paper plate and dip the cone scales in it.
- Rotate the cone so that each tip is covered in paint. Set the bud aside to dry and repeat with the rest.

- When all the cones are dry, proceed to hang them on the thread. To do this, wrap the end of the thread around the bottom of the first cone and tie a knot. Then tie the second, third and all other bumps around their lower parts, and tie a knot on the last “link” of the garland.

- Additionally, fix the position of the cones with a hot glue gun.
Balloon garland
Paper balls can be used to create both a New Year's garland with your own hands, and any other. It all depends on the colors you choose. To make a garland of balloons with your own hands you will need: glue or double-sided tape, beautiful paper(eg, colored or scrapbooking paper), scissors or a special hole punch for cutting out circles.

Instruction:
- To make 1 ball, you need to cut out 6 circles of the same diameter from paper. However, you can cut from 3 to 16 circles for one ball. The more circles you use, the more voluminous it will be.
- Fold each circle in half so that front side paper was inside.
- Now you can start forming the ball. To do this, glue the resulting halves of the circles wrong sides to each other.

- Before gluing the last parts of the ball, pass the tape through its core.
- According to the described scheme, make a lot of balls and fasten them all to the tape.

- if you have sewing machine, the process can be accelerated in the following way. Cut out circles from medium-weight colored paper (no more than 6 per ball) and arrange them in piles. Keep in mind, the paper must be colored on both sides. Next, sew the piles on the typewriter in turn, and when the garland is completely “sewn”, just straighten each semicircle of the ball. As a result, you should get something like this decoration.


By the way, according to the same principle, but using details cut out in a different shape, you can create a garland of any subject.


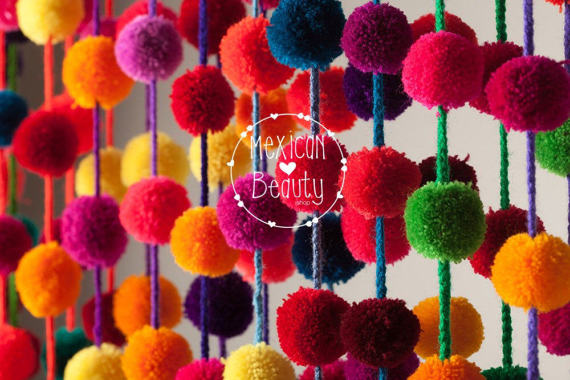
Yarn pom-poms
Depending on what color of yarn you take, you can create a garland for any occasion. So, for example, for the New Year you can take white, red and green colors, for Halloween - orange and black, and if you take skeins under color scheme interior, get a trendy decor item.

Christmas garland of pompoms made by hand


There are many ways to make your own pom-poms, but for a garland, the best one is the one that allows you to quickly make several balls at once.
Instruction:
- Wrap the yarn around the legs of the upside down chair as shown in the first photo above.

- Remove the resulting skein from the legs and tie it along the entire length with the remnants of the thread, maintaining an interval of about 5 cm.
- Then simply cut the skein into identical balls so that each ball has a tied center.
- Trim the villi and straighten the balls, turning them into balls. If there are not enough balls, repeat the steps with another skein.
- Attach the balloons to the ribbon.
Egg carton LED garland
And now let's find out how to transform an ordinary LED garland with flowers from ... egg carton cells. The decoration will turn out not only beautiful, but also consistent with the idea of recycling waste. Moreover, the box can be not only cardboard, but also plastic.

Instruction:
Prepare the following materials and tools:
- Egg packaging (6-12 pcs.);
- LED garland;
- Acrylic paint (spray or can);
- Hot glue gun;
- Scissors;
- Stationery knife.
- Cut off the lid of the box and set it aside.
- Using a knife, cut out the cells (for tulips) and/or the areas between the cells (for small or narrow elongated buds) of the box.

- Using scissors, form petals from the walls of the cells. Feel free to experiment and cut petals in different shapes and sizes.
- Once all the flowers are cut out, start painting them. You can dry the flowers on wooden skewers stuck in the lid of the box.
- When the flowers are dry, cut a small cross at the bottom of each bud.

- “Put on” a bud on each bulb of the LED garland.
- Now you can hang your flower garland anywhere you want.

Tissue paper flags
Bright colored flags on a ribbon are a classic decoration that is appropriate for any holiday or just for decorating the interior. Today we propose to make an updated version of it, namely from tissue paper or tissue paper and with fringe.
Instruction:
To make your own flag garland, you will need: tissue paper/tissue paper in different colors, scissors, a pencil, a plate (any round object that can be circled), a ruler, tape that can be folded in half, and a glue stick.

- Fold the paper in a pile and draw a circle on the top sheet using a plate.
- Without sorting the stack, cut out the circles. Then cut the stack of circles into halves.

- Start creating a fringe on the blanks. To do this, simply cut the semicircle into narrow strips, not reaching 1-1.5 cm from the top edge and observing approximately the same interval.
- Now just glue the top edge of each half circle onto the tape.
- Follow the same principle to make a garland of flags and pennants, but use paper of a different color.
pasta garland
Figured pasta is almost ready-made parts of a garland that you only need to decorate a little and string / fasten on a thread. So, for example, you can use butterflies (bows).


Instruction:
Prepare one or two packs of butterflies, paint, PVA glue, glitter and pretty thread.
- Paint the butterflies and leave them to dry.
- When the pasta is dry, grease them with PVA glue with a brush, then sprinkle them liberally with glitter. Shake off excess and let butterflies dry.
- Tie each pasta to a string.

If you wish, you can replace the bows with any other curly pasta, for example, shells, tubules. You can make a garland not only from bows, any curly pasta and tubules will do as in the photo below.
Garland with luminous balls
Small spheres that glow in the dark and seem to be hanging in the air look very impressive. To make such a garland, you will need to buy a large number of ping-pong balls, prepare a clerical knife (or better, a mock-up knife) and, of course, the electric garland itself.

Instruction:
- Use a knife to cut a cross on each ball.

In this article, you will learn how to make several different types paper garlands by yourself. Garland making can be quite fun and easy. Perhaps the simplest tool in a craftsman's arsenal, paper is full of possibilities and purposes. You can turn it into anything. I use it for Christmas home decor, this year the round ones with stitched stitches are the priority. You can use them as decorations for a party, event, or simply. About everything in more detail later in the article.
Making a garland
First of all, prepare many, many paper circles for work. I cut my circles with the help of a scrapbooking punch (in our opinion, a hole punch). But you can find more fancy gadgets for these purposes, of which there are many on the Internet. I chose several shades of pink to create a romantic appearance. I also added a few gold medallions which contrast nicely and make the decoration not boring.
First, I laid all my circles in turn in a row in the order in which I saw them, and my goal was to get an ombre effect. Then she started sewing.
Sew along the center of your first circle, then take the next circle, placing it in front of the presser foot and sew right after the first. Continue moving until you have a chain of circles of the desired length. I used fine stitch on a sewing machine.
Make as many strings for the round garland as you need. For my design, it took about 15 sheets of double-sided thick colored paper measuring 20x30 cm. I installed the finished product on a regular double-sided adhesive tape, adding a couple of threads of decorative light bulbs for a festive mood that were held on a nail, and placed the battery packs right there - at the top of the windowsill, also with double sided tape.
Expendable materials
- double-sided thick paper in several colors;
- metallic paper;
- ponch with a diameter of 5 cm;
- sewing machine
- double sided tape;
- decorative light bulbs.
As soon as you hang all this, you will only have to enjoy, since paper itself is originally festive. Place it close to others holiday decorations, such as Christmas, and you get a festive color.
You will also need a garland for occasional parties. If you have children, they will appreciate this approach and will be grateful to you.
Light elements add a special atmosphere that is inherent in winter holidays. I really love everything shiny, luminous and shimmering, especially during the holidays.
Someone will find the round option boring, or you may not have all the tools at hand. Therefore, I have prepared for you a few more ways to decorate with paper garlands. So let's get started.
Method 1
Geometric
Fold each sheet into a triangle. Start by folding the sheet in half. Then fold the triangle in half to make an even smaller triangle.
Consider making small slits around the edges to make your garland more interesting. Do not make any cuts along the folded edges.
Staple the two triangles together in the middle with a stapler. Do the same for the rest of the triangles so that you have six bonded triangular shapes.
fasten two triangular shape together in the corners. Take two triangles and overlap dots 1/2 inch (1.27 cm). Sew the corners down.
Pin the forms together to keep them in place. If you don't want the staples to show, you can only stitch the inner layers and leave the top layers free.
To make a garland of separate triangles, connect the parts to each other by the edges.
When you're done, fasten the garland to the wall using the buttons.
Method 2
And again a round garland (they are so funny). This time it's a way that doesn't involve sewing machine. The scrapbooking hole punch works the same as regular hole punches, except that the former is different forms and sizes. It can cut circles, hearts, squares, stars and even snowflakes. You can buy a scrapbooking hole punch at any stationery or art supply store. You can also find it online.
If you do not have a figured hole punch, you can use a regular compass. It's a little longer in time, but your perseverance, I'm sure, will overcome the routine.
Walkthrough
- Take colored paper. The best option there will be a choice of special for scrapbooking or cardboard. Craft or origami paper is fine too, but the finished garland won't last long.
- Try using two to three different colors or shades. For example, try light blue, blue, and navy blue.
- Make circles different color using an available method.
- If you are making a nursery garland, use patterned and bright colors. For example, half of your shapes could be bright blue, and the other half of your shapes can be white with bright green polka dots or stripes.
- You can use one punch and get shapes of the same size this way.
- Either go my way - I made two options round shape in different sizes. One is 5 cm and the other is 8.8 cm in diameter. This trick gave my garland some variety.
If you can't find punch, draw circles with a compass!
- Cut out your shapes. If your paper is thin enough, you can cut two or three sheets at a time. Cardboard, however, must be punched or cut one sheet at a time. If you try to pierce too much at once, you will end up with fuzzy edges on the shapes and could damage the blade.
- Align the shapes in a straight line. If different sizes are used, try alternating them. You can alternate them randomly or in a specific pattern.
- Draw a line of glue down the middle. Make sure it goes continuously through all the forms.
- Apply the ribbon over the glue. Make sure that the braid has a tail 30-50 cm long at the end. This way you can hang your garland.
- Lay similar circles with glue on top of the figure with braid, making a “sandwich” out of each shape with twine in the middle. Now our garland becomes like the truth, acquiring the features of a two-sided design.
- Repeat the process with the rest of the shapes. They can be both at a distance from each other, and close to each other. Make sure you have about 30-50 cm of free rope left at the end of the garland, otherwise you won't be able to hang it up later.
Let the glue dry before hanging the garland. Depending on how much glue you used, this can take anywhere from two hours to a day.
Method 3
How to make a garland-flags
Step 1
Prepare 20/30 cm scrapbooking paper. You can use any color or pattern you want. To make the flags more interesting, consider using multiple colors, shades, or patterns. For example:
- If the garland is for a child's room, use pink and blue and white paper with pink/blue polka dots.
- If the garland is for an ocean-themed party, consider using light blue and blue color schemes.
Step 2
Fold in half lengthwise. If the paper has a pattern or is one-sided, make sure the pattern is on the outside of the fold. The empty/white part should be inside.
Step 3
Cut in half along the fold line. You should get two copies from a folded sheet of the same size as it.
Step 4
Cut out a triangle from each sheet. To do this, fold the rectangle with the colored side up two times at a right angle. Then cut off the corner to make a rhombus on the spread. In this case, the middle of the triangle should fall at the angle of two folds:
Step 5
Measure the string on which the flags will hang, in addition to the place for the garland, it should have a margin of at least 30 cm at each end for strings in order to easily hang the finished product where required.
Step 6
Open one triangle and cover it with glue around the edges and in the center. You can also add glue in the middle of the triangle.
Step 7
Place the rope along the crease and close the triangle. Iron the flag with the edge of the palm of your hand to flatten it and seal it.
Step 8
Repeat the gluing process for the rest of the triangles. You can arrange them as close to each other or as far apart as possible. However, be sure to leave at least a few centimeters of space between the triangles so that the garland looks nice when suspended.
Step 9
Consider leaving a message on your banner by placing a letter on each triangle. You can cut out the letters from the colorful and glue them on one side of each flag. You can also paint the letters using a stencil or acrylics.

This option is suitable for those who want to diversify the usual old garland.
What do you need
- white paper cups;
- a sheet of plain paper;
- pencil;
- scissors;
- scrapbooking paper;
- glue or double-sided tape;
- stationery knife;
- electric garland.
How to do
First you need to make a "wrapper" for the cups. To do this, cut one glass in half, cut off the bottom and edges. Flatten it, put it on plain paper and make a template.

Lay the template onto the scrapbooking paper with reverse side and cut out as many "wrappers" as you have cups. By the way, you can choose any color of paper. Just try to match it in color with an electric garland.

Then wrap the cups in paper and glue the edges with glue or double-sided tape.

Make cross cuts in the bottom of each cup. stationery knife. Insert the light bulbs of the electric garland into the cuts. Unusual christmas garland ready!

 purlsoho.com
 It is very easy to make such a beautiful soft garland. The amount of material depends on the desired length of the decoration.
What do you need
- white and red strips of felt 2.5 cm wide;
- 2 needles;
- threads.
How to do
Lay the white strip of felt over the red one and pin them on both sides with needles. Then make longitudinal cuts in the middle of the strips at the same distance from each other.
 purlsoho.com
 If you want to make a very long garland, cut the felt gradually: make no more than five cuts at once, move on to weaving, and then repeat the procedure. Thanks to this scheme, the strips will not move out, and it will be much easier for you.
To braid a two-tone braid, thread the end of the strip through the first hole and pull tight so that the strips do not fall apart. Then thread the garland through all the other holes in the same way.
 purlsoho.com
 Trim and sew the strips to each other at the ends of the finished garland so that they do not stick out. By the way, you can combine any colors of your choice. For example, these:
 abigail.engineer
 thecheesethief.com
 These miniature stars look like glass, even though they are made from plain cellophane! This material is not as malleable as paper, but such an unusual garland is worth the work done.
What do you need
- cellophane;
- lined sheet of paper;
- scissors;
- thin needle;
- thin threads.
How to do
Cut the cellophane into strips. It is more convenient to do this by placing a lined sheet of paper under the cellophane. Please note that the length of the strips should be at least 30 times their width. In other words, if the width is 1 cm, then the length must be at least 30 cm.
Then make stars out of the stripes as shown in this video:
Carefully pierce the stars with a needle through which a long thread is threaded. The stars should be at a small distance from each other.
By the way, garlands of paper stars also look very nice. Therefore, choose the material to your taste.


 oneperfectdayblog.net
 Choose tartlets in classic Christmas colors: green, red and white. Such bright Christmas trees will appeal to both adults and children.
What do you need
- multi-colored paper tartlets (cupcake molds);
- glue;
- decorative sequins in the form of stars;
- twine or ribbon;
- Scotch.
How to do
Fold the paper cutter in quarters to form a triangle.

Lubricate the corners of two triangles with glue. Lay three triangles on top of each other and glue them together to form a Christmas tree. In the same way, make as many Christmas trees as you need for your garland.
Decorate them with sequins. If you don't find star-shaped sequins, just cut them out of colored cardboard.
Then glue the Christmas trees to the twine or ribbon with adhesive tape at a small distance from each other. The garland is ready! Decorate with it or hang it on the wall.

 createcraftlove.com
 Another way to transform a boring electric garland.
What do you need
- decorative burlap of New Year's flowers;
- scissors;
- electric garland.
How to do
Cut the burlap into equal small strips. Tie them in turn with a knot between the electric bulbs.
 createcraftlove.com
 Very simple and beautiful!

 annfarnsworth.com
 This beautiful garland looks very impressive, and it is very simple to make it. If you do not have twine, you can use thick threads or yarn.
What do you need
- Balloons;
- petrolatum;
- ½ l of PVA glue;
- 2 tablespoons of corn starch;
- 2 tablespoons of warm water;
- twine;
- needle;
- electric garland.
How to do
Blow up balloons of the same size. Note: a garland of small balls will look prettier. Lubricate them with Vaseline. This is necessary so that the twine does not stick to the balls tightly.
Mix glue, starch and water. If the mixture is too thick, add a little more water. Just do not overdo it so that it is not very liquid.
Wet the twine in the resulting adhesive solution. Then wrap the rope around the balloons. The easiest way to do this is to hang the balls on a rail. Just do not forget in this case to put an oilcloth under them, where excess glue will drain. The density of the balls of the future garland depends on how much twine you wind.

Leave the balls to dry overnight. Then pierce each balloon with a needle to make it burst. First check whether the twine has become stiff enough and whether the finished ball will hold its shape. Remove the balloon carefully.

Then insert the bulbs of the electric garland into the balls of twine. If the balls turned out to be very dense, then you can make holes in them with scissors or a pen.

 stubbornlycrafty.com
 For such a garland, you need thick paper, such as cardstock. But thin cardboard is fine too.
What do you need
- thick paper (gray and several other colors to choose from);
- scissors;
- hole puncher;
- glue;
- twine.
How to do
Cut the gray paper into strips of 3 x 10 cm. The parameters of the strips from the rest of the paper are 2.5 x 20 cm. The number of strips depends on the desired length of the garland.
Fold the gray stripes into octagons and make holes for the twine with a hole punch as shown in the photo. Then glue the edges of the octagons.
 stubbornlycrafty.com
 Now make the light bulbs. To do this, fold the long strip in half, only slightly running your fingers along the fold. Holding the strip by the tips, press it to the palm of your hand. When you release the paper, it will take the shape of a light bulb.
 stubbornlycrafty.com
 At the ends of the strip, exactly in the middle, make a hole for the twine with a hole punch. Thread the twine first through one hole on the gray octagon, then through the light bulb, and finally through the second hole in the octagon. Repeat these steps with all the other details and align the "bulbs" along the length of the twine.
 stubbornlycrafty.com
 acupofthuy.com
 Such beauty can become not only New Year's decor but also decorating a child's room.
What do you need
- A4 paper packaging;
- template (download);
- scissors;
- glue stick;
- Double-sided tape;
- threads.
How to do
Print and cut out the templates, circle them on sheets of paper as shown in the picture below. For the garland, you need 24 of the first and second parts of the lanterns and 126 stars. And to speed up the process, draw stars on sheets folded four times.
Cut out all the details.
 acupofthuy.com
 Take one part of the flashlight and grease one side with glue. Glue the same part to it. One flashlight should consist of six identical parts. Just do not glue the sides of the first and sixth parts until you have made a loop.
To do this, stick double-sided tape on the fold. Glue the thread from the bottom up, make a small loop at the top, then glue the thread from the top down and cut off the excess. Now you can glue the sides of the first and last parts.
Repeat the same with the rest of the flashlight parts. In total, you will get 8 flashlights.
 acupofthuy.com
 In the same way, make 21 volumetric stars. The difference will be only in gluing the thread. It must be stretched through three stars, making a loop on the topmost of them.
Now pull the thread through all the loops, forming like this beautiful garland:
 acupofthuy.com
 linescross.com
 Just enough to cut out the pieces ready template and decorate them with glitter.
What do you need
- thin cardboard;
- template (download);
- scissors;
- stationery glue;
- colored sequins;
- twine.
How to do
Print on thin card stock and cut out the templates along the solid lines. The number of parts needed depends on the desired length of the garland. Bend the blanks along the dotted lines.
 linescross.com
 After one, grease the triangles on the templates with glue and sprinkle with sparkles. When the glue dries, shake them off. You may need to repeat these steps one more time so that the triangles are completely covered in glitter.
 linescross.com
 Then glue the semicircular parts on the templates with glue and glue the figures. Pull the twine through the figurines. If you are afraid that you will not be able to do this, run the twine through each figure before gluing, and not after.
 thepartyteacher.com
 Such Christmas trees can be decorated with anything: sequins, sequins or buttons. Connect your fantasy!
What do you need
- green tissue paper;
- scissors;
- glue;
- yellow cardboard;
- red cardboard;
- twine.
How to do
Straighten the tissue paper. By the way, this can be done with an iron, setting it to the lowest temperature. Fold a long sheet in half crosswise and cut lengthwise into two parts. You will get two long strips folded in the middle. Make long cuts on them, leaving part of the fold intact. You will need as many of these details as you want to make Christmas trees for the garland.
 thepartyteacher.com
 Unfold the strip and twist it thinly. At the fold, make a loop and twist several times so that it does not fall apart. If desired, you can fix it with glue.
 thepartyteacher.com
 Tie the resulting Christmas trees to the twine. Then cut out stars from yellow cardboard, and circles from red cardboard and glue them. Try to fasten the stars so that the knots on the twine are not visible.
 shelterness.com
 And finally, an option for those who have absolutely no time to make something, but there is a great desire to update the New Year's decor.
What do you need
- beautiful Christmas balls;
- twine.
How to do
All you have to do is thread the string through the loops Christmas balls, tying it with knots and place the balls at the same distance from each other.