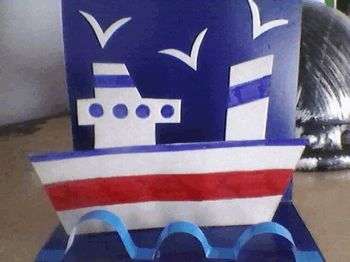
A paper shirt with a tie step by step. How to make a shirt out of paper the easiest way
Our daily life surrounded by many cute little things that, falling into our eyes, remind us of past events, meetings and loved ones. If you present someone with an unusual souvenir, then it will delight and remind you of the person who gave it for a long time. As an original addition to the gift, we suggest making a shirt out of paper. It can act as a stand-alone postcard, packaging for a small presentation, or a small business card indicating from whom the surprise was presented. For those who love crafts, a paper shirt is a matter of minutes, and even a novice needleworker can cope with such a task without any problems, following the detailed instructions.
What you need to make a paper shirt
List necessary tools and materials for work:
- white and colored paper;
- scissors;
- glue;
- pen or felt-tip pen.
For a start, it is advisable to test your strength on a one-color craft, besides, the finished shirt can be dyed in any color, applied with inscriptions and drawings - this will make it unique. Several multi-colored little ones will be a great addition to your desktop, enliven the atmosphere, and the notes on them will definitely be remembered. The origami paper shirt does not even require glue, only if you decide to glue a tie or other decorative elements to it.
How to make a shirt out of paper? You will need a rectangular sheet, for example, A4 format. It is folded in half (portrait orientation), marking the center line, and straightened. The left and right parts are folded, connecting in the center along the original line. The upper corners are bent outward - these will be the sleeves of the shirt. Turn over reverse side up and sleeves down, from above bend a line of 3-4 cm over themselves.Turn again face and fold the corners to the midline - a collar is obtained. Now the lower part is lifted up, folding the craft in half, slipping it under the corners of the rack.

If from this description the whole process of how to make a shirt out of paper is not entirely clear, be guided by the given diagram, it contains a step-by-step image.
Other ways to make a similar postcard
Above was described the easiest way to make a shirt out of paper without using glue and scissors. But if you want to do more long sleeves, to modernize the style of the collar - it is not necessary to follow the instructions given. Estimate the size of the shirt and all its details, cut them out of paper and fasten them with glue. In the same way, the craft is complemented by any decoration popular for a shirt - a tie or bow tie, buttons cut from paper of a different color or drawn with a felt-tip pen, pencil or paints.

If you involve in the process of creating this unusual crafts children, then here they can show all their imagination by painting a faceless white postcard with bright colors.
Decorating the finished craft
Skillful craftswomen do not stop there. Having made a paper shirt, they proceed to the process of decorating, decorating each ready-made postcard to their taste. For example, instead of buttons, they use rhinestones, beads, satin bows, pasta and other suitable items, including real clasps. On the bottom of the shirt, a ribbon with a bow or buckle (like a belt) or a wide strip of fabric (for a tuxedo) is used as a belt. The same trim is glued to the collar and sleeves.
A New Year's card-shirt made of paper looks very nice (the diagram is given above), decorated in the form of a Santa Claus or Santa Claus costume. To do this, take red paper, fold it as described, and decorate it. On the collar and sleeves there is a white edging, like a falling snowball, in the center there are black buttons, and at the bottom there is a black or dark blue belt with a white buckle ...

Surely such an addition to New Year's gift will be remembered no less than the present itself.
How to use a paper shirt
So that the card not only gives positive emotions to its appearance, but also carried a semantic load, inside (before folding the craft in half) you can write a congratulation text or just nice words to the person to whom the gift is addressed. The text is written by hand or printed on another paper and pasted inside. If you glue the sides to a large shirt, you get gift bag, packaging for a light presentation. All that remains is to attach the pens, and you can safely give a gift to a man for any occasion. And if you decorate the craft in pink or red colors, add feminine accessories, beads, ribbons and bows, any lady will be delighted with such a presentation packaging.
We hope that after reading the information provided, the question of how to make a shirt out of paper will no longer bother you. Create, create masterpieces, give joy and positive energy to your loved ones!
Invitation card for men's holiday. Master class with detailed description.

Berdnik Galina Stanislavovna, teacher primary grades KOU KhMAO-Yugra "Laryak boarding school for students with disabilities health ".
Description: this master class intended for younger children school age, teachers additional education, educators and creative people who love to create beautiful gifts do it yourself.
Purpose: the work can be used as an interior decoration, a gift for a holiday or an invitation card for any festive event.
Designed for making by children from 8 years old.
Target: Making an invitation card from paper.
Tasks:
1. To consolidate the skills and abilities of working with paper.
2. Raise the desire to make the product with your own hands.
3. To cultivate the habit of working independently, carefully, to bring the work started to its logical conclusion.
4. Develop Creative skills, imagination, fantasy.
5. Develop compositional skills and aesthetic feelings.
Materials and tools required for work:
1. Colored sheets of paper for printing A-4 (colored paper), scrap paper.
2. A simple pencil, ruler, scissors, glue.
3. For decoration, you may need ribbons, beads, rhinestones, threads.

A postcard is a gift that is usually given in addition to the main gift. But just buying a postcard with a prepared text is at least impolite, you must at least sign it. But it's better to arrange the postcard yourself. It will be much more pleasant to the one to whom you give it.
Stages of manufacturing a product.
I. Making the base.
1. The base of the postcard is folded of plain tinted office paper for printing. Three bases will be obtained from one standard A4 sheet.
To do this, divide a sheet of paper into three parts. This size is the most economical in the sense that three bases for a postcard can be prepared from one standard sheet.

2. Fold each rectangle in accordion proportions as follows. It is important to define the right side of the base of the card, as the greeting text will be placed on the right side. Therefore, start folding the accordion from the left side.

3. Thus, you get the base for the postcard, consisting of three pages.

4. To prevent the accordion from falling apart, connect a drop of glue to the inner sides of the card. Iron it well. It is better to put the workpiece under the weight for a while. Then the pages of the postcard will be straight, even and look neat.

We picked up the following color scheme.

II. Making a men's shirt using origami technique.
1. We will decorate the postcard men's shirt, made using origami technique.
For the shirt, you need to choose the appropriate drawing on paper. You can use scrap paper. If not, then you can print on a printer. The most economical way is to fold the shirt out of colored office paper.

2. So, draw and cut out a rectangle with sides 8 cm by 15 cm.

3. Determine the middle of the rectangle. To do this, fold exactly in half along the length, with the white side inward.

4. Unfold. Fold the right edge about 5-7 mm.

5. Fold the bottom and top sides of the workpiece to the marked center line.


6. Fold out the outer "flap" on the right side. These are the sleeves of the shirt.

7. Rotate the shape. On the left side, fold a strip 1 cm wide.

8. Rotate the workpiece again. Now, on the left side, bend the top and bottom corners to the center line. Thus, we will form the collar of the shirt.

9. Right side Connect the blanks to the left side. Place the right side under the collar. Iron all folds well.

Our shirts are ready. All that remains is to place and glue them to the base of the postcard.

III. Making a paper tie.
The shirts were decorated with ties. The "money" tone was chosen for the ties.

1. A tie can be made from plain colored paper as follows.
Fold the 3 cm square diagonally.

2. Fold the right and left sides to the marked center line.

3. Turn the workpiece over. Bend the top corner down by a third.

4. Now, lift the same corner up, forming a small fold in the middle.

5. Flip the shape over. Bend the top corner down.

6. Bend the right and left sides at the center line. Iron it well. With a drop of glue, connect the folded parts.

7. We connect a tie with a shirt.

We place and fix the finished shirts on the first page of the blank.
Postcards are stable upright. On the second and third pages, you can write congratulations or an invitation to the expected celebration.

Here are some combinations colors postcards with shirts.


I think the postcard will come in handy for any men's holiday.
A handmade gift - what could be better? In particular, such surprises are pleasant to those closest to you and dear people... An origami paper tie along with a fancy tiny shirt makes a great gift for Father or Grandfather's Day. This token of attention can be an independent souvenir, as well as a cute postcard or container for a cash or sweet prize.
Necessary materials
A cute origami tie with a shirt can be given with or without. There are a lot of men's holidays where this craft will come in handy: February 23, Builder's Day, Father's Day, Railwayman's Day, and so on, not to mention numerous birthdays, anniversaries and others. memorable dates... It takes only 2 pieces of paper and quite a bit of time to create this cute little thing.
You just need to follow the instructions, step by step, and you will have a unique and original gift... For a shirt, you need a sheet of paper (8.5 cm x 11 cm), and for a tie, you need a square sheet of paper (5 cm x 5 cm). The dimensions are approximate, depending on the dimensions of the craft, they can be varied, however, without violating the aspect ratio.

Making a shirt:
- Step 1: Take a piece of paper and fold it in half, ironing the fold carefully. Then the unroller is back.
Step 2: Fold the left and right edges of the paper towards the center fold to form two flaps.
- Step 3: Take the top inner edge of each sash and fold it outward, creating a semblance english letter"V". These will be the sleeves.
- Step 4: Flip the paper over to the other side and also vertically.
- Step 5: Take the top edge of the paper and fold it down about 2-2.5 cm. This is the first part of the collar.
- Step 6: Flip the project back to the other side. Take the top left and right corners and fold them so that they meet in the center. You now have a collar.
- Step 7: The shirt is almost ready, it remains to bend the bottom edge of the paper (with the letter "V") up.
- Step 8: It remains to neatly tuck the bottom edge just under the collar. It's done, now you have a miniature origami shirt! If you do not make a V-fold, then the shirt will turn out to be sleeveless.

It's time for a tie
To complete the craft, add an elegant origami paper tie. How to do it? Follow the instructions.


It remains to fasten the origami tie to the shirt and that's it, the souvenir is ready. If this is a postcard, you can write a congratulation on it and give it. If the original idea was to build a container for cash gift, then the folded bill can be hidden in the folds of a tie or shirt.
Origami shirt is one of the most popular paper origami. If you do not know how to make an origami shirt, then on this page you will find everything you need to assemble this simple paper figure.
In the first photo, you can see what you get if you follow the assembly diagram below. The second photo of the origami shirt was taken by one of our site users. He also made Nice dress from paper. If you have photos of origami collected by you, send them to the address This email address is being protected from spambots. You need JavaScript enabled to view it.

Assembly diagram
Below is a diagram of the assembly of an origami shirt from the famous Japanese master origami Fumiaki Shingu. If you follow the instructions carefully, assembling the origami shirt will not take long, and the result will be the same as in the picture. After repeating the described in the diagram several times, you will understand how to make an origami shirt quickly and without peeping into the diagram.

Video master class
Putting together an origami shirt for beginners can seem like a daunting task. Therefore, we advise you to enter the query "origami shirt video" on YouTube, the largest video hosting service on the Internet. There you will find many different videos about an origami shirt, in which the steps for assembling a shirt are clearly shown. We hope that after watching the video of the assembly master class, you will not have any more questions on how to make an origami shirt.
Here is another video tutorial on assembling a paper shirt:
That's pretty interesting video on how to make an origami shirt from a banknote:
Symbolism
The car has quite a few symbolic meanings. This is largely due to the fact that the machine is a relatively recent human invention. However, today, for many, a car is a symbol of luxury and well-being.
In order to congratulate dad on some holiday or just express your love to him, you do not have to buy expensive gifts... A handmade postcard will remain in your memory for a long time. Recently products self made are valued much higher than purchased ones. We offer step by step master class, how to make a 3D postcard for a beloved father.
Original postcard - shirt with tie
A shirt with a tie is primarily associated with an elegant man. If on womens postcard flowers are most often found, then on a man's - cars, airplanes, watches, etc. If you decide to present an original gift, try to make a shirt and tie out of paper.


Decorate the card with buttons and sign. A shirt with a tie on a plain postcard looks original. gives zest to the whole craft.

In a similar way, you can design a notebook for dad with a shirt. Imagine and surprise your dad, classmates or co-workers with creative gifts.
