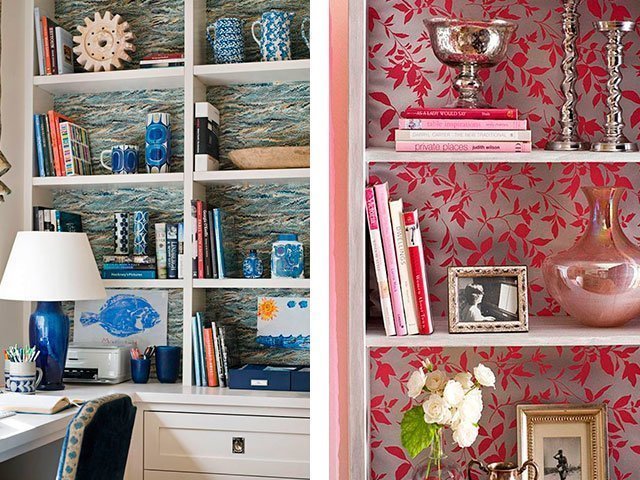
DIY homework is the most interesting. DIY homework: the most interesting with detailed photos
Today we will prove to you that making the most interesting handicrafts for the house with your own hands is much easier than it seems to inexperienced hand-made lovers. To comprehend its basics, you will need a minimum of available tools, skills and time. At the same time, you will receive original products that you will not find anywhere else, except for your own interior.
- Fabric handicrafts for home
The most pleasant thing about handicrafts for home and summer cottages with your own hands is that everything necessary tools and materials can be found at hand. There is no need to spend money on ready-made expensive products to add a touch of home comfort, warmth and soulfulness to the interior, if you can make them yourself!


How to learn how to make rugs yourself
Floor rugs that have been undeservedly forgotten a few years ago are returning to the interior proscenium. They will find a place in children's rooms, hallways, bathrooms, next to the bed in the bedroom or in front of the sofa in the living room. Small round or rectangular rugs with an interesting texture (shaggy, fluffy, with long elongated loops, and so on). Let's consider two simple master classes, having mastered which, you can perform this beautiful handicraft for the house with your own hands.
How to crochet a floor rug: a master class for lovers of knitting

You will need the following:
- thick crochet hook (no. 10 will do);
- thick yarn (yarn can be used different colors, then the finished product will turn out brighter and more original);
- scissors.
Advice! Instead of yarn in its traditional sense, you can use old knitwear- T-shirts, longsleeves, T-shirts. You will not only find use for old clothes, but also get a soft and pleasant to the touch yarn, which is a pleasure to work with.


There are also many interesting rug ideas that can be woven, knitted, or crocheted.

"Grandma's" rugs are very popular in modern homes

Crochet fluffy grass rug
It will come in handy for you:
- five skeins of yarn different shades green;
- very thick hook # 14;
- scissors.


Advice! Be careful with the choice of thread. If you use acrylic or any other synthetic yarn, the finished product can be slippery and electrifying. If we use woolen thread, it is very likely that the rug will "pinch" your bare feet. The ideal option is a half-woolen yarn.


In this simple way, you can create an original rug for your home. Take a closer look, maybe there are materials in your apartment that are suitable for creating a real masterpiece?


Fabric handicrafts for home
The fabric decor is very popular. It helps to bring a touch of home comfort, warmth and soulfulness to the interior. Fabric decor looks especially good in rooms decorated in almost all styles. We invite you to get acquainted with a very in simple ways making original fabric paintings.
How to make eco-paintings from fabric and natural materials with your own hands?

Prepare the following:
- burlap or other natural textiles with a bright, pronounced rough texture;
- any natural materials(for example, coffee beans, cinnamon sticks, star anise stars, dried flowers, natural moss, and so on);
- decorative elements (ribbons, wooden or bone buttons, lace);
- frame;
- cardboard for the base;
- glue gun;
- scissors;
- simple pencil.
Idea! Such paintings fit perfectly into styles such as country, eco, bungalow. They look best in kitchen decoration.

And you can also create a huge variety of interesting gizmos from fabric.


Painting from fabric to the nursery
We offer to decorate your kid's room with a very interesting handicraft for the home - a picture made of foam-based fabric.
What do you need for this?
- colored shreds;
- foam base;
- a picture to be transferred to the base;
- pencil;
- copy paper;
- glue;
- nail scissors;
- any flat sharp object for punching the pattern (for example, a patchwork spatula is suitable for this purpose);
- ripper.
Advice! The spreader (like the spatula) can be replaced with other fittings that are suitable in shape and thickness and are available at hand. For example, it might be a dull butter knife.
- On all sides of the foam blank, retreat 1.5-2.5 cm for the future frame. Press the resulting rectangle with a spatula.
- Transfer the selected picture with copy paper to the foam base.
Do-it-yourself handicraft for home is an exciting activity that allows you to save significant money. In addition, this will make it possible to make the home original, fill it with exclusive interesting things. self made.
DIY home design gadgets
The choice in this regard is wide enough. DIY homework allows you to use items that are usually thrown into the trash. For example, boxes and baskets made of newspaper tubes or mosaic paintings made of bottle caps look great.
DIY design gadgets for home are all kinds of bas-reliefs on the walls, decorations in the form of ornaments for furniture, made in the same technique, lamps from improvised material, pots and other interesting things. And for craftswomen who are friends with knitting and sewing, there is just a lot of things to do here!
Step-by-step instructions for making a bas-relief on a wall
The abundance in the market for wallpaper and other wall coverings has spoiled consumers. They want more and more exclusivity and uniqueness in order to create their own unique design in the room. And therefore, more and more original handicrafts are used for the home, the variety of ideas is now just off scale.
Designers today propose to make a plaster bas-relief on the walls of their homes with their own hands, limiting themselves to the usual whitewashing.
- Having chosen the drawing (plot) of the bas-relief, the master can sculpt it from plasticine on a flat horizontal surface. It can be flying pigeons, floating swans, flowers. You can use your favorite statuette. In the latter case, the thing must be "drowned" in plasticine or clay so that the outside is exactly that part of the thing, which will later be the protruding part of the bas-relief.
- The template, which is what the master will make an impression from, is lubricated with vegetable oil or glycerin and covered with silicone sealant.
- After drying, the impression is removed from the template.
- Diluted gypsum or alabaster is poured into the mold and left to harden.
- The finished part of the bas-relief is glued to the wall. If the part is bulky and heavy, it is appropriate to screw it in some places for insurance.
Knits and cups
It is very important that handicrafts for the home are of practical use. With your own hands, for example, you can knit amazing heating pads for brewing tea, both on teapots and on glasses or cups. You can even make a knitted cup holder if you wish. These things are extremely useful in everyday life, as they allow you to turn the tea drinking procedure into a kind of ritual that will allow you to get maximum pleasure. It is easy to make such products for those who adore needlework.
For the home with your own hands, you can knit a heating pad in the form of a smiling face of an animal, for example, a cat or a bear cub, or even the animal itself, for example, a cool calf or a funny cockerel.

Knitted ottomans - a creative approach to creating a cozy nest
Real masters of needlework will be able to bring the spirit of novelty and originality into their home. Needlework, do-it-yourself exclusive things will make the design inimitable and unique. Today, magicians who create in the handmade style even manage to create furniture from yarn. There are several options for making items such as ottomans, chairs and stools, which are made at home by craftsmen.
Needlework, do-it-yourself ottomans are one of the simplest options for furniture. For knitting, traditional knitting needles or crochet hooks and regular yarn are used. The mistress in this business in a known way makes a pillowcase of a round or oval, square or rectangular shape, which she then stuffs with padding polyester. Although some will like more creative options for ottoman forms, such as kittens or turtles, whales or owlets. Here, a huge field for imagination opens up for the craftswoman. With the help of embroidery and variability of the shape of the pillowcase, she can give the product any look.

Furniture knitted from thick bundles
It's nice to be in a home, where each item keeps the warmth of the hands of its owners, and will help create cozy home needlework. Handmade little things decorate even the most modest room, make you admire the craftsmanship and skill of their manufacturers.
Creating knitted furniture is not as easy as it seems. As a material of manufacture, it should be used which is twisted into one thread with a diameter of 5 cm. The seats of stools and benches are knitted by hand or by a large crochet, which is cut out of wood to order. A craftswoman who knows how to crochet makes a loop, puts her hand into it and grabs the working thread with a handful. Then the hand with the thread is removed from the loop, and the thread is pulled along with it, forming a new loop. Crochet to scale is what thick cord furniture is all about.
The second row is knitted on the resulting chain, only the hand is pushed into each link in turn, and every two new loops are knitted into one.

Designer table lamps
Even unnecessary junk will find application if the master wants to create a real home for needlework out of his home. Hand-made crafts made in the handmade style will become the very highlight that will make the whole district talk about the golden hands of the owner.
For example, it can be lamps from ... "ears" from aluminum cans with drinks or disposable plastic spoons! Of course, you should not specifically set a goal for yourself to drink the right amount of Coca-Cola or Sprite, or use it exclusively for several months. disposable tableware... All this material is easy enough to collect in food service outlets or during youth festivals.

Workshop on making a lamp from the ears of drinks cans
It is very important to do with the soul such creativity as DIY handicrafts for the home. Craft making master classes will help you achieve the highest results.
- First of all, you need to carefully separate the "eyelet" from the can.
- The part is bent so that there is a larger round "eyelet" hole outside.
- Then, alternately bent "ears" are hung on the previously prepared wire circle of the lamp shade of the lamp - this is how the first row of the metal openwork lampshade is formed.
- For the second and subsequent rows, parts cut from the inside are used. Slightly pushing them apart in the place of the incision, two adjacent "ears" are captured by the holes. The second row is securing, so you should grab the parts of the first row through both holes at once.
- The third and subsequent rows are attached only to the outer hole.
- Weaving is repeated until the size of the "chain mail" of the lampshade reaches the desired size.

Disposable spoon lamps
For making such an original lighting fixture the master will need an empty five-liter plastic container, a base for a table lamp with a stand and a bunch of disposable spoons. The bottom of the container is cut off or a round hole is cut in it. It should be fixed on the base of the luminaire with the upper part - the neck. Spoons with cut-off handles are glued to the surface of the "eggplant" with the convex part upward in a checkerboard pattern.
You can leave the spoons white, or you can paint in yellow and fix the green plastic "leaves" on top of the neck of the plastic can. Then the lamp will imitate a pineapple fruit.

Luxury designer lamps
The fantasy of the master and the creator constantly throws up a wide variety of ideas for home, decor and needlework. With his own hands, a craftsman can even create a creative table lamp from an ordinary driftwood and an old hat. You can also create a glamorous luxury product using an old lampshade for this purpose, you can make the top of the lamp yourself from a wire frame and fabric, or you can carve it for a base or sculpt it from clay or cast from plaster.
It should only be borne in mind that inside the base (driftwood, vase or figurine) there must be a hole in which the electrical wire will be located. A cartridge is attached to its upper part, where an electric light bulb is subsequently screwed in. The holder of the lampshade frame is also fixed here.
Master class for making a product from a clothesline
Even a simple rope that housewives use to dry clothes can be used in an activity such as DIY handicrafts for the home. Master classes will help you learn how to create boxes, baskets, jars, pots by laying and fastening a tourniquet.

- For work, you need a rope (bundle, soft wire in insulation, packing cord), scissors, a needle and strong threads.
- The string is rolled up with a shell and fastened with a thread with a needle. The contrasting color of the thread securing the rope makes the garment brighter. Use to bind rows of thread different color will make the thing more elegant.
- When the bottom of the product is ready, you should start making the walls. Now the rows will need to be laid not with a shell, but along the circumference of the extreme row of the bottom, one on top of the other, so that the product “grows” vertically.
- When the garment reaches the required size, the rope or harness is cut off. The end should be carefully tucked into the product and hidden between the lower rows, firmly fastening the last upper row with threads. Artificial flowers sewn or glued to the side, compositions of acorns look very beautiful on such things. You can decorate the little thing satin ribbons and bows.

It is important to understand that every handmade thing keeps the warmth of the hands of the person who made it. And therefore the energy in houses, where a lot has been done with one's own hand and with love, is much stronger.
Today, it is increasingly popular handmade or, in the usual language, needlework. Did you know that DIY homework is the most interesting creativity, since you can contemplate the result of your efforts every day.
When creating a design for your home, you realize your most cherished creative plans, bring a piece of your own warmth into the interior, give comfort and beauty with your own hands. In addition, you save money on decor, creating exclusive things yourself, literally, from improvised means. You don't have to worry, these will not be pathetic alterations, like the ones that you were offered to tinker in school in labor lessons. Today there are many interesting ideas that you can implement at home. Especially for you, we have selected the most best photos and master classes for beginners to help you create an incredible design for your home.
The carpet, as an indispensable attribute of our recent past, is experiencing its second youth today. Yes, yes, in a slightly updated form, cute rugs reappear in the apartments and houses of true connoisseurs of hand-made. First, it's beautiful. Secondly, it is practical. And thirdly, do-it-yourself needlework for the house, rugs in particular, is a pleasant and useful activity for the development of imagination and fine motor skills hands. And if you see how many options for different floor rugs are offered by modern craftswomen, you will certainly want to repeat at least one of them.
The first rug we offer crochet... Believe me, this is not difficult at all, and the result will please you very much.
To work you will need:
- thick crochet hook (for example, # 10);
- coarse yarn (several colors possible) or old knitwear that can be cut into strips for a rug;
- scissors.
That is, in fact, all the preparation. And now we proceed directly to the weaving process.

- We knit a chain of 16 loops (single crochet).
- We connect the first and last loops into a ring.

- We make 2 lifting loops.
- Second circular row we knit already with crochets. To make the rug brighter, use a different color of yarn.
- Climb 2 loops up again.

- For the third row, we increase the number of loops. Tighten the knit using not only the loops of the previous row, but also the gaps between them. Thus, the mat will gradually expand.

- Knit the rows of the garment to the required size, alternating the yarn of two or more colors.

- We tie the finished rug with lace. We skip one loop of the previous row, make two loops up, then 2 air loops, as well as a single crochet.
- We complete the work by knitting one row of loops with a single crochet.

- We hide the edge of the thread from the seamy side, fix and cut the ponytails. To keep the ends of the thread firmly in place, make several knots.


Here you have a cozy, cute rug. We offer you several more options for rugs that will certainly decorate your home and give you an unforgettable atmosphere.

Your little one will love this funny panda.

The original version is a rug with LEDs.

Romantic rug for the bedroom.

Delicate fabric rug.

For those who like to make pom-poms from threads with their own hands - this is such a soft and very bright rug.
DIY homework from newspapers: weaving beautiful decor
As you already know, you can make incredible home decor from improvised means. An excellent example of such creativity is DIY homework from newspapers. Yes, you can make all sorts of beautiful things from ordinary newsprint, decorate the interior with them or give them to neighbors and friends. We will tell you about such popular nowadays "newspaper" creativity as weaving. And first, let's weave from newspapers beautiful decorative ball.
For this we need the following tools and materials:

- We start weaving the ball with the formation of the base. For this lay out newspaper tubes crosswise, as in the photo, and fasten them with glue.

- We take 2 new tubes and braid the base components with them.

- On the 5th row of weaving, we divide the paired tubes of the base one by one.

- When 5-6 rows are ready, we take balloon or a ball and fix it to the workpiece with rubber bands or ropes.

- We put the ball on our knees and continue to weave. Press the tubes tightly against the ball so that the weaving turns out to be even and beautiful.

- We take a stick or pencil and make holes between the bindings. We insert 2 additional tubes for each hole. We weave 1 row and again split double tubes.


- We continue to weave according to the pattern known to us.

- When the weaving is already coming to an end, we " splicing "vertical tubes weaving through 2 guides.

- At the end of weaving, we need to pull out the ball. We simply pierce the balloon with a needle, and in the case of using the ball, we take out the valve.

- We finish the product and complete the work.

- Our newspaper decor is ready!
You can make more than just balloons from newspapers. Through such a simple weaving, you will succeed beautiful box, craft box or even stylish basket for fruit. It depends on what your fantasy tells you. We suggest that you familiarize yourself with several more weaving patterns from newspapers.
Homemade fabric crafts
Undoubtedly, one of the most popular materials for creativity is fabric. It's incredible variety of textures, colors and shades helps the craftswoman to realize the most daring and most interesting creative ideas. You can come up with many crafts, appliques, paintings, pillows, toys, pendants and souvenirs from fabric. We have prepared for you awesome video tutorials, with which you can make yourself beautiful crafts for a home made of fabric.
Making a box for needlework
In the arsenal of each craftswoman there is a sufficient number of tools and materials with which she creates a real fairy tale... But you can add up all these "assistants" in incredible beautiful box, which is also worth doing with your own hands.
Do-it-yourself kitchen potholders
If you handle the kitchen as deftly as you make crafts, then you will certainly come in handy bright and cute gloves for hot... Make them yourself, and at the same time decorate your home exclusive things... Even if you have not made such products before, then with the help of video lessons you can study in detail the needlework for the home and summer cottage with your own hands: diagrams and patterns are also present in the video. AND experienced craftswomen they will be happy to share them with you.
Do-it-yourself charms for the home: sacred creativity of modern women
Have you ever tried make a talisman? Maybe the time has come to master this sacred and, in truth, fabulous occupation? And our video tutorials will help you with this - watch and enjoy.
Do you think that threads are needed only for sewing? We will tell you how to turn ordinary threads into real masterpieces of needlework. The most interesting video already waiting for your attention.
Salt dough crafts
In one of the previous articles, we talked about. Now is the time to apply this wonderful material.
Beautiful paintings for the home with your own hands
The painting is classic and, at the same time, unique home decor... But what if the usual paints and canvases are replaced with beads, leather or other improvised means? See how to make incredible works of art at home.
Crafts from beads and beads
DIY candlesticks: decorating the house with taste
Stylish handicrafts always attract attention and can be a good business. Therefore, here are some ideas for fashionable hand-made, which will bring not only pleasure, but also income.
Stylish handicraft. Wardrobe additions
Who doesn't love beautiful wardrobe details: ties, belts, scarves. Pay attention to this segment. Do you know how to beautifully embroider or knit? Think about neckerchiefs, shawls, belts and ties with embroidered ornaments (it can be anything: folk motifs, flowers, abstract drawings, even banal horses or Mickey Mouse).

Those who know how to work with leather are very lucky, because you can make wonderful accessories and jewelry out of it. Something unique and very stylish. Needlework will have an original author's style and will start to enjoy popularity. You can create leather backpacks, pouches and cases for phones and tablets, document covers, as well as home decorations, jewelry (bracelets, pendants) and hair clips.
Stylish handicraft. Batik
This technique has been at the peak of its popularity for several years now. Batik - painting with special paints on fabric. In this manner, you can create not only pictures, but also excellent scarves, scarves, pareos.
Stylish handicraft. Sewing and knitting
If you know what is the difference between front and back loops and can distinguish raglan from sleeves, have a developed taste and sense of style, and can quickly work on orders - try sewing or knitting to order. Remember to navigate fashion and perhaps be able to give advice without hurting the client's feelings.

Stylish and original toys - what could be more interesting! Today, craftswomen create reeled dolls, knitted toys for the smallest and even full-fledged dolls with hairstyles and outfits made of lace, taffeta, embroidered details.
Another direction is the creation of Christmas tree decorations and accessories for the holidays. Christmas, New Year, Halloween, March 8 and Valentine's Day - these days people decorate their homes and workspace with symbolic decor and often give each other themed gifts (this is especially typical for the last holiday). You can design and make original and funny souvenirs: Christmas decorations, snowmen, Christmas trees for the New Year, scary and funny pumpkins for different purposes for All Saints Day, romantic key rings, pillows and boxes for loved ones on February 14.
Stylish handicraft. Sweet souvenirs
Handicraft is not only about traditional knitting and sewing. You can create whole candy sculptures. Christmas trees, bouquets, artificial trees and everything that your imagination tells you. These sweet gifts are adored by children and adults.
Stylish handicraft. Embroidery
In the past year, it has become a real trend that even appeared at Paris Fashion Week. It is now fashionable to decorate your clothes and accessories with embroidery; this is a truly stylish handicraft. You can embroider not only with special threads, but also with ribbons and beads.
In addition, embroidered paintings, icons, towels and tablecloths are of interest.
Stylish handicraft. Unexpected handicrafts
Some people have interesting and original hobbies. For example, creating amulets, bags, cosmetic bags or stylish scarves... If your hobby is not like traditional handicrafts, it can generate just as much interest. Do not hesitate to show your work to friends and acquaintances, post photos on the Internet, start your own blog. Surely there are those who want to acquire an interesting and stylish little thing, made in a single copy especially for the customer.
If your handicraft has turned into a business, do not forget to constantly evolve and look for new ideas in order to further arouse the interest of customers.
Stylish needlework: video
If you want to beautifully decorate your home with your own hands, but do not know where to start, we suggest you interesting ideas for decor that you can easily repeat yourself.
DIY home decor
In order to decorate your apartment and make it even more comfortable, you don't have to spend fabulous money on a decorator. You can become your own interior designer. To do this, you need to arm yourself necessary materials and patience.
Florarium
Necessary:
- glass container with or without lid (aquarium, vase, jar)
- soil that matches the plants
- drainage (sand, small pebbles, expanded clay, broken brick)
- activated or charcoal
- plants
- decorative elements for decoration (figurines, houses, branches, driftwood)
- tools (spatula or spoon, long tweezers, sprayer, watering can, scissors)
- Prepare the container by washing and drying it (you can pour it over with boiling water).
2. Pour the first layer - 3-4 cm of sand (you can use expanded clay, pebbles or decorative stones).
3. Lay out the second layer - activated charcoal (you can use pharmaceutical tablets) or ordinary small wood charcoal. This layer will absorb all harmful chemicals and prevent the growth of mold and mildew.
4. Pour 4-9 cm of wet soil (for desert plants - sifted sand, for tropical plants - ready-made substrate).
5. Level the soil and make a depression for the plant. Clean the roots of the plant from the soil from the pot. Plant and sprinkle with soil. Make sure that large leaves do not touch the sides of the container, otherwise condensation may constantly accumulate on them and they will rot.
6. Water the flower and add decorative elements. Ready!
Felt carpet
The main material is multi-colored strips of felt (or any other dense material: an old blanket or plaid, coat, sweater, jacket). You can glue the pieces with any glue, in this case, use a glue gun (hot glue). The main feature of the carpet is a beautiful color transition from one shade to another.
The technology for creating a carpet is very simple: apply a strip of glue to the felt and roll it tightly into a roll, glue the next tape into the joint of the previous one. You can make several large round or oval "rolls" (any other fancy shape) and join them beautifully, giving the shape you want. Arrange them beautifully, and fill in the stripes in between.
Pillow-knot
In order to make such a cunning and beautiful pillow, you just need to sew a "tube", which then needs to be tied with an interesting knot.
To do this, you will need:
- a piece of knitted fabric or cotton (woolen) tights
- sintepon
- cardboard roll from paper towels or toilet paper
- long stick for tamping padding polyester
- needle and thread
To simplify the process, take tights and cut off all excess (you can also use sleeves from an old jacket, socks, knee socks). Connect all the pieces and make a long sausage.
But if you are not looking for easy ways and want to create a new chic decor for your home, take the fabric and cut it into strips of 20-30 cm. The length of the "pipe" is about 3 meters.
Then build a roll and use it to fill the "tube" with cotton wool or padding polyester. Use a stick to tamp. Stuff tightly and tightly, then sew the edges.
Tie with any original knot, delighting your family and guests with an unusual pillow.
Furniture decor with wallpaper
If you want to freshen up the interior or just decorate an old boring closet, you can resort to the old proven method of decorating furniture with wallpaper.


Materials and tools:
- wallpaper:
- sandpaper;
- primer;
- wallpaper glue;
- water-based varnish.
The decor technology is very simple:
- Refurbish and paint furniture.
- Sand the wood surface and prime.
- Glue the wallpaper with glue.
- Cover with varnish.
Examples for inspiration: 


Phone charger holder
If you have the diligence and some free time, forget about the phone lying on the floor. The phone holder is probably the most necessary purchase, so you can easily make such a gift for your friends. They will certainly be very happy, since it is impossible to buy such a “gadget” in a store, and not everyone has enough skill.
Necessary:
- Empty bottle of cosmetic product
- scissors
- pencil
- sandpaper
- brush
- paper napkin
Process of creation:
- Mark the shape of the holder with a pen.
- Cut
3. Thoroughly wash, dry and sand with sandpaper.
4. Decoration - can be pasted over with a napkin or simply painted acrylic paints... Add rhinestones, stones, ribbons, beads if you want.
V this case decorate serves simply beautiful napkin... It is necessary to apply glue to the bottle, gently attach a napkin and smooth out all the wrinkles. Apply a layer of glue on top. Trim the jagged edges, cut the charging area, decorate the bottom nicely.
Patchwork plaid in the style of "patchwork"
Instruments:
- ruler,
- cloth or available flaps,
- roller knife,
- scissors,
- thread,
- sintepon
- sewing machine.
Materials:
- the cloth;
- synthetic winterizer (100 mm) or other filler;
- threads.
- Cut the required number of squares of different colors 12x12 (they will be 10x10 when sewn). Plaid 150 * 160 cm = 240 pcs. The same amount is needed for the seamy side.
- Cut the padding polyester squares 9.5x9.5 cm.
- Make blanks: fabric-synthetic winterizer-fabric.
4. Place the assembled workpiece under the foot in such a way that 1 cm remains from the corner to the beginning of sewing. Then align the layers of the upper and lower fabrics so that their edges coincide, and lower only the needle. With the needle lowered into the fabric, turn the workpiece and sew the block. You must stop 1 cm before the end of the block so that you have the same seam allowance as at the beginning of the seam. To roughly understand where you need to stop, you can, just as at the beginning of the sewing, raise the foot, unfold the fabric and see the remaining distance along the markings on the plate.
5. After you finish sewing the workpiece, do not cut the thread. Just raise the foot, draw out the thread, and move on to the next square.
6. When all the blanks are stitched, we end up with a long "garland". We cut the connections.
7. Next, do 4 and 5 steps, getting the blanks stitched crosswise and ready to be assembled (sew the second line as slowly as possible, especially towards the middle of the block, so that the fabric feed goes smoothly).
8. Collect the workpieces in rows. To do this, add two reverse side inside and sew them together with the same 1 cm seam allowance.
9. When joining rows, it is important that the seam allowances go in the same direction. When finishing up to stitching, raise the needle and foot, and then use a plasticine knife (a very handy device!) To move the seam allowances to the desired side. Then lower the needle and foot again and continue sewing the rows without cutting the threads.
So that there are no holes in the place where the seams are joined, it is better to grab the 1 cm allowances themselves. And do not forget about the bartack at the beginning and end of each line.
10. The most difficult thing is over and it remains to simply sew the blanket around the perimeter with the same 1 cm allowance.
11. Cut the seam allowances. They are cut in such a way that 2-3 mm remain to the line. The distance between the fringes is up to you. In my opinion, it is ideal to cut allowances every 0.5-0.6 mm. It is possible more often, but not less often.
The blanket is ready!
Christmas gnomes
To create such wonderful gnomes you will need:
- Felt gray and red
- Jersey fabric
- White thread and a needle
- Scissors, White paper, pencil
- Cotton wool (or any other synthetic filler)
- Button
- Wooden legs
- Strand of whites artificial hair
- Red paint
- Make a hat and torso pattern (you can simply attach a white sheet of paper to the monitor and trace around the contour).
- Embroider snowflakes on your hat with white thread.
- Cut the edges of the cap, thus making a "tassel".
- Sew the back of the cap and handle with a buttonhole stitch with white threads.
5. Decorate the torso with white snowflakes.
6. Sew the sides and bottom, leaving a hole.
7. Fill the body with cotton.
8. Sew small narrow "tubes" of knitted fabric - legs for the gnome.
9. Sew them to the back of the torso, covering the hole.
10. You can make socks from striped knit fabric.
11. Make a beard by gathering a lock of white fake hair (you can just wind the white thread) and sew to the body.
12. Sew on the button - the nose of the gnome.
13. Paint the wooden shoes red (you can find such blanks in any department for needlework).
14. Glue the shoes to the feet.
15. Connect the hat and torso (with a small stitch at the base of the arm).
16. Wind a white thread around the tassel (you get a handle).
Soft headboard for bed
3. Flip the headboard face... Spray the surface of the batting with aerosol glue and, starting on one side, gently roll the fabric onto the batting. Press well and smooth the fabric so that there are no bubbles, wrinkles and distortions. After the glue has dried, attach the canvas to back side plywood. Stretching well, wrap the canvas around the frame and secure with a furniture stapler.
4. With the help of nails, you can make any pattern, but we will make a neat line around the perimeter.
Make the same lines on each edge and draw out a thread that will serve as a guide.