Craft paper fish with your own hands. Applique from colored paper using a fish template
The site "Mom can do everything!" offers to make an interesting fish out of colored paper with the children. Even the smallest toddlers will be able to participate in the process. They can be trusted to glue the eyes and fins, and children 5-6 years old will be able to cut out the details themselves. Making paper crafts with children is a very exciting process. And the crafts themselves often become an interesting interior decor.
Materials:
- colored paper;
- PVA glue;
- pencil;
- scissors;
- thread.
How to make a fish?
First, take a sheet of double-sided colored paper and draw a circle. This is easy to do if you circle the glass. Then cut it out. This will be the body of our little fish.
Now let's take care of the tail. Take a fox of paper of a different color and cut a square of about 10 * 10 cm out of it.
And then cut it in half. 
We carefully fold each half with an accordion. We fold each accordion in half. 
Gently apply glue to our folded accordions as shown in the picture and connect them. 
Our tail is ready. It remains only to glue it to the fish. Cut out two small circles from dark paper and glue one of them. It will be a small eye. We glue the second on the other side.
The next step is to make the fins. Take a piece of paper and cut a 10 by 10 cm square out of it. Fold it in half and cut along the fold. 
Fold each strip in half again and cut. As a result, you should get 4 squares with sides 5 by 5 cm. Take one of them and fold it diagonally in an accordion. 
Spread out the fin and gently glue it to the fish. Place the other half on the other side in the same way. Fold another square diagonally accordion. Cut it in the middle again and cut off the ends a little. These will be the lower fins. Glue them carefully to the fish. 
Now let's make the top fin. Cut out two pieces as shown in the picture below. Fold them like an accordion, straighten them and glue them with glue on top of the fish. Put a thread between them so that the fish can then be hung. 
How to make summer accordion paper crafts with children with your own hands on the theme of "sea": fish (5 options) and shells. Instruction (master class) with step by step photos.
Fish and shells - summer children's paper crafts with an accordion
You can make many different crafts with children from white or colored paper folded like an accordion. The manufacturing process is simple, while training takes place fine motor skills, dexterity and skill of children's hands. And the crafts themselves turn out to be unusual, voluminous.
In this article I will tell you how to make shells and five options for fish with your own hands - summer sea crafts from paper accordions.
Fish - children's paper craft in an accordion
Option 1. Oval fish
Plain colored paper is suitable for this craft, and waste material- advertising magazines from supermarkets. The size of the finished fish depends on the size of the leaf. You can take an A4 sheet (a sheet of office paper), its half, quarter, sixth or even an eighth.
Stages of work


Option 2. Triangular fish

Option 3. A fish with a tail and accordion fins
And this fish made of paper accordions does not have a body, as in other versions of this craft, but fins and a tail.
Stages of work
- Draw the body and head of the fish on paper.
- Cut.
- To make the fins and tail, accordion fold two small rectangular sheets of paper of the same size and one larger rectangular sheet.
- Glue each accordion on one side with a small piece of colored paper or transparent adhesive tape (scotch tape), and straighten the other side.
- Glue the fins and tail to the body of the fish.


If you make a fish out of yellow or orange paper, and add a crown and a background with sea waves (they can be drawn or made using the technique of applique from colored paper, while it is convenient to use it to cut out the crown and waves), you will get the "Goldfish" craft.

Option 4. Round fish

Option 5. Fish with an accordion in the middle
This option is the easiest. In this fish, the accordion-folded part is located in the middle.
Stages of work
- Cut a long strip from a sheet of colored paper.
- Draw a fish's head from one end of the strip, and a tail from the other.
- Cut.
- Fold the part of the strip between the head and tail of the fish like an accordion.


The same option can be done differently:

Shell - summer craft for children
Shells are made in the same way as the first version of fish, only instead of fish tail you need to make a small strip below.

Use plain office paper, colored paper, or brown, yellow, or gray office paper for this craft.


A shell (shell) with ears is a house of mollusks called scallops.
Variants of using crafts "Fish" and "Shells"
A large colorful panel can be made from several fish and shells if they are glued with double-sided tape on a sheet of Whatman paper with the sea coast drawn on it. Such a panel can be used to decorate the walls of a childcare facility, for example, a kindergarten. For a small panel in the children's room, it is enough to make a few fish and shells.

For a children's room or a room in which it is planned to hold a holiday for children in a marine style, garlands and pendants with paper fish and shells are perfect as decor. To make such garlands or pendants, paper figures need to be strung with a needle on a thick thread.
And you can also decorate with these figures:
- crafts on the theme "aquarium" or "seabed"
- frames for photos from summer holidays
- birthday cards for relatives or friends. The photo shows one of the possible options for such a postcard.

I suggest looking at other articles with tags (for example, an article about six methods of sculpting with these fish - flat and voluminous), or articles from the heading.
© Yulia Valerievna Sherstyuk, https: // site
All the best! If the article was useful to you, please help the development of the site, share the link to it in social networks.
Posting site materials (images and text) on other resources without the written permission of the author is prohibited and punishable by law.
Many crafts are available for toddlers kindergarten, they are performed in different techniques. This develops the imagination of children well, you can decorate a wall, cabinet or shelf with crafts. Consider the easiest ways to make a fish: paper, plastic lids, CDs, origami technique, etc. You can start sculpting fish from dough and plasticine.
Application
Fish made of colored paper, paper cupcake molds. For work, cardboard, multi-colored paper, even colored paper molds for cupcakes or sweets are suitable.

DIY fish making master class:
To get a beautiful aquarium of several fish, you need to take a blue A4 sheet of paper. According to the size of the multi-colored candy wrappers, we cut out small triangles (tails for fish) from colored paper that matches the color of our future fish.

First, we glue a triangle-tail, on it - a round corrugated candy wrapper. Fish should swim at different heights, slightly at an angle, but not touching in the aquarium (sheet).

To look like real fish, you need to glue the toy eyes. Draw on the eyes with a black felt-tip pen (marker) and the mouth in a semicircle, as shown in the figure.


Air bubbles from sequins or confetti circles look very realistic (punch from a bright postcard with a hole punch). We glue the bubbles of bubbles well from each fish upwards.

Our aquarium is ready!

Plasticine fish
Children are very fond of sculpting from plasticine, you can choose any fish.

Prepare for work:
- plasticine 1 color;
- small scissors with rounded ends;
- plastic knife;
- transparent nail polish.

You can even take 1 color of plasticine, for example, orange. To obtain goldfish, you need to add a little acrylic paint to the plasticine.


Stages of work:
We take a piece of plasticine, roll up the "sausage", cut off 1/3 with a plastic knife. Divide the smaller piece into 2 equal parts. They will go to the fins of the fish, and the big one will go to the body. We take a small piece of plasticine, first we need to roll a "drop", then flatten it with the side of the knife.

Use scissors to cut out a beautiful curved tail of the fish, as shown in the figure. To decorate with a knife, draw long diverging lines along the tail. From the 2nd piece you need to make fins: 1 large and 2 very small. We repeat the technique as on the ponytail.

We return to the large piece of plasticine, roll up a round ball. Then we draw scales on it with a knife - small semicircles in checkerboard as in the picture.

Now you need to attach a vertical large posterior fin to the base (ball), then the upper and 2 small fins at the bottom on the sides. For a peephole, roll up small balls of 2 of each color: white is larger than the rest, slightly less green (blue), even less black.

Then flatten the white balls and attach to our fish from the center to the left, another to the right. The eyes should be large, touching in the center.


On top of the white circles we attach flattened green circles from the center to the sides. Then flattened black circles on top. We got voluminous eyes of 3 colors. On the sides of the black circles, we sculpt 2 small white circles on each side, as shown in the figure. Below the peephole we make a semicircle - a smile.

You can paint your eyes completely with colorless varnish (for nails or acrylic). They will shine beautifully and become more durable. Leave the craft for 15-20 minutes, the varnish should dry.

Later, you can place the "gold" fish among beads, colored plastic balls and algae in a symbolic aquarium in a container or on a flat surface.

The plasticine craft can be taken into the water to play, it is durable, it will retain its original appearance.

Origami fish
The ancient art of origami from China has spread throughout the world. It is translated from Japanese as "folded paper". Let's consider the simplest way.


We will need:
- two-color (colored) paper 2 sheets A4 different colors(for example, orange and pale pink);
- simple pencil;
- ruler.


Step-by-step instructions on how to make a fish craft:
Better to take two-color paper specifically for origami or colored paper on 2 sides. Cut out a square 20 x 20 cm. Bend the square diagonally to form a triangle with a right angle of 90 degrees.

We turn it with a wide base up. We divide the sides approximately in half and bend the corners to the center, we get a rhombus. At the top, you need to bend the corners up, connecting them into a small triangle, as shown in the diagram. The resulting corners at the top of the rhombus must be bent at an angle of 20 degrees. So the ends of the folded corners protrude slightly beyond the limits of our workpiece.

The lower part of the rhombus. We divide the lower triangle into 2 equal halves by eye, outline it horizontally with a pencil. Cut out the 2nd square from another paper and apply it to the lower corner, as in the diagram.

Now the bottom part of 2 sheets. It is necessary to bend the upper corner of 1 sheet along the diagonal of the common rhombus. This will overlap the bottom of the diamond with the top. The remaining half of the upper part must be bent to the central common line. In the rhombus, the lower part must be bent back.

At the bottom of the rhombus, a "pocket" is obtained. If you slightly press down on the craft, the pocket unfolds. Now we expand it 90 degrees, and bend it so as to move the fold lines, again getting a rhombus, as in the diagram.

In the rhombus, we divide the left half into 4 identical parts, bend 1 of them, then unbend and return the pocket to its original position, as it was in paragraph 10 (see diagram). Then you need to unbend the back to get a square, and 2 corners will look out from behind.

Next, you need to cut the square to the fold, which you received in the previous paragraph. Now we need to return to step 11, ¼ part must be bent inward. Now the back part can be slowly pulled out to make the tail of the fish. Now it remains only to start decorating our product. We glue an eye on a two-color fish, it turns out very realistic.

Now you know different techniques how to make a fish out of paper, plasticine, origami. If you use a little imagination, make different sizes of colored fish, they will be different and will create a flock in the aquarium or on cardboard.

Do not be afraid to experiment, create! We offer original photos crafts of fish.

Photos of crafts of fish


We bring to your attention a master class with a diagram in which we will tell you how to make an origami paper fish. This craft is so simple that it is perfect for kids or budding craftsmen. A step-by-step instruction with photos will tell you the order of work.
Tools and materials Time: 10 minutes Difficulty: 3/10
- colored paper of various shades and preferably double-sided;
- scissors;
- pen or pencil;
- ruler;
- stationery glue or PVA.
As you know, art - allows you to make real masterpieces from the most ordinary improvised means. Try it too!
Step-by-step instructions with a photo
Our origami fish is not completely flat as its fin points slightly upward. Depending on the paper you are using and how you fold it, you can place some glue under the top fin and close the craft.
Create a charming applique with your kids on marine theme with the help of origami paper folded fish! Undoubtedly, it will be a gorgeous composition!

Step 1: cut the square
Cut out squares from colored paper at the rate of 1 square for 2 fish. How large sizes you make squares, the larger your fish will be.

Step 2: cut the squares
Fold the square in half horizontally and cut it into 2 equal rectangles. You can fold one fish from each rectangle.
Step 3: fold the paper
If your rectangle has only one colored side, place it on top. Fold and unfold the rectangle horizontally and vertically.


Step 4: fold the corners
Fold the top two corners down to form a triangle.

Unfold the paper.


Unbend back.

Step 5: form the center square
Flip the model over to the other side.

Press the folds lightly together at the top center point and bottom center point.

Then flatten the model. You shouldn't make any new folds.

Step 6: fold the square
Turn the model with its mouth to the left.

Fold the two corners from the right side to the left. Smooth out the folds well.

Flip the model over to the other side.

Step 7: fold the fish
Fold the top-right and bottom-right corners towards the center horizontal axis. Smooth out the folds well.

Open the two flaps under right side models up.

Fold the top flap to the left.

Fold the bottom flap to the left.

Fold the top left flap over the fishtail and your fish is done!

The shield will remain sticking out slightly upward. If the model opens too much, place some glue under the bottom of the top flap and close it.
We hope you enjoyed our origami paper fish. This is very simple model with small amount steps, but she looks very cute with her fin pointing up and her tail fanning! You can fold and glue your origami fish onto blue paper and then hang them on a wall or window, etc. If you use bright colors, you can make very colorful decorations for bedrooms, auditoriums, etc.
Below are photos of ready-made applications with fish in a wide variety of designs:
Tropical fish bright colors swim in the blue sea.
Blue, silver and goldfish
Very beautiful fish, isn't it?

Blue, green, yellow and pink fish

These beautiful fish can become a decoration of a child's room if you hang them on strings from the ceiling or from a chandelier. Then they will sway from the slightest breath of wind, as if floating on the waves. And also, making from colorful paper a few fish, you can teach your child a simple count. Despite this a large number of photos, this craft is simple, and even a preschooler can handle it. And mom can help him a little with this.
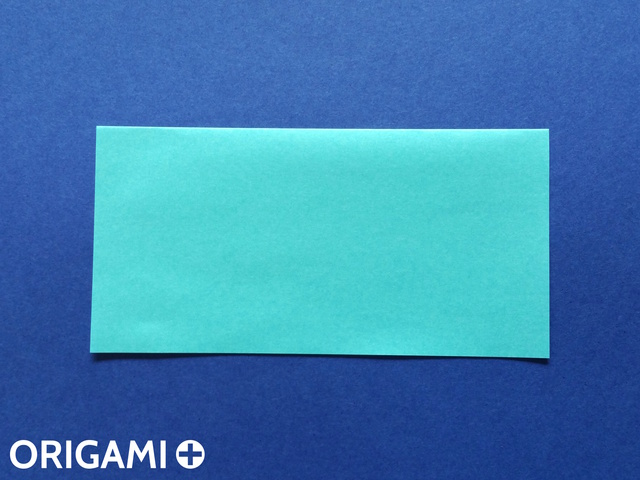
To make such a fish, you will need a square sheet of colored paper. Fold it in half diagonally.

Expand and diagonally connect the other two opposite corners.

Unfold the sheet again, turn it over to the other side, and fold it in half horizontally.

Now fold vertically and unfold. You will get such a blank.

Take the opposite corners of the square and connect them to each other and to the bottom corner.

You will have such a folded square.

Fold the two lower sides towards the center.

Bend the top corner down.

Expand the edges of the square.

Open the resulting "pocket" to a horizontal fold.

Wrap its edges inward along the outlined lines.

You should have such a blank.

Bend the moving parts of the workpiece up.

Fold the sides of the shape in half.


Flip the shape with the "trident" down and bend the middle part up as much as possible.

Return it to its original position and bend it to the right, aligning the side and the horizontal fold.

Unfold and align the left side with the new fold.

Fold the part to the same width on the right side.

With two fingers, grasp the corner of the workpiece and bend it up. This is part of the ponytail.

Flip the future fish to the other side so that the tail is on the left.

Bend the triangle in the middle from left to right.


Turn the craft over again from left to right to the other side and fold the shape in half vertically. Most of the rhombus will cover the tail, and the smaller part will become the head of the fish.