Braided baubles. Simple schemes of baubles from Moulin
Funches take their roots since the times of Slavs. By the way, in those days they were considered overalls and distilled off evil spirits. To date, of course, they are used in the form of decoration. Moreover, both among the female and among the male population. Most often, they are keen on a young age, but it is still important to know the secrets of the correct performance of the product. This will be discussed in our material.
In principle, baubles are very quickly and simply made, and the material does not require high costs. More precisely, you can make from any existing - from threads, ribbons or beads. With the latter, of course, you need more time, attention and tremendous patience.
More than fuzheki make girls. Boys somehow some other hobbies are somehow, and they lack heavenly. But the wearing wearing of such beauty uses everyone equally. Now you can buy baubles in a stall or shop. But you see that with your own hands it looks much more cute. And if you give a bauble dear person, for him, she becomes simply priceless.
At first it is worth allocating which types of weaving are:
- oblique
- direct
- uncertain
Of course, for beginners, it is better to first choose the scheme easier and make from thread-Moulin. And you do not need to take a large number of flowers. Now it is worth understanding the method of fastening threads.
- The easiest way is to use the clamp that is attached to a dense notebook or book. After all, the threads must hardly hold on to be lost in the process.
- You can use a large pin. Threads are attached directly to the pin, which is attached, for example, to the back of the chair or chairs.
- Each student has a tablet (plate with a clamp). And you do not need to invent anything. That's just for a stronger thread holding, you can put a ruler.
- And completely simple and quickly - this is with the help of Scotch.
Basic nodes
It can be called the basis in the weaving of phenushek. Let's say that if you understand its principle (there is nothing complicated), then, in conjunction with a fantasy, you can create masterpieces.
- We take two threads, for example, red and yellow. Different colorsto make it easier to learn
- And now the yellow thread is on the top first. Making a loop, stretch our thread (yellow) between the first and second thread
- And thus the knots are tied. It is important to monitor them to get the same size.
Half knot
Such a node is obtained in the form of a spiral, which looks very interesting:
- In this situation, we already take four threads. Two threads will be one color (red), two - the other (blue).
- And here is an important detail - the average straps are tensioning and fixed. It is possible to clamp, but you can even scotch.
- We work now directly with blue threads. Left deprote on top of our main strands, creating a loop, and let go under the right thread.
- Next, very carefully. We allow the right thread under the main so that the left remains in place. That is, it turned out the knot. But it is not necessary to delay it.
- And then, right threads to do between the main and left thread so that it turned out from above.
- Everything! Now it remains only to tighten such a slightly intricate node.

Flat knot
Also requires its attention, because it is often used in this form of weaving. After all, it turns out very beautiful.
- Also required thread, for example, yellow and thread, for example, blue flowers. And also two basic threads. That is, in the amount it turns out four laces. For convenience, we will call them by numbers. Yellow is one, and the blue will be the fourth.
- The principle of weaving is similar to a half knot, but a little complicated task, let's say.
- So, the first thread also skip the major strands on top and let go under blue thread.
- The fourth thread is started under them and bring the yellow lace from above.
- Now carefully! The node is not tightened. Again, our first thread let the major strands and remove under the blue thread.
- And the fourth fiber is also bend, let it down and remove the yellow thread from above.
- That is, let's say half the knot, we seemed to be tied up twice.
The easiest and easier way:
If you really want a phenus, and there is no desire to weave, then you can resort to a small tricky.
- Take 4-6 colors. It can be more, but a very thick lace should not work. But the thin will not look so impressive.
- By the way, the length of the thread should not be less than 60 cm and more than 70cm.
- We associate all the threads with the usual nodule ("through the hand"). If someone does not know or forgot, we will remind. One edge of the thread hold the thumb, wind the medium and index finger. Then the second end is done under the wound thread and, thus, it turns out a node.
- Breep in any way. And start spinning. Only tight and tightly needed, very tight. And so until the end of the lace. Then, one hand is kept for the end, the second hand finger - for the middle of the lace. Bend in half, we stretch well and remove your finger.
- Threads themselves will begin to twist and, in such a fast way, it will turn out to be fuzheka.
- Now it remains only to bore the ends of the bracelet.
In principle, this is the main information that will help the novice master. Of course, there are other weaving methods, but at the beginning, you need to start with Azov.
How to weave baubles according to the schemes?
Schemes are invented in order to make it easier to make any intricate pattern. After all, even if a drawing occurs in my head, it is very difficult to realize it in life. As a rule, before any scheme should be an explanation for it. But many still have questions, in which direction weaving is sent. After all, there are no detailed descriptions of the nodes.
It is worth noting that there are four nodes that are mainly used in the schemes. Call so and will be in order.
- Node number 1 or left in the diagram is depicted as a cross with a circle. And the arrow in it is directed from left to right, down. Left thread to execute the main node that is described in the previous paragraph. Only it is performed twice.
- Node number 2 or right has the same image, only the arrow is directed to the right left, too. Accordingly, the thread with right side We make the main node. Also twice.
- Node No. 3 is depicted with a curved arrow, which has the direction to the right. We make the main node on the right side on the right side, only for the second time the thread is paving nene the main fiber, and below.
- Node No. 4 is also drawn with a curved arrow, only its direction to the left side. Similarly, it is performed, as in the previous case, but we work with the left thread.

As can be seen, if you feel a pretty, no problems will be read the scheme. And with an "experienced" hand, you can perform any drawing and of varying complexity. The main thing is to do everything carefully and clearly follow the instructions. The color gamut can be changed at will, but then you need to be very careful in order not to confuse anything.
How to weave baubles from thread moulin?
Most often, of course, baubles are made from Moulin. But this is not a limitation. They can be placed from various threads for knitting, for example, acrylic or six, you can use an iris or cotton thread.
It is interesting! The apogee of the popularity of Fenushek falls precisely during the Hippie times. After all, they considered themselves "children of flowers", and also had large love To all color.
An important requirement - the thread should not be too thick. After all, then it will not work out that expected beauty. No, it happens, make from dense shoelaces or thick threads, but only on a simple scheme and with a minimum number of colors.
- A large plus specifically threads Moulin is that the color scheme is simply stunning. Knitting threads, unfortunately, have a less rich palette.
- From the threads of weave, in principle, simplest. The main thing is to choose necessary schemewhich will be like you and your strength to fit. Therefore, at first, it is not necessary to grab the superchard and intricate pattern. And how to read the schemes, we have already described.

- By the way, when choosing colors, symbolism should be taken into account as each color and their combinations. For example, red and green color Speaks about love for nature. But the rainbow from seven colors speaks of joy, love, friendship and colors.
- Also, you can decorate such a bracelet various rhinestones, beads or chains. Optionally, you can attach beautiful feathers to Fecent. The choice of all kinds of decorations is just huge, so they will help the bracelet in any style.
How to weave bare bags?
This type of phenoshek weaving is a bit more complicated. And most importantly, it is to have great patience and greater perfection. But believe me, the result will be worth it. True, you should not be enough for the complex scheme. To begin with, it is worth practicing on a simpler version.
Immediately it is worth noting that you will need:
- Beads - any: you can large, you can small and completely any color. The main condition is quality. Beads should be the same size and it is important that they have holes. Since in the poor-quality goods there is a defective beads without holes or only one.
- Lerke, kapron thread or special bead thread.

- Needle. But this is optional. If we take a fishing line, you can do without it. And with a simple scheme, it will be enough to lubricate the tip of the thread with a colorless varnish.
- Scissors and matches in order to handle edges.
- Clasp. But also optional, because often the same beads make them.
- Machine for weaving. It can be done independently from the cardboard box. Make the edges of the cuts at the same distance and tough thread tight. By the way, some schemes do not require a machine.
Option number 1
This is the fastest and simple variant of the beads. More precisely, from beads. Since it will be much prettier to look if you take medium-sized beads.
- Three cuts of fishing fishing fastener
- Then we dress for each segment of beads (any color). Length should be a little more than hand pickup
- And then just weave the pigtail, and the ends also attach to the clasp
- That's all! Maximum five minutes and bracelet ready
Option number 2.
Also a fairly simple way to cope with everyone is "canvas". The machine is not required.
- We put on the line the amount of beads needed by width
- Then each bead should be attached to the previous row separately.
- To do this, you need to wear a new beerink on the fishing line, then go through the first row bead and return to the starting point. And again begin to a new bead, which will already be attached to his biserinka of the previous row.
- This technique is very well used to make a drawing or inscription.

There is still a sufficient amount of weaving schemes with beads, but we will not stop on them, as there are many videos on the Internet about this detailed description. You just just look at the type of weaving you are interested in and try to make a bracelet personally.
How to weave baubles from ribbons?
Also a very popular decoration that is just done enough. The main thing is to be in the essence of weaving. And then it will be, "like oil." Naturally, consider the easiest way that uses only two colors. For example, there will be white and black (length of their at least 1 meter).
- You need to bend the segments of the ribbons somewhere centimeters by 10-15. And impose them to each other.
- Next, we take a black ribbon (it will be on top) and wind the white strip over it and return to its original position. As a result, a small looping should be turned out.

- Next, we do a white tape into this loop.
- And gently tighten this nodule black ribbon. It is important not to tighten a very tight, since it will deteriorate the whole look.
- And then the long segment of the black ribbon is made in a white loop (there should also be a UCHO). Again, tightened and made a loot. And so you need to do until the desired length is possible.
- At the end - tapes to bore the nodule, and you can attach a fastener for convenience.
Round bracelet.
The option is a bit more complicated than the previous one, but it turns out more cute. Also take for the convenience of perception dark ribbon and light.
- Fold them will be crushed and copped with a pin. For example, dark tape will be top.
- Then a light ribbon bend like the letter "P", only rounded (or in the form of the arch, as elsewhere called) to the left.
- Similarly, we also wrap the dark ribbon, but down. As a result, four points of contact with ribbons should be obtained.

- Then they do the same with other ends of the tapes, but in the other direction. That is, a light ribbon - right, and dark up. It is important to ensure that the lines are perpendicular to each other.
- The knot, which you turned out, you need to tighten well (I must remind a square).
- Such manipulations with ribbons must be done to the end until the required length is possible.
- Cut ribbons can be used as rinsing. As a result, a bracelet should turn out, as if burning from the tapes.
How to weave baubles with names?
Ribbons with various inscriptions or names are very popular. And such a gift clearly appreciates that expensive person to whom it was intended.
- It is worth noting that it is possible to weave with threads or beads, and the color gamut can be chosen completely any. But it will be much better to look if you choose two contrasting colors. So that the inscription was clearly visible.
- You need to write your name in the cells or use already ready-made stencils of letters.
- And already, following the scheme, weave the bracelet, and also do not forget to change the color on time.
- You should also calculate how much the name will occupy that the edges of the bracelet will be the same.
- If the bracelet is made of threads, then you need to use simple schemes of weaving, the nodules of which have already been considered above.

- If it is from beads, then the most successful will be the method of "cloth". You can still use the "Cross" technique, but on it the inscriptions do not look so impressive.
How to weave bane straight weaving?
This is the most common way to weaving phenushek, and most importantly - fast and diverse. After all, you can use perfectly any schemes and use completely different colors.
It is necessary to start highlight the threads.
- Home or leading thread. I think everyone understands that thanks to her bracelet, and the color depends on it. It is not cut from the tangle and, as a rule, you need at least 5 meters.
- The main thread is that thread on which the nodules are attached. Therefore, the color of the bracelet practically does not affect, more precisely, only the extreme threads remain.
- Additional or auxiliary threads. It is they who help create the desired drawing.

To perform with a straight weaving with direct weaving, you must first select the scheme and color gamut.
- Mounting threads can be found in any convenient way.
- There is also a small trick - so that the ranks were smooth, they need to press the line
- We start working with the left thread, which moves to the right
- And here is the following row in the opposite direction
- And, if this requires a drawing, then do not forget to alternate colors or enter new
- And so make the necessary color to the very end. Just do not forget to do two nodules
- If you are going to create a drawing, it is mandatory to calculate how many rows will be before and after
How to weave oblique baubles?
This method of weaving phenoshek is considered the simplest and great for beginner masters. The fact is that the ranks are not strictly in one line, but as if with a small displacement (somewhere on the floor knocked).
- First, it is worth noting that the threads in this method are not woven during the work. The whole bracelet is performed by those threads that began
- Schemes, most often, provide for the pair of fibers

- Since the types of nodules and reading schemes have already been clarified, it remains only to add that there is only one rule for oblique weaving. This compliance with the instructions.
As you can see, if you want to create baubles, using absolutely varied weaving and threads. And the variety of schemes is simply a huge, which includes various drawings, and color gamma for every taste. Therefore, you can make any bracelet. And most importantly, it will be an exclusive bauble. Develop a fantasy, and our advice, we hope will become an excellent practical benefit for you.
Video: "Fences direct weaving with letters"
The extraordinary popularity today has acquired such a kind of needlework as a weaving of phenushek. The history of the creation of such a bracelet begins in South and Central America, the tribes of the Indians did not think how to weave the bastards, they did them, the feathers, blades and even twigs in them, they quickly rummaged and lost, but in this case there was a desire that required It came true, and now they are very easy to do Muline from the threads.
Since the bracelets flew not only for your own wearing, but also as a gift, Fuenches were considered the subject with the meaning, and not just a decoration, later for this reason the hippie community borrowed baubles as a symbol of accessories to them. In Russia, there were also multi-colored bracelets, in whose weaving techniques were various openwork and embossed nodules. Today, basting phenushek is more considered to create decorative accessoryBut sometimes these decorations are given in a sign of friendly relations.
Bunching baubles from threads (woolen, cotton and moulin), beads, woven and leather shoelaces, leather and satin ribbons. You can weigh the bracelet in several ways: oblique, straight and in the macrame technique, with the addition of beads, beads or chains. But for beginners with the simplest option of weaving the first ones, there will be a phenchka of 2 threads of different colors.
The first way of weaving baubles from threads Moulin
You will need a thread of two different, contrasting, colors in length equal to the wrist girth plus an increase in fits freedom, strings and on the nodules along the edges of the baubles, which will keep two threads together, approximately 30-40 cm each.
Two threads should be tied together at one end of the knot, stretch the threads in different directions so that the node turns out to be in the middle, then you can ask someone to help twist the threads of baubles. One crusher holds one end to the overall thread, and the other is the second end of the thread, and each starts twisting the thread in one direction and in the opposite, i.e. One person twists the thread, and the other is from himself. Threads must be kept in tension, so that they are then correct and smoothly sat down together. The subsequent step must be taken behind the nodule with one hand, and other ends of the thread - together in another hand and let go. The ends of the threads will begin to spin together, only you will need to fix it a bit and at the end tie a nodule at free ends. Here is a simple phenus from two threads ready!
The video footage will add clarity in creating such a bauble:
Second Weaving Method Bracelet
According to such a scheme, weaving can be associated with a bulk baubles of two threads (in the photo instead of the threads satin ribbons), the thread must be taken not very thin, the drawing will be brighter visible if the thread will be thickening.

And the video will tell about the diagram of the crossing of the threads and the end result:
Weave from two threads product according to the scheme and description
2 Mounds are required Moulin different color, scissors, pin and pillow to which the product will be attached.
Instructions for weaving scheme
This simple bracelet with a simple ornament for bauing baubles. To more complex schemes, it is worth starting after studying simple. The length of the threads should be about 1 m, about five times more than the length of the finished bracelet.
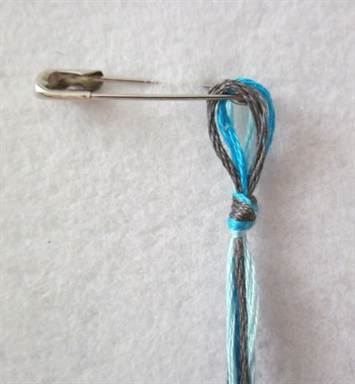
1) Axial (nodel) thread - it will be tized nodes from the working. Bracelet string do simple way - At a distance of 7-10 cm from the ends of the threads, the node is associated. The resulting knot pin is fixed to the pillow. The working and nodular threads are arranged apart from each other.

2) Now the left thread is defined as axial thread, i.e. It will be imposed on the right thread, it must be kept with the tension, and the right-working thread, it turns the axial (node) thread, making movement from left to right. The tip of the right working thread is dragged from the formed looping, after which the finished node is delayed - this is the right looping node. Next, the second node is done on the same manner, not very tightened, it is closely shifted to the first node. It turned out a double knot. Now the threads change their location and roles, i.e. The axial thread becomes a working, and the working - axial (base).


3) The next left looping knot is proceeded in a similar way, only the direction of the working thread of the double node on the contrary, to the right left.
4) The next node, which will be needed in the poles, the right and left turn. For the right turn: On the axial thread, the right looping node is needed, after which the left looping. For the left turn: the working thread gossies the left loop, and then the right.

When the bracelet of two threads woven the required length, it is necessary to fix the threads, i.e. Tie the ends of the thread by a knot, at the end of the work it is necessary to bring the product to the nearest species - scissors to trim the extra tails.
When bane banes from two threads tested, then you can try working with three, four, and then with a large number of threads.
3 Threads of beautiful baubles
Below are the types of nodes that can be selected or alternate in the weaving of phenoshek:

1) First on the left in the photo knot - double flat knot.

It is necessary to associate it like this: first the left single flat knot is woven, followed by the right single flat knot, so it turns out a double flat knot, it can be absorbed by all the baubles, but that the nodes look smooth and neat, the thread that goes inside the node, Say the basis, regularly pull up. The threads that tied the base (in fig. 1st and 3rd) must be four times longer than the threads on which these nodules are tied.
A double flat knot can be placed from 4 threads, out of five, out of six, how many plenty. The photo shows the variations of this node, due to the number of workers and nodule yarns.


Unusual and cute baubles from threads always attracted the attention of others. You will not surprise anyone with the usual jewelry, but with such bracelets you can easily stand out from the crowd. And they are attractive not only with their brightness, but also by the fact that they can be made independently. Another important feature is quite an interesting meaning that binds two friends.
Funches - what is it?
Fuenus is an accessory in the form of a bracelet, made in the form of weaving from the threads, tapes, beads and other materials. Most often he woves manually, and in its creation laid the meaning of friendship between two people. But last paragraph It is not necessary, since in modern times many perceive it just like decoration.


The prototype of modern phenoles is the decorations of aborigines and the Indians, which exchanged similar bracelets to establish spiritual communication. Later, this idea was borrowed supporters of the "Hippie" movement, which thus confirmed their attitude to this fraternity.


The classic option is baubles, woven from Moulin's threads. They can be both monophonic and multi-colored. Also on them, depending on the type of weaving, various drawings and patterns can be depicted. Colors on baubles have certain values, due to which it was possible to determine what a person represents.


Now banes from threads and other materials are a fairly popular accessory, while weighing it can be both independently and buy a finished product. They are perfectly combined with summer and spring images. At the same time, they can be worn both girls and guys.


Methods of weaving Fenushek
Fenushek weaving itself is the zealing of the nodules of four types. There are two main ways of phenoshek weaving: oblique and direct. Already among them, you can find interesting decisions of the drawing or patterns that will differ not only in difficulty, but also on the technique of execution.

Those who have enough experience can even combine these two ways of weaving, creating new original drawings, color mixes.
Spit weaving

The principle of oblique weaving is that the nodules fit in one selected direction - from left to right or vice versa. The simplest scheme that perfectly demonstrates the principle of oblique weaving is a classic tricolor.

So, you will need three colors threads, the length of which is at least 60 cm.
- The first step will be the creation of a node, the beginning of Ferrelka from the threads. It is attached to the working surface.
- Weaving begins from left to right. It is from this side that it is necessary to start tying a nodule. For this, two extreme threads fit together into the node, while the most extreme adheres to.
- The resulting node is transferred to the base of the baubles from the threads, and the next node is made.
- The same must be done with other threads towards the right. That is, the extreme thread will tie two nouts on the subsequent threads.
- After the first row, you can proceed to the following. It is done in the same way as the first. Only the color of the extreme thread will already be different.
- When bane bastings from threads will approach the sizes on the wrist, the final part should be fixed.


Direct weaving
A straight weaving of phenushek is more difficult. However, those who have mastered oblique, will also cope with this. The advantage of this method of weaving is a greater variety of schemes. On baubles can be present not only multicolored patterns, but also full drawings. This can be achieved due to the fact that knitting nodes occurs horizontally.

Weaving moves first to the right left, and then on the contrary. Start learn to weave baubles by direct way better with two colors. One will be background, and the other - knots. And the second needed much more.

- The beautiful base of the baubles from the thread is done like this: the threads that will be used as a background must be folded in half.
- On the one hand, closer to the collar, the thread is tied, which has the name "leading".
- The leading thread should be tied up all the threads of the background so that in the end it turned out a beautiful uniform loop.
- Then it is necessary to tie certain nodules on the backs of the background, moving towards the opposite side.
- When the first row is completed, it is necessary to move to the second. Here weaving will be carried out on the same principle, but in the opposite direction. Therefore, this method is called "snake".
Hacking a hand on weaving the phenosheks of their two colors, it is worth trying their skills on several shades or start creating real patterns.

Schemes of weaving phenoshek from threads
First you need to say that the schemes are two types:
- a full cycle means that after the pattern of the pattern is over, it must be repeated again;
- the incomplete cycle demonstrates the principle of the tying of nodes, that is, on top there will be some colors, and from the bottom - others.

As for the nodes themselves, they also have two types:
- right is characterized by the fact that the working thread will be located on the right side of the node obtained,
- the left means that the working thread will be on the left side of the node itself.

There are also 4 types of nodes:
- direct - on the diagram is depicted by an arrow indicating in the direction to the right and down. And for this you need to make two left nodes;
- the reverse is depicted on the scheme in the form of an arrow, which shows the direction to the left-down. And this means that you need to do two right nodes;
- left Frivitis looks in the diagram as an arrow in the form direct cornerlooking in the lower left direction. To make it necessary to do such actions: First you need to start the left knot, after which changing the threads in some places, you need to make the right node;
- right frivitis - the scheme has the designation of the direction to the right and down in the form of a direct angle. It is performed by the same principle as the last node, only in the opposite direction: first the right node, then the left.

Often, the schemes are depicted by the colors of the nodes, however, you can replace them with others. At the beginning of the path of the phenoshek from the threads, so as not to get confused, you can mark the ranks that have already been made.

As for the schemes themselves, there are a huge set. Thanks to them, you can create various drawings and patterns on baubles. It is also possible to come up with a scheme itself, special programs have been created for this, which treated the intended ornament in the form of a weaving scheme.


On the video below you will see how many phenets may be from threads, in which case direct weaving, and in what oblique. Inspire.
To create multi-colored baubles from threads, threads will need a thread of Moulin - at least six colors, scissors and fastening.

- Threads are cut in half so that each color is in double quantity.
- Then the threads are arranged in such a way that the same colors are mirrored. That is, the red color will be extremely on the left and right side, green - second, etc.
- The fastening of the thread is made by any like way.
- Weaving can be started on either side, for example, with left. To do this, the extreme thread makes two left nodes that need to be placed directly at the base of the bracelet.
- Then again the red thread should tie nodes and on other threads. They need to tie them up to the middle.
- The same must be done on the other hand, that is, repeat the actions, but in the opposite order.
- When red threads come together in the middle, you need to tie a node with the right leading thread.
- You need to start the second row with green. Everything is done in the same way as with red thread.
- At the end of the weaving, the baubles can be tied on the knot and weave from the remaining threads a thin pigtail. The same needs to be done with threads that remained at the base.


How to decorate baubles?
Baseball itself is a distinctive accessory, but this does not mean that the bracelet should be made in absolutely from Moulin. It can be complemented by various decorations. Most. simple option Fencing decorations are interesting locks. They can be purchased in stores for needlework. This may be a sign of infinity, chain links, lighthouse and much more. And in the bracelet itself, you can need beads, spikes, beads, stones, sequins, rhinestones.


To decorate baysins or beads with beads, they need to be rolling on a thread and with the needle to sew in the bracelet.

It is interesting to decorate in the form of rhinestones. They can be glued to the finished phenus, but in this case it is possible to risk that glue will leave the traces. Therefore, you can buy a thread with already ready-made small rhinestones.
So, in order to attach a thread with rhinestones, you need to do the following:
- In the middle along the phenosheki from the threads you need to decompose the thread with rhinestones of the corresponding length.
- Then the thread, which is suitable for the fugenic, you need to start sewing a thread with rhinestones.
- To do this, needle needs stitches that will go perpendicular to the threads with rhinestones.

To decorate with phenoschka spikes, you need to stock up with special fasteners. But before this it is better to make marking under the decoration. Then with the help of the spike needle are applied to the bracelet, and with invented side fixed.

Fencing's weaving is a fairly interesting process, but difficulties may also have difficulty. And the first problem of beginners is the wrong definition of the length of the thread. First, you need to leave the length so that you can wear baubles on your hand. Secondly, depending on the complexity of weaving, the threads are needed from 80 cm long. Therefore, the harder the pattern, the longer the thread should be.

At first, you can simply fix the threads in the form of a simple knot. But that work looks more accurately, you can use one of the proposed methods:
- Fixing the threads using a pin. All threads need to tie around the pin, and then you can attach it to a piece of fabric or even on your jeans.
- Fixing the threads with a tape, a tape or a patch to the working surface.
- Testing knots by leading thread around the base of the bracelet.
- So that the end of the phenuschka does not embroider, you need to tie it on the knot, or heat the tight pigtail.


Another important point is the quality of the threads. It must be a moulin of cotton. But since it can be dull, manufacturers carry out the process of mercerization. You can still weave baubles from strands of silk, woolen and staples.

If the thread ended during the weaving, and this often happens when creating complex patterns, you need to do the following: from the wrong side to the ending thread attached new Togo same colors.
If you want to create baubles according to traditions, then you need to know the values \u200b\u200bof the colors:
- red symbolizes love and passion,
- green - hope and faith,
- white - innocence and freedom,
- black - loneliness and independence.

Fenechka is an excellent decoration that is suitable for summer. And the process of weaving can become an interesting hobby, because there are many schemes of different complexity, for which you can create a beautiful and unusual bracelet. Also, the phenus, woven manually, can become a pleasant presentation for girlfriends or friends.
Finally, a lightweight master class on weaving the most simple bacon of threads, which will allow even inexperienced beginners to challenge the idea of \u200b\u200bweave.
Fuenus from Moulin will good gift For friends or relatives. In order to blame her you need threads, ruler, scissors. Given that weaving takes a lot of time, it is best to sit in a well-lit place. Below we will tell you how to weave the most diverse views of the phenoshek.
1. Weave braid
The easiest way to keep a pigtail. It weaves from three threads, also in pigtails sometimes turn the ends of the phenushek. The end of the pigtails can be tied in the nodule.
One of the weaving techniques - weaving pigtails from 4th threads. Using this scheme of weaving, you can use a greater number of threads (even fourteen). The main thing in this scheme is to transfer threads alternately from left to right, and right to left.
Can weave the pigtail and out of 5 threadsSo called the cord of the Axelbank. This scheme is used for any non-pairwise amount of thread. The essence of the scheme is a variable movement to the center of the left thread, and then right thread, and repeat how much you need.


From 6 threads


2. weaving oblique weaving
In such a weaving, you will use 4 nodes that can be placed differently. Starting weaving should be left right, or vice versa, managing the scheme.
3. Fences with sharp arrows

 You need a thread Moulin about a meter, take 12 threads of 6 colors. Spread them in a bundle, tolding a node on 7 centimeters from their edge. It will be better to fix the thread scotch to the edge of the table, divide them into 2 parts by colors.

Taking the left left thread, make the "four" on the second thread on the left, and spend through the hole (see Figure). Then you need to draw a thread up and right. This should be repeated, you will have a double knot. The rest of the threads are also knit until you reach the center. So it turns out half of the baubles.


On the other hand, do everything symmetrically. Continuing knitting knots, you will finish the first line of baubles. Having received the desired number of lines, tie the bauble on the end of the node from all threads. Such a bauble can be done as symmetrical in color and not.
4. Wet rhinestones

 Take the finished baubles, thread Moulin, scissors, needles and rhinestones.
 Tie a thread on the needle and thread her through Fuenus at the very beginning. Stretch chain with rhinestones on baubles.
Make stitches through 2 rhinestones, then again thread the needle from the bottom up, trying this time to get in the middle between the second and third stone.

15 shocking plastic Operations, ended crying

What happens if you look into the eyes of a person for a long time

Ten habits that make people chronically unhappy

 At the end, tie the knot on the reverse side.
5. Fuzhechka with spikes

 You need 5 spikes, fastening to them, scissors, screwdriver, bauble.
Mark the markup on the bane at the binding places. Put holes in them, with scissors. Take a screw in it, secure the spike. Do this action with all spikes.


6. Fuzhechka with a chain

 You need phenosheka, thread Moulin, not a long chain, needle, scissors.
 I traveled to the needle in the needle, make the end of the thread with the last knot, the needle should be returned at the beginning of Benches.
Putting the chain next to Fenochka, make a needle through each link, making it on each of them stitches.

 If the chain is too long, tight it in size, removing several links.
7. Weaven baubles with nuts

 You need cotton ropes, scissors and nuts (you can take hex).
 Tie 3 ropes in the knot, leaving 5-7 centimeters from the edge. Transfer 6 centimeters with a regular pigtail.
Making a strand with a left thread, put a nut on a thread, watch them alone to another.

When you make a strand right thread, again put on the nut, and press it.


10 signs that angel visited you

What are the most regretting people at the end of life

Survive in the metropolitan: how to be healthy all year round?


8. Fuzhechka with a lugged chain

 You need threads Moulin, 2 hairpins, a large chain and scissors.
 Cutting two sets of fifteen threads, you must get threads that are 4 times longer than your bracelet. Tie all the threads into the node, leaving from the end of 6 centimeters.
 Secure each set of threads in the hairpin, it will simplify you the whole process.
 Stretch the kit in the first link (see Figure), putting the second set on top of the first, spend it from the bottom up in the first link.
 On the second link, we begin the same, putting the first set on top of the second, and spend on the link.
 We also do with the second set. So repeat with all the links.
9. Make Friendship Necklace

 You need cotton ropes, threads Moulin, washers, nuts, scissors and coils for threads.
Mix 2 days of threads Moulin on the coil, so it will be more convenient for you. Secure all the threads in a convenient position for you. Next, follow the instructions in the photo. The described procedure should be repeated as long as you want to change the color.

Change color is simple, you should shift the replaceable thread in left, And new knitting knots, as shown in the photo.

The color scheme can be changed at will. In the process of knitting, you can add washers, nuts, fixing them with nodules. Remember that a necklace with many colors will look better.

10. Fenechka with chain and rhinestones

 You need 130 centimeters of a leather cord, a thickness of 1.5 mm, about 30 centimeter chain of crystals, or balls, about 160 centimeters of thread, nut.
 The length should be chosen depending on your wrist, so that you can wrap the phenus 2 times around it and tie.
 Make a big loop from the leather cord, folding it in half, so that the nut can go to the loop. Take a thread and secure it on the end of the loop, then start tying it with a chain to the leather cord.
Continue so until the end of the chain. At the end, you should tie a nodule to fix the nut.


The classic way of weaving "Friendship bracelets" is weaving phenoshek from Moulin. For beginners, this is perhaps the easiest way that allows the method of samples and errors to fasten the base, with the knowledge of which you can later create an incredible braided things. In order to weave from Moulin, there is nothing complicated, but you will need a lot of patience: the average bauble with a width of one centimeter weave at least an hour. And if such dates are not stopped, you can move to the process of creativity.
In order to weave the baubles from Moulin, you will need: 
- Cut 6 threads so that each length is 120-140 cm, divide them by colors and gently tie the node.

- Secure the bauble with the pins for the knot and separate the two extreme left threads - and starts with them spit weaving.

- Left green thread from left to right to place on the right and skip the resulting loop. Gently tighten the knot, pulling the right thread up.

- All nodes must be double, because otherwise the bane twists. Tie the second same node: that's what you should get. After tightening the thread node, which you tied the second thread should remain on the right.

- Now the same thread and the same double knot, impose the left yellow thread. Green thread again remained on the right.

- At the same thread, continue to flush the row, and when free threads are running out, take a new left straight thread and in the same way to tie the following rows.

- For convenience when forming a nodule, you can fix freely hanging threads with your fingers, slightly pulling them.

- So there looks like a bacon with eight rows.

- So, you endured the Fuenus to the length you need. Now it is necessary to fix it.

- Divide the threads into three parts and braid an ordinary braid from them. Movement at the end Fix the nodder and cut the remaining threads so that you are comfortable. Do the same on the other hand, pre-unleaving the locking node.

- Your first feathers is ready!


- Cut threads up to one length (approximately 100 cm), tie a node and fix it with a tape.

- To the extreme left thread, tie the next two threads in the same way as in the first method of weaving.

- Now go to the extreme right thread. The node here is the same as usual, except in mirror reflection. Right right thread right to left on the left and under the left, spend it into the formed loop. Tighten and make a double knot. In this case, the light thread, which was with the edge, after tightening the nodule will remain on the left.

- In the same way, reinforce the second thread with a double knot.

- Two bright threads remained in the middle of the baubles. With the right thread, impose the left, as in paragraphs 3-4 - subsequently all the average double nodes will be construeding exactly the right thread.

- Repeating previous actions, gossip the second row.