Knitting patterns for knitting slippers with a description. Knitted slippers with needles with a description
Slippers on two needles knit quickly and easily, while they are very soft, warm and beautiful. In the cold, you so want to warm up and knit something cozy and warm. What if the whole process takes no more than one evening in front of the TV? We want to please you with clear, simple and cute options for home slippers - socks that will perfectly warm your feet and can become a wonderful gift.
Slippers on two needles description:
Slippers are knitted on two needles, starting from the sole. Slippers are knitted with needles # 4.
The size of the slipper is 23 cm in length.
Knitting density: 20 loops for 20 rows - sample 10 * 10 cm.

Sole:
Cast on 26 loops
1 row: knit all the loops with the front ones, at the beginning and at the end add one loop each (28 loops)
2nd row: all knit stitches
Rows 3-16: repeat a row. 1 and 2 (42 loops)
17 row: knit, knit 2 loops at the beginning and end of the row. together persons (40 loops)
Row 18: all knit stitches
Rows 19 - 32: repeat a row. 17 and 18 (26 loops)
Top:
33 row: cast on 8 loops (heel loops) and knit faces. (34 stitches)
34 row: all loops of faces. at the end add 1 loop (35 loops)
35 row: knit loops
Row 36-48: Repeat Row. 34 and 35 (42 loops)
49 row: bind off 24 loops, finish the row with faces (18 loops)
50 row: knit loops
51 row: out. loops
Row 52-56: repeat a row. 50 and 51 (18 loops)
57 row: cast on loops 24 loops and knit faces. (42 loops)
Row 58: knit stitches, at the end knit 2 persons together. (41 loops)
Row 59: persons. loops
Row 60-73: repeat a row. 58 and 59 (34 sts.)


Close all loops, leaving lengths. thread.
We sew and decorate to your liking!
Slippers on two needles - a step-by-step photo of the knitting process:


Features of knitting and crocheting home slippers.
With the onset of cold weather, it becomes uncomfortable for us to step on the floor with bare feet. Therefore, warm socks and cute fur slippers appear in everyday life.
Beginners and experienced needlewomen try to please themselves, their family and friends with warm new clothes for the season.
Household slippers of various styles are knitted both with knitting needles and crocheted. For men - in restrained colors, for women - brighter, and for children - with a twist in appearance.
Consider the features and secrets of knitting and crocheting warm house slippers for the whole family.
How to knit slippers with knitting needles: a diagram with a description

For knitting slippers of footprints, needlewomen choose different methods:
- one piece seamless knitting
- in parts, product details
- with one seam on the back wall of the instep of the heel
Let's dwell on the latter.
Prepare:
- yarn 50-100 g depending on its thickness and length
- 2 needles with a thickness equal to the diameter of the yarn
- hook
- flexible meter
- scissors
The order of work for 38 rubles:
- cast on 31 sts and mark the 24th. After it there are loops for the toes,
- do all rows with the front ones,
- knit each 4th row short, that is, do not tie the loops for the fingers, but turn the work to the other side. So that there are no holes left in these places, wrap the thread around the first loop that does not fit, and pull tight,
- after 9 cm along the larger edge from the beginning of work in the front row, close 16 loops,
- continue working another 3 cm,
- in the purl row cast on 16 loops at the end,
- again continue to work with garter stitch for another 9 cm,
- close all loops without pulling them together,
- transfer the outer loops for the fingers to the thread and pull off. Hide the end of the thread inside the track,
- sew a seam along the long side of the garment, folding it in half.
Repeat all steps for knitting the second footprint.
Crochet the rims with crochet stitches, if desired.
Another option for knitting footsies with knitting needles, see the diagram below.


How to knit indoor slippers with knitting needles for beginners: a diagram with a description

A simple and understandable way for a needlewoman of any training and experience is to knit house slippers on 2 knitting needles. And working on two sneakers at the same time will reduce your time for checking and calculating rows / centimeters before decreasing the loops and changing the pattern.
The direction of work is from heel to toe. Pattern - garter stitch and 1x1 elastic.
You need:
- yarn in 2 skeins
- 2 spokes
- scissors
- hook
- big needle
Operating procedure:
- on both knitting needles cast on 29 loops from each ball. Future sneakers will fit 37 foot sizes,
- 1 row - 9 facial, 1 purl, 9 facial, 1 purl, 9 facial. For 38-39 p. knit 11 knit instead of 9, typing initially 32 loops for each sneaker,
- 2nd row - all knit,
- continue to work 23 rows, alternating loops according to the scheme of 1 and 2 rows,
- perform 1x1 elastic for the next 6 rows,
- knit 2 loops together to the end of the row,
- turn the work over and repeat the previous row,
- put the final 8 stitches over the thread and pull together. In this case, put 2 strips from the front loops on the front of the products. The sock of the sneakers is ready,
- use a needle or crochet to sew 13 cm of the edge of the product from the toe and the back from the heel up,
- crochet the rim with a crustacean stride or single crochet, if desired.
The scheme of home slippers for knitting by beginner craftswomen is below.


How to knit beautiful cozy slippers with two knitting needles that knit very simply and quickly?

Take a few preparatory steps:
- pick a beautiful yarn color
- take measurements of the foot and draw a diagram
- tie the test piece with the front rows and a scarf pattern
- determine the knitting density for each pattern
- translate measurements from centimeters to loops
Operating procedure:
- cast on the number of loops equal to the circumference of the slipper in the upper part and knit with a scarf pattern 3-4 cm,
- divide the loops in half so that there is one in the middle,
- knit face stitch in the front rows and purl in the purl,
- in the front rows around the loop in the middle of the canvas, perform 1 yarn over on each side,
- the line with this loop is the top of the slipper,
- continue to work to the desired depth of the product, excluding the toes,
- go to a shawl pattern without adding loops,
- after 4 cm close all loops,
- fold the product in half so that the front surface remains outside. Stitch along the long edge and heel lift.
How to crochet slippers with felt soles?

The felt outsole is good for warm models home slippers. When crocheting, choose the appropriate yarn and pattern. For the latter, a mandatory requirement is the ease of adding and subtracting without disturbing the picture.
The direction of work is from the toes to the heel.
- Cast on the loops for the nose of the slipper and tie 3 cm of the canvas with the extension.
- Continue working until the required distance to the beginning of the hole is reached.
- Divide the fabric into 2 planks and knit each one individually to the back of the heel.
- Connect the canvases with single crochet.
- If you plan to knit a slipper overshoes, do not cut the thread in the previous step.
- Raise the blade in a circle to the desired height.
- Tie the second slipper in the same way.
- Attach the finished sneaker to the sole and attach with needles.
- Sew them with a strong thread over the edge.
- Decorate the finished products as desired crochet flowers, leaves or ready-made compositions of ribbons and feathers.
How to crochet the sole for slippers?

The sole for slippers is crocheted in the direction from a chain of central air loops to the edges in a circle.
This can be seen in the diagram:

To tie it, determine the size of the leg and the equal number of base air loops. For example, for the 37th, 22 is enough, and for the 39th, 25.
How to knit sneaker tanks?

Computer games and films about the war cover up the attention of boys and men. Surprise them with an interesting model of house slippers in the form of tanks.
Use a felt insole to keep them warm. From it, crochet up.
The stages of the work are clearly shown in the photo below.


How to knit slippers for a boy?

The answer consists of the sequential execution of the following points:
- decide what you will knit - knitting or crocheting,
- choose yarn and additional materials, for example, insole, original buttons,
- come up with a future model of slippers or peep it on any handicraft site / magazine,
- take into account the interests of the boy before making the final choice appearance future finished product. For example, a fan of tanks will not be pleased with the funny faces of animals on sneakers,
- realistically assess your abilities and skills before starting knitting,
- take measurements of the boy's legs and draw a diagram,
- knit the model of slippers you like and give it to the child for use.
Below are some ready-made models for inspiration.


How to knit beautiful slippers for girls with knitting needles?

There are as many beautiful models of slippers for girls as needlewomen have imagination.
They are distinguished from men's discreet products:
- brightness
- combination of juicy and pastel colors
- a lot of options for drawings
ready bright knitted slippers for girls, option 2
How to knit men's slippers?

The approach to work and knitting techniques for mens slippers are identical to those for women.
The only difference is:
- yarn color
- laconic patterns and decor
- foot length
Take as a basis for work any of the knitting patterns you like male models home slippers.
How to crochet slippers on the insole?

If you want to crochet slippers with a finished insole, then:
- using a gypsy needle or awl, make holes at a distance of 0.5-1 cm from the edge at a distance of 0.5-1.5 cm from each other. They are needed for crocheting the insole,
- tie it with single crochets or half-crochets. In each hole, make 2-4 columns, and 3-5 insoles on the roundings,
- watch the density of knitting. The insole must maintain its shape without pinching,
- fasten the last loop with the first connecting post,
- tie 2 lifting loops for the second row, which will be the first in the work on the main canvas of the slipper.
So, we examined the techniques of crocheting and knitting house slippers for the whole family and were inspired by the photos of finished works.
Light loops for you!
Video: how to knit and crochet indoor slippers?

Cast on 60 pet., Knit in garter stitch 6 rows in the main color, 2 rows in a different color., 2 rows in the base. tsv., 2 rows of other tsv., 2 rows of basic. tsv., 2 rows of other colors., 6 rows of basic. color Close the hinges.
Fold the details as if in a loop and cast on one narrow side 12 pet., + 3 air loops. and from the second narrow side another 12 pet. There are 27 pet on the needle. On these loops, the toe part is knitted in the form of a triangle in garter stitch:
1 row - 27 pet. main color
All even rows are according to the pattern, i.e., persons. pet.
3 row - 27 pet. other colors
5 row -12 persons., 3 cm. persons., 12 persons. main color
7 row - 25 pet. other colors
9 row - 11 persons., 3 cm. persons., 11 persons. main color
Continue to decrease by 3 pet. in the center in each 4th row of the main. color In total, you should get 12 strips of basic. color and 11 strips of other colors.
Cast on 27 sts from the center of the heel, then 26 sts on one side of the triangle, 26 sts on the other side. and another 27 pet. to the center of the heel. A total of 106 pet on the needles. Knit back and forth 6 rows of DOS. tsv., 2 rows of other tsv., 2 rows of basic. tsv., 2 rows of other tsv., 2 rows of basic. tsv., 2 rows of other colors., 6 rows of basic. color Knit either on stocking needles or circular (fishing line).
I knitted in a circle, alternating faces. and out. ranks. Knitted only 10 rows, then knitted in shortened rows, increasing the bow back and forth:
1 row - 80 persons., Turn
2 row - 54 persons., Turn
3 row - 47 persons., Turn knitting
4 row - 40 persons., P. elm.
5 row - 33 persons., P. elm. 6 row - 26 persons., p. elm.
7 row - 19 persons., P. elm.,
8 row - 12 persons., P. elm.
9 row - 58 persons.
10 row - 106 persons. (In my case - outl. Pet.)
11 row - we start knitting the soles: 57 persons., 2 cm. persons., pov. work
12 row - 1st pet. sn., 8 persons., 2 vm. persons., pov. work
Then we repeat the 12th row until there are 5 pet. from the sides. Next, we knit 3 pet. vm at the end of each row ("pet. from the sole and 1 pet. side), knit the last 2 pet. together and sew the heel. I had a solid heel, so I reduced the number of sts to 12 (6 pet. soles and 6 pet. of the heel cloth and sewed the loops with a needle).
Soft comfortable trays
Many of us prefer to wear at home instead of slippers and socks - socks, they are soft, comfortable and warm enough. We bring to your attention a method of knitting footprints from fingertips to heels, without a single seam.
To knit footsteps, you need 100 g of semi-woolen yarn (100g / 100m), a set of knitting needles No. 4 - 5 pcs.

To start knitting, you need to make a set of loops simultaneously on two knitting needles, which is presented in detail .
Cast on about 10 loops on each knitting needle, twist the ends of the threads and knit two rows in a circle with the front loops.

Next, start making additions on the sides, for this, at first knitting loops from the knitting needle, grab the loop of the bottom of the lying row with the right knitting needle, put it on the knitting needle and knit along with all the loops, at the end of the freed left knitting needle, grab another loop of the bottom of the lying row and also knit her facial. Repeat the additions again for the other side, thereby adding 4 additional loops in a row of 2 on the sides, then knit the next row without adding.

So alternate a row with and without additions, until the toe reaches the width of the foot.

Then knit without adding to the top of the rise and divide the knit down the center. To do this, knit the front row to the central part *, knit the last two loops with the front one, then turn the work, remove the first loop (thread before work) and knit the purl row - with purl loops, knit the last two loops together with the purl, turn the work again, remove the first loop (thread at work) and knit the front row, repeating from * 3-4 more times, thereby making subtractions from the center of the track.

Next, knit without decreasing a straight fabric to the center of the heel. Then divide all stitches into three sections and knit a regular heel up. To do this, in the purl row, knit the purl loops of the first part and the middle one, and * knit the last loop of the second part together with the first loop of the third part - purl. Turn the work, remove the first loop (thread at work), knit the middle loops with the front and knit the last loop together with the front one with a tilt to the left with the first loop from the next knitting needle (remove the last loop from the next knitting needle, knit the first loop from the next knitting needle and pull the knitted one through the removed one) ... Turn work again, remove the first loop (thread before work) and repeat from * until you subtract all loops from the edge knitting needles. Close the remaining loops on the middle knitting needle and the track is ready.

FOOTPRINTS WITH EASILY REPLACEABLE HEEL

Slippers
VIDEO
by photo


FOR SIZE 37-38
FOR SIZE 37-38
FOR SIZE 36-37
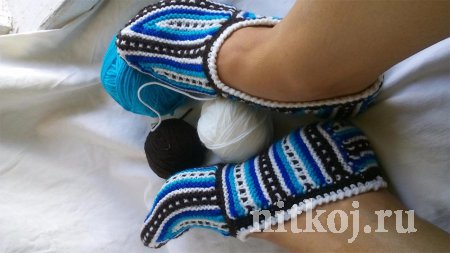
Knitted slippers
STRIP
From the author: "I knitted in 4 colors of threads: brown, white, turquoise and blue. You can take any colors and not necessarily 4. Dial 29 pet. Then knit in shortened rows without tying 3 loops:
1-2 rows - 29 pet.
3-4 rows - 26 pet.
5-6 rows - 23 pet.
7-8 rows - 20 pet.
9-10 rows 17 pet.
11 row - 14 pet., But knit 1 person., 1 knit at work
12 row - 14 pet.: 1 persons., 1 sn. thread before work.
Now we increase it by 3 pet.
13-14 rows - 17 pet.
15-16 rows - 20 pet.
17-18 rows - 23 pet.
19-20 rows - 26 pet.
21-22 rows - 29 pet.
23-24 rows - knit 29 pet. 1 person., 1 sn. like 11-12 rows.
25-26 rows - 29 pet.
It turned out 1 wedge of the pattern, 4 wedges are needed in total. After 4 wedges, pet. close, sew with a typesetting edge, and pull the nose, fasten the thread. Then dial 40 stitches on the stocking needles, starting from the middle of the third wedge with dots to the middle of the second wedge and knit the fabric of the required length to the beginning of the heel, knit the heel at medium 10 sts. on the principle of knitting the heel of the sock. Crochet the edge.
For a wide foot, dial not 40 sts, but 2-3 sts more. from each side.
Easy loops for you and pleasant leisure! "
TROOPS - SOCKS SPOKES
FROM NADESHA TOKARENKO

The tracks are knitted on two needles. They are very comfortable to wear and look beautiful on the foot. They are knitted from the rest of the yarn, but it is best to use yarn, which contains more wool, because they will be warm and will follow the shape of your feet.
Cast on 30 stitches.
1p - 6p: persons p.
7p - 22p: face.stitching (odd rows - face.p., even - out.p.)
23 - 41r: knit the heel, for this knit knit 19 sts, and 20 and 21 sts. knit persons together, turn the work. Knit 9 pp, and knit 10 and 11 pp together. Again, turn the work, knit 9 persons.p, 10 and 11 p. Knit together persons., And so knit, alternating 24 and 25 p. until 10 sts remain on the spoke.
42r: dial 10 pet from the braids of the side of the heel, turn the work.
43p: knit 20 sts and cast on 10 more sts from the other side of the heel. = 30 p.
44 - 74r: knit faces. satin stitch.
75r: start management: 7 persons., 3 persons together., 10 persons., 3 persons together., 7 persons.
76r: ex.
77r: 6 persons., 3 persons together., 8 persons., 3 persons together., 6 persons.
78r: n.p.
79r: 5 persons., 3 persons together., 6 persons., 3 persons together., 5 persons.
80r: n.p.
81r: 4 persons., 3 persons together., 4 persons., 3 persons together., 4 persons.
82r: out. P.
83r: 3 persons., 3 persons together., 2 persons together., 3 persons together., 3 persons.
84p: 9 purl and 10th knit from a pigtail (in total from braids dial 18 pet. On each side).
85r: 4 persons., 3 persons together., 3 persons. and the 4th from the pigtail.
86r = 84r.
87r = 85r.
Repeat 84 and 85 r until all the loops of the braids are knitted.
Bind off remaining 9 sts.

Cast on 59 loops and knit with a hollow elastic, the height of the elastic is optional.
Then we find the middle loop is 30 loop and in each front row we knit three from one loop (faces, yarns, faces).
I knitted the side of the slipper with a pattern. :
1st row: (person. Side) Thread A, 1 person. n. * 1 removed from. n., 1 person. n., rep. from * to the end of the row. 2nd row: 1 persons. n., * thread in front of the product, 1 removed from the inside. n., thread by product, 1 person. n., rep. from * to the end of the row.
3rd row: Thread B, 2 persons. n., * 1 removed from. n., 1 person. n., rep. from * to ate, n., 1 person. p. 4th row: 2 persons. n., * thread in front of the product, 1 removed from the inside. n., thread by product, 1 person. n., rep. from * to ate, n., 1 person. P.
Repetition of these 4 rows forms a knitting pattern.
So knit a slipper to the desired depth, then on the middle 13 loops we knit a trace, and then the heel.

Description:
Dial 22p.
1p-15p base color, 6p other color
2p-12p main color, 6p other color
3p-9p base color, 6p other color
4p-6p base color, 6p other color
5p-3p base color, 6p other color
6p-2p base color, 4p other color
7p-like 5p.
8p-like 4p.
9p-like 3p.
10-like 2p.
11p-like 1p.
12p - the whole row of basic colors. 22p. 1photo.
** Repeat again from 1p. for 12 rubles. 2photo.
** This is the middle.
1p-7p main color, 14p other color
2p-6p base color, 12p other color
3p-5p base color, 10p other color
4p-4p main color, 8p other color
5p-3p base color, 6p other color
6p-2p base color, 4p other color
7p-like 5p.
8p-like 4p.
9p-like 3p.
10p-like 2p.
11p-like 1p.
12p - the whole row of basic colors. 3photo.
** We knit again from 1p to 12p - 2 times. 4photo.
** We knit 5 rows of garter stitch.
We launch.
On the edge of the semicircle, dial the loops, and tie the sole on the middle ones.
** On the sides of the sole, dial 17p. And knit to the required length.
Run your heel.
Crochet.
Slippers ready
Knitted slippers.
MK from L. Myasnikova.

Yarn - brown Semenovskaya * Natasha *. 100gr - 250m. 50% wool. 50% acrylic. SECTIONAL - Troitskaya * Little *. 50 gr. - 135 m. 20% wool. 80% acrylic. Knitting needles number 2.5. We collect 23 loops - knit 2 or 4 rows of garter-stitched brown thread. 1st petal - 1 row - Cr. 13 loops OTs (Main color - brown) 6 loops DC (additional color - sectional). There are 3 loops left on the left knitting needle, we do not touch them, we turn the knitting to the wrong side and knit 6p. DC. 13 loops OTs. Cr. 3 row - Cr. 12 sc. 6 DC. 5th row - Cr. 11 OC 6 DC. 7 row - Cr. 9 OTs. 12 DC. 9 row - knit like 5 row 11 row - like 3 row. 13 row - as 1 row. 21 row - 1 cr. 20 OTs.
ERROR - NOT 21 ROW, - 15 ROW
2nd petal - 17 row - Cr. 10OC. 6DC. 19 row - Cr. 9 OTs. 6 DC. Row 21 - Cr. 8 OTs.6DTS. 23rd row - Cr. 6 OTs. 12 DC. 25 row - like 21 row 27 row - like 19 row. 29 row - like 17 row 31 row - Kr. 17 OTs.
3rd petal - CENTRAL 33 row - Cr. 7 OTs. 6 DC. 35 ROW - Cr. 6 OTs. 6 DC. 37 row - cr. 5 OTs. 6 DC. Row 39 - Cr. 3OC. 19 DC 41 row - like 37 row 43 p - like 35 row 45 row - like 33 row. 47 row - Cr. 17 OTs.
4 PETAL WE KNIT LIKE THE 2nd PETAL, BUT IN THE REVERSE ORDER - FROM 29 ROW TO 17 ROW
WE KNIT 5TH PETAL AS THE 1st PETAL - FROM 15 ROW TO 1 ROW. and knit 2 or 4 rows of garter stitched brown thread. ALL KNITTING IS A BARK KNITTING, i.e. FACE HOOPS ON THE FACE AND ON THE WAY OUTSIDE OF WORK.
Do not close the loops on the last row.
Sew on the sole. We collect 23 loops on the dial-up row + 23 loops were left open with us. Only 46 loops and knit the length of the foot to the heel. Here you can knit with any pattern. enter the DC thread. It all depends on your imagination. I ran a track from the front loops on the sides, and knitted the top with DC with an elastic band 1-1. We knit the heel as usual. I crocheted the top with a two-color twisted border. Light loops for you.
Simple tracks on two needles
http://klubok.kg7.ru/1/53/5459/

Model No. 3... We collect 22 loops and knit 10-12 cm in the main color. We begin to knit * RAINBOW * in shortened rows. 1-2p -20 red loops. 3-4 p. - 18 stitches orange. 5-6 p. - 16 yellow loops. 7 - 8 p. - 12 stitches green. 9 - 10 p. - 10 blue stitches. 11-12 p. - 8 loops blue. 13-14 p. -violet. 6 loops. 15 - 16 rows - all 22 loops in the main color. IT IS NECESSARY TO LINK 7 SUCH WEDGES. Then we also knit 10 - 12 cm in the main color. fold in half and sew
Model No. 4 the knitting principle is the same. Only after knitting a color row - we knit a row with the main color, also in shortened rows. Try on the leg - how many wedges need to be tied. Sometimes 3-4 is enough, and sometimes you knit 6 - 7. It all depends on the size, yarn, number of knitting needles.
In these tracks, the shortened rows are colored rows. knit 20 loops with colored thread --- on the needles you still have 3 loops. You do not touch them - turn the knitting on the wrong side and start knitting with colored thread back to the beginning of knitting with colored thread.

2 knitting options
1: for example, we collect 6 loops and knit the tongue in each even row, add 1 loops at the edges, the length of the tongue depends on how high your slippers should be. Then we add new color and we knit the sled itself with a new color, here we add again in each even row along the loop along the edges. Do the addition until you have tied that length as well as the length of the tongue. Then we knit the sides and the sole with any pattern or monophonic, when we knit the length you need, knit the heel and close everything. At the end, sew on the tongue as in the picture and you're done.
2: We begin to knit like normal footprints from the heel, knitting to about a little more than the middle of the leg, start to decrease on the contrary. The first time we close 2 loops in the middle and then in every 2 rows along the loop along the edges, and so on until you have, for example, 25 loops. Then close these 15 loops and knit the tongue separately according to the length you need, at the end you sew it.
HA 3-X

Cast on 24 pet., Knit 4 rows in the main color. garter stitch.
Next, we proceed to knitting the pattern in shortened rows, i.e. do not tie the loops in a row. All even rows in color are front.
1 row - 14 pet. main color, 7 pet color A, turn knitting;
3 row - 15 pet. main color, 7 pet. color A, pov. elm.;
5 row - 10 pet. main color, 7 pet. color B, pov. elm.;
7 row - 11 pet. main color, 7 pet. color B, pov. elm.;
9 row - 6 pet. main color, 7 pet. color D, pov.vyaz;
11 row - 7 pet. color, 7 pet. color D, pov. elm.;
13 and 14 rows - 24 pet. main color, pov. elm.;
15 and 16 rows - 24 pet. With any of the colors A; B; D, stitch;
17 and 18 rows - 24 pet. main color, pov. elm.;
It turned out one wedge of the pattern. There are 5 more such wedges. Finish the pattern with 4 rows of basic colors.
You can leave the loops on, fold the knitting in half and sew a seam along the sole.
Then dial 24 pet. from the edge where knitting began. For convenience, distribute all the pet. on 3 stocking needles and knit a straight fabric to the heel. Knit the heel on the middle 9 pet. like the heel of the sock. Crochet the top of the slipper with a crochet "rachis step".
Very lazy sneaker
Tatiana Kozhevnikova (Ivanova)

Cast on the required number of loops, knit the slippers on top. Knit with a pattern: 1st row: (person. Side) Thread A, 1 person. P.
* 1 removed int. n., 1 person. n., rep. from * to the end of the row.
2nd row: 1 persons. etc., * thread in front of the product,
1 removed from. n., thread by product, 1 person. n., rep. from * to the end of the row.3rd row: Thread B, 2 persons. n., * 1 removed from. n., 1 person. n., rep. from * to ate, n., 1 person. P.
4th row: 2 persons. etc., * thread in front of the product,1 removed from. n., thread by product, 1 person. n., rep. from * to ate, n., 1 person. P.
The repetition of these 4 rows forms a knitting pattern. Next, we divide the loops into 3 parts, I have 23-12-23. We knit the toe to the desired length. Then dial the loops around the edges of the toe and knit the height of the slipper. Here I knitted - this is an American elastic band .finished the height of the slipper with one pattern of corn and moved on to knitting a trace, sewed the heelThe number of loops for American elastic is a multiple of 3 plus 2 edging.
1st row (person. Side): - * 2 persons., 1 out. *
2nd row (wrong side): - * 1 persons., 1 yarn, knit 2 knit and stretch them in a yarn *
3rd row - repeat from 1st.
ON 2 SPOKES

Women's slippers with an ornament knitted with two knitting needles

Size: 36-38
You need
Thick yarn (50% wool, 50% acrylic) - 100 g dark of blue color.
Remnants of blue-gray blue for embroidery.
Knitting needles number 4.
Hook number 5.
Front surface: persons. rows of persons. loops, out. rows - out. loops.
Work description
The slipper consists of three parts: top, bottom and back.
Upper part: cast on the needles with dark blue thread b p. And knit faces. satin stitch, adding 1 st at the beginning of each row until there are 18 stitches on the needles. Then knit 20 rows straight. Close the hinges. With blue yarn, embroider any pattern with a loop-to-loop stitch, guided by the photo.
Bottom part: knit like the upper part, but after knitting 20 rows straight, do not close the loops, but continue to knit, decreasing at the beginning of each row by 1 point until 6 points remain. Close the loops.
Back: Cast on 6 sts, knit faces. stitch, adding 1 st at the beginning of each row until there is 18 sts. Knit 2 more rows straight and close the loops. Connect all the details with a crochet 1 next to the item b / n gray-blue thread.
Embroider the ornament as shown in the diagram.
Embroidery scheme:


SOCKS
Master class of knitting of socks on 5 knitting needles with a detailed photo report. Shown here are the basics of knitting the heel, shaping the toe wedge, and toe down. After learning these basics for knitting socks, you can later knit them using a variety of techniques.

For knitting socks, choose semi-woolen yarn with the addition of acrylic, for this master class used yarn "pekhorka" 50% wool, 50% acrylic, 300m per 100g and stocking needles No. 3 - 5 pieces. In order for the sock to be the right size, you first need to tie a test sample of the front surface and count how many loops are in 10 cm.Then we measure the ankle with a centimeter tape, the foot in the widest part - at the instep and at the base of the toes, of course, the length of the foot and the height of the heel ...

In our example, the knitting density sample was 10 cm 28 loops, ankle dimensions: 20 cm, rise 23 cm, foot width 20 cm.Thus, to start knitting the cuff, you need to dial 56 loops (always make the number of loops even) and distribute them on 4 needles, 14 loops.

Next, we continue to knit the cuff in a circle with a 1x1 or 2x2 elastic band, alternating 1 front or 1 purl or 2 front and 2 purl and in the following rows, knit over the front - front loops, over the purl. For decoration, you can introduce threads of a different color without cutting the thread of the main color, and we knit several rows of colored stripes.

So, when the cuff is tied to the desired length as desired, we begin to knit the heel. To do this, we continue knitting with the front stitch of the loop only on two knitting needles, moving them one, on front side knit front loops, turn the work and on seamy side- purl loops. We knit the fabric to a heel height of about 4-5 cm, 15-17 rows.

Next, mentally divide the loops into 3 parts: 28 loops / 3 = 9 side loops and 10 center loops each (always transfer the remainder to the center) and from the wrong side we begin to form the heel: we knit 9 loops (side part) with the wrong side, 9 loops (central) and we knit the last 10th loop of the central part together with the first side purl, thus decreasing the left side by one loop. Next, we turn the work, * remove the first loop, thread at work and knit 8 front loops, and the last 10th loop of the central part we knit together with the side front loop with a tilt to the left (we remove the 10th loop on the right knitting needle, without knitting, we knit the next side loop, and then we stretch the unkit through the knitted loop). We turn the work, remove the first loop (thread before work) and knit the purl row, knitting 8 purl loops, knit the last loop together with the side purl. Then we repeat from *, until only the loops of the central part remain.

Having knitted the heel, we begin to knit the sock again in a circle, dialing loops along the side of the heel, it is more convenient for me to just insert a knitting needle into the extreme half-loop and knit a front or purl loop from it.

Thus, in the first row from the sides of the heel, I collect 16 loops and distribute them into 2 knitting needles, adding 5 loops of the central part of the heel to them, I get 21 loops on the bottom of the toe and 14 loops (no changes) on the knitting needles of the upper parts of the sock.

In the next rows, we begin to form a lifting wedge, decreasing on the sides one loop at a time, knitting together 2 loops of the front extreme loops from the knitting needles of the lower part of the sock, in each row or through a row in accordance with your measurements.

After decreasing the required number of loops, continue to knit in a circle with the front satin stitch to the base of the thumb. Then begin to form the toe, decreasing in each row 2 loops on the right and left, knitting from the top together two knit stitches with a tilt to the left, knit 2, knit 2 together and so subtract until 4 loops remain, cut the thread, pull the crochet trim through the remaining loops and secure it from the wrong side.

In each front row, I knitted 5 loops from this loop (faces, yarns, faces, yarns, front stitches). The purl rows were knitted as the knitting looks. When 97 loops were tied on the knitting needle (this is 37 size), I knitted 6 rows of garter stitch, that is, all with front loops, and began to run the sole on 13 loops (like a heel). Then I sewed it on the back. That's all!
From the comments: Without tying 6 loops on the needles, I begin to decrease the middle 3 loops of the sole in each person. row, until there is one left from the sole, and then I do not sew with a needle, but I connect the border with knitting needles, like a shawl. Do not forget about the decrease on the sides.
FOR SIZE 39
Warm footprints
This simple model suitable for both women and men. Slippers are knitted on two needles. For knitting, choose thick woolen yarn or make the thread in several folds, select thick knitting needles.
Total used for knitting slippers in size 39 100 gr melange yarn, for the second option, 50 grams of dark blue yarn and 50 grams of gray-blue, knitting needles No. 4.5.

Before starting knitting, measure your foot - measure its length and width.
Description of knitting slippers:
Make a set of loops for a length equal to double the length of the foot minus its width. The number of loops must be odd. You will need marking rings to mark the places where you need to make additions, for this you can tie loops from a bright thread and put them on the knitting needles to the left and right of the central loop.

First, the sole of the slipper is knitted with garter stitch - in the front and back rows, knit only the front loops. Through a row, make additions, knitting new loops from the crossed broaches raised between the loops. Make additions after the first hem, after the first mark on the marker, before the second mark, and before the last buttonhole on the knitting needle. Thus, through the row, 4 loops are added, of which 2 loops are added in the central part, marked with markers.


Knit the sole in garter stitch, half the width of the foot, then proceed to knitting the side of the slipper with the front stitch - in the front rows knit the front loops, in the wrong rows - purl.
Knit with the front stitch to a height of 2 cm without decreasing or adding. Then, in each front row, make decreases from the central part marked with markers, before the first mark, knit 2 front loops together with a broach, after the second mark 2 front loops together.

Having made such reductions in the three front rows at the central part, after knitting 2 loops together with the front one, do not continue to tie the row, but * turn the work, remove the first loop, knit the central loops with the purl, the last loop of the central part and the first side loop together with the purl.
Turn the work again, remove the first loop, knit the center loops, knit the last loop of the center part and knit the first one from the side together. * Repeat from * to * until you knit the top part.

Then knit the cuff with a 3 x 3 elastic to a height of 8-10 cm. When you finish knitting the cuff, close the loops and sew the slippers on the wrong side, making a back seam along the cuff and a central seam along the sole.


The second option for knitting slippers from yarn of two colors without a cuff. Knit the sole with a dark thread, and the upper part with a light thread. Instead of a cuff, knit 2 rows of garter stitch by reintroducing the dark thread. Close the loops and sew a seam down the back of the slipper.

Footprints with braids around the edges from Ivushka

Elizaveta Rumyantseva
Nothing is impossible for diligence and art.
Content
At home, a person wants to feel comfortable and cozy. Slippers are of particular importance. They also create that very home environment. Knitting slippers with knitting needles is an easy way to create your favorite thing self made, which will allow you to feel the unique comfort of your home. Knit slippers for yourself, men, children, following our detailed step by step instructions and following all these recommendations.
We prepare materials and tools
You will need knitting needles to knit slippers. Their thickness depends on the selected type of knitting. Thick knitting needles are suitable for lace slippers, but dense and durable footprints need to be knitted on thin knitting needles.
We choose the yarn carefully. It should be durable, not wear off, not fade and be pleasant to the touch. For knitting children's slippers, you need to pay attention to the slipperiness of the finished product. Synthetic-doped yarns are suitable. A clean coat will be prickly and slippery. The needles can be on line or straight. The article will also look at how to knit slippers on five knitting needles.
You will also need a tape measure, a hook, and a gypsy needle. For the insole - thick fabric, or better - felt or leather.
Determine the size of the product
The choice of size for children or adults depends on how the slippers will be knitted. Footprints are measured in the same way as socks. In this case, you can use the standard pattern for identifying sock stitches.

In other cases, when a dense sole is used or slippers are knitted in a different way, the size is determined depending on the size of the shoe. You can measure your ankle circumference and lifting height. Add these two numbers and divide by two. The number of loops is calculated depending on the knitting density, which is determined from the sample.
Knitting of slippers based on knitting needles: a step-by-step master class with a photo
The easiest way is to knit indoor slippers on the basis of. The best option there will be a felt insole for the base. You can trace the foot on paper and cut out two soles from the resulting pattern. Please note that they must be symmetrical. We put the finished insoles aside and start knitting the slippers with knitting needles, following a simple step-by-step scheme:
- To create slippers for size 36, cast on 42 loops on two knitting needles. We knit with a garter or knitted stitch 1.5-2 centimeters.
- We divide the loops into 4 parts: we leave the outer quarters on the knitting needle, and the middle, that is, 20 loops, continue to knit.
- We continue to knit only in the middle. You can change the thread or choose a pattern. We knit until the length of the product reaches the end of the little finger.
- If you were using a different thread, cut off the end. We continue knitting with the same thread as we started. Cast on 25 stitches along the resulting rectangle.
- Form the toe. We knit unfinished rows until four loops remain. We continue knitting, picking up loops along the edge on the second side of the rectangle.
- We knit 6-8 rows with the selected knit to create the height of the future product.
- On this you can. But, before closing the loops, try on the workpiece on the leg - does the knitted fabric cover the foot. If not, then knit a few more rows.
Having closed all the loops, you can start collecting slippers. To do this, using a gypsy needle and thick thread, we sew the knitted fabric to the insole. At the same time, we sew a seam on the heel. So, using the correct knitting technology in a short period of time, you will knit comfortable and warm slippers.

Footprint slippers with embroidery
There is another way to create slippers. V in this case a seamless sock knitting technique is used, but without an elastic band. To complete, follow the description:

- It is necessary to dial the required number of loops for quick knitting of slippers-footprints (depending on the count according to the table).
- We knit 2-3 rows of satin stitch and proceed to. We put aside two knitting needles and continue working on the other two. We knit the heel height.
- Begin by knitting two stitches together on each side to create a heel wedge.
- As soon as all the side loops are closed, we make a set of edge loops and continue knitting in a circle.
- To form the desired size, we make deletions in even rows on the 1st and 3rd knitting needles.
- We tie it to the desired length - the product should cover the little finger or reach the thumb bone.
- We close on the 1st and 3rd knitting needles 2 loops in even rows until the number of loops is halved. We continue to subtract already in even and odd rows. The remaining four loops are pulled together with a thread.
- Ready-made slicker-slippers are decorated with embroidery. You can use floss threads or multi-colored yarn. It is easier to do this with a gypsy needle. The choice of pattern depends on your desire.
Advice: do not position the embroidery so that the threads are in the area of contact of the footprint with the floor, that is, on the sole or side parts.
This technique will be especially familiar to those who have already knitted socks. But even for beginner knitters, it will not be difficult to create footprints. If you have any questions about this technique, you can find answers to them in our video tutorial.
Children's slippers or flight of fancy
Knitting children's slippers is a separate topic that requires not only developed imagination, but also great skill. You can tie the tracks and simply decorate them with embroidery, patterns and appliqués. If the skill allows, then the mother will have a great idea - to knit the baby's slippers in the form of animal faces or any other shape. The baby can even sleep in slippers made of fine lace knit.

Consider your child's tastes when choosing a model. For a boy, an unusual and beautiful knit in the form of a tank-sneaker.

A cool idea of footprints for a girl in the form of animals - a hedgehog, a dog or a tiger's paws. If a girl goes to dances, then knitting Czech women will be an excellent and stylish solution. In order for the child to have an unusual pair of shoes for school, take the trouble to weave ballet flats for him. The technique for making such shoes is more complicated, but after several workouts you will be able to knit such a product. Great idea gift for New Year for a child - slippers, knitted with their own hands, in the shape of a herringbone.

But still the most fascinating activity knitting slippers for babies will become for you. These are unique models that seem complicated only at first glance. To create them, you can use the above master class, which will help you a lot.

Decorate your slippers with anything you like. The most simple method is the thread embroidery described above. Models with applique look great. You can do volumetric applique and create interesting faces or flowers.
Skillful craftswomen of needlework decorate slippers, knitted with lace pattern, rhinestones, beads and stones. They can be located along the edge of the product or on top of it. Thanks to these methods, you can make dressy slippers even with a minimum of skill.
Slippers knitted using a complex pattern look especially attractive. Multicolored models are no less interesting.

Professional advice
- When knitting slippers, use dense threads that cannot be separated into separate fibers.
- In the toe and heel area of the track, you can strengthen the wedges by adding a second synthetic thread.
- Don't make your tracks loose. Having a short length, they will fall off their feet. To prevent this, you need to knit a couple of rows with a thick elastic band and only then continue knitting according to the pattern.
- For embroidery, use threads that do not fade. Take the time to wash a piece of thread in advance and rub it on a white linen. If there are no traces left, feel free to use embroidery thread. The same goes for the applique. The linen of the fabric should not fade, otherwise your slippers after washing will no longer be so attractive.
- The most practical are slippers with soles. For winter evenings you can knit footprints or slippers using the sock technique, and reinforce the finished product with an insole sewn over a knitted fabric. These slippers will serve you for a long time. They are especially suitable for men and children. In the latter case, try to use a non-slip cloth. Leather or rubber soles are ideal.
If step by step master class too complicated for you, we suggest you try to learn how to knit slippers by following the instructions in the video tutorial. You can watch the video to the end, then stop at any convenient place, and watch it again and again if necessary. We are sure that thanks to the video you will be able to master a new hobby, as well as create any home slippers not only for yourself, but also for all your loved ones.
Found a mistake in the text? Select it, press Ctrl + Enter and we'll fix it!The cold has come, and at such a time of the year, more than ever, you want to be in warmth and comfort. Of course, you want to keep your feet warm. Knitted slippers can help with this. They are warm enough, comfortable and beautiful, besides, they are a great gift for loved ones.
Master class for you how to knit slippers

It is quite simple to knit beautiful warm slippers on two knitting needles, having diagrams and descriptions at hand.
The proposed option is simple enough even for beginners. One of the advantages is that they are knitted in pairs at the same time.
For work, you need knitting needles, yarn of two colors, 138 meters each. Before starting work, you should prepare the yarn into balls (if it was in skeins). Considering that two products are knitted at the same time, skeins different color connect in two tangles. You can also make them monochromatic.


On the needles, 29 loops are typed from one ball and the same number from another ball. One set for one slipper and one set for the second. Thus, both products will be knitted exactly the same. This ensures that the slippers are identical.


Now you can start knitting. First row - K9, P1, K9, P1, K9. Thus, the first row of the slipper is on the second spoke. The first row of the second slipper is also knitted.


The second row is knitted - front. Thus, two V-shaped lines are formed. 23 rows are knitted. Even if you lost count, you can count the face loops that form the lines, if there are 24, then the first stage is completed. The resulting base of the slipper will be size 37.


Toe shaping. The next 8 rows - alternation of 1 persons, 1 out. And so all 29 loops on both slippers. In the last two rows, the total number of loops 29 decreases to 8. This is done in two steps: every two loops are knitted together, since the number of loops is odd, then the last loop is knitted in its place, thus 15 loops remain, the product is turned over and the procedure is repeated, after which there should be 8 loops.


Now the last step remains - to collect the products. Cut the thread so that there is enough thread for the seam. Very carefully, one of the future slippers is removed from the knitting needle and, starting from the last loop, the thread is pulled through all the loops and tightened tightly. Before doing this, make sure that the V-shaped ridges are on the outside.


This calculation is suitable for 36 -38 sizes, if you need a product bigger size you can knit 11 persons 1 out. 11 persons 1 out. 11 out. And so 28 rows, and perform the sock in 10 rows. For a child, you can try 7 persons 1 pn 7 persons 1 pn 7 persons knit 18 rows, knit a sock in 6 rows. The resulting sneakers stretch well enough that they are not suitable for one size.

The size of the slippers in the proposed description is 36-37, which corresponds to medium length 22 cm.
Slippers are knitted from the bottom up. On the needles number 3, 84 loops are typed, the first 14 rows are knitted with garter stitch, and then knitting of the leg begins. From the middle of the row, knitting of two middle loops begins, thus two parts of the footboard come out - the outer and the inner. This is how to knit up to 42 rows of about 10 cm. Then 12 rows of garter stitch are knitted. Now it remains to assemble the finished product, stitching it along the lines of the sole and heel.
Another option for knitting slippers

Knitting begins with a set of loops, the number of which depends on the size of the leg. On average, for an adult, you need about 40-60 loops. You just need the exact number to be odd.

First, the top of the slipper and its sides are tied. Any dense knit is suitable for this, for example, a scarf or a 1x1 cutter. For slippers with a lapel, 20 rows or more are knitted, and for slippers without a lapel, 10 will be enough. The knitted fabric is divided in half, leaving one loop in the center. The toe is knitted up in garter stitch.
In each row, the first half is knitted to the middle loop, the yarn is made, the middle loop is knitted and the yarn over again. So the product is knitted until the required depth is reached. The next step is to create the sole.

The canvas is divided into three parts, the middle one will consist of 11 loops. It is knitted as follows: the first part is knitted to the middle, then 10 loops are knitted from the middle part, and the 11th is tied together with the 12th, which is the first in the third part.

Then it is knitted to the end of the row, the product is turned over and the procedure is repeated until the loops left on the sole remain - 11 loops in the middle. For the back of the heel, all remaining loops are knitted in several rows, knitting together with the first loop of the side parts on one side and on the other.
Another description is two-knitting seamless socks. Very beautiful and lightweight model.


The socks begin to knit up from the toe of the sock, the product will end up without a seam.

After that, you need to determine the middle circle, add up the obtained values and divide by two. Based on the resulting number, the required number of loops is calculated.
Now you can start knitting.

The yarn is connected with an additional thread, the length of which is about 35 cm. Half of the calculated loops are typed on the knitting needles. The first row is knitted with the front loops, the second with the purl, the last loop is not knitted.

The next row is knitted, the last loop is not knitted. And so on, until a third of the calculated loops remains. Then an increase in the number of working loops begins. In subsequent rows, one removed loop is knitted.

To avoid large holes, it is worth raising the side loop on the left knitting needle and knitting together with the next purl, in the purl and the front in the front row. Knits like this until all the loops come into work. Thus, a toe is obtained.

Further, the loops are included in the work, which were fixed with an additional thread. The first loop is raised and transferred from the left knitting needle to the right, all other loops are raised in the same way until they are all on the right knitting needle.

The auxiliary thread is carefully pulled out. Knitting continues as follows: the first loop, raised from the auxiliary thread, is knitted with the front one, the next loop is removed and the thread is in front of it, then again one loop is knitted, and the next one is removed and so on until the end of the row, knitting the last loop with the front one.

Next row: the first loop is removed, the next knit loop, then the purl loop, and so it is repeated until the end of the row. In one row, one half of the loops is knitted, in the other the second, thus the pipe comes out.


When the length of the product becomes equal to the length of the foot without a heel, knitting of the heel begins. After one, the loops are removed on the auxiliary knitting needle.


The remaining loops are tied in the same way as for the toe of the sock. First, the number of working loops is reduced to a third, then one loop is put into operation in each row until they are all involved. All loops are transferred to one knitting needle, one front loop is knitted in turn from the front knitting needle, and one loop is removed from the back.


After it is knitted in the same way as the foot, to the height at which the elastic will begin. The elastic is knitted as follows.


One loop is removed, one is knitted with the front one, the next is removed, the thread is in front of work, one purl, the next is removed, the thread should be before work. And so on until the required height of the elastic is obtained.
All loops are closed and the sock is ready.

Did you like the master class on how to knit warm home slippers with your own hands? Share on social. networks with girlfriends!
Look detailed master class Knitting crochet slippers on video:
Leave your comment