Children's applications from leaves on the theme of autumn. Autumn Leaves Applique
Autumn, fallen leaves crunch underfoot ... What a pity this yellow-red fading beauty, crumbling and trampled into the mud. Here is a birch leaf - pale yellow, toothed, here is an alder - ribbed, but mountain ash is a family of long leaves on a thin stem. Let's take them home and make them beautiful autumn crafts, applications. We also need a piece of colored cardboard for the background and glue to glue the leaves.
How to make an applique from autumn leaves
Autumn leaves that have dried on the street are uneven and rather fragile, so first we will dry the leaves ourselves. We find freshly fallen, bright and beautiful, undamaged leaves, and put them between the sheets of some thick book. We put the book under the press (under something heavy). In a week or even earlier, even autumn leaves for application are ready, they can be easily glued to paper or cardboard with PVA glue.
Sequencing
A real artist sees living images in nature, so we will dream up. Let's lay out in front of us all our collected and dried wealth and see what it looks like. Take suitable leaves and lay out on cardboard until you get a picture. You don't need to glue it yet, at first just lay it out until everything starts to suit you.
When the picture is perfect, you can stick it. We take one leaf at a time, remembering where it was lying, we spread it reverse side, glue in place. If the applique is multi-layered, first glue the lower leaves, then a layer of the upper ones. The craft is ready! You can admire!
But what if, well, the ideas of the applique do not come to mind, and the leaves look only like leaves, and not in any way like bunnies and chanterelles? Then take advantage of our ideas.
Leaf craft ideas
Applications with animals
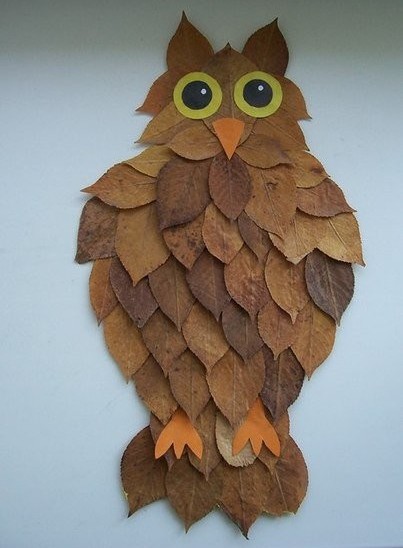
Leaves owl:


Ginger kitty


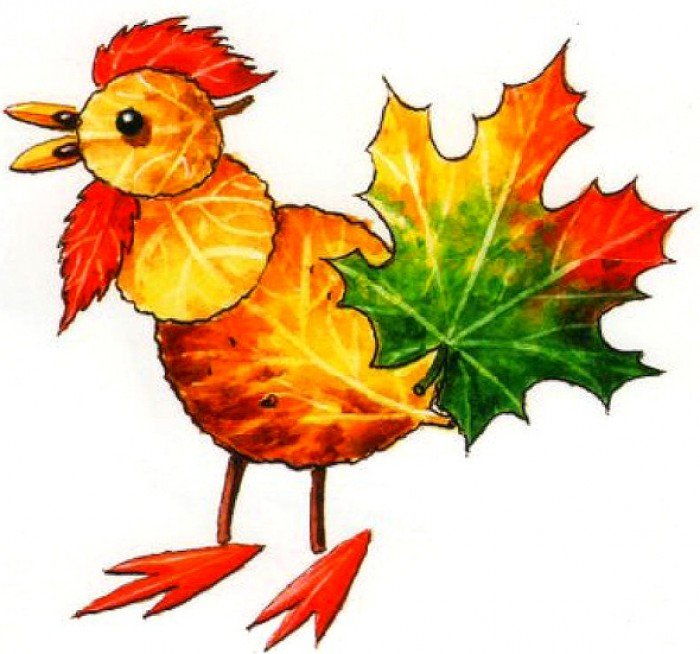
Bird with chicks:


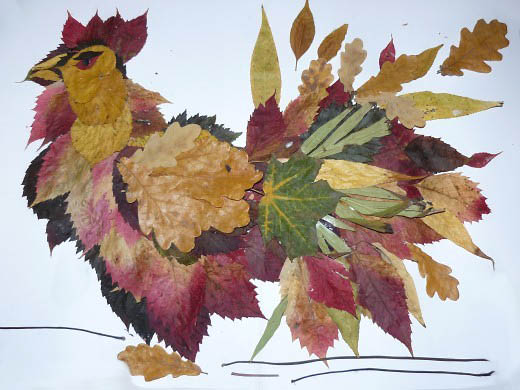
And even an eagle:

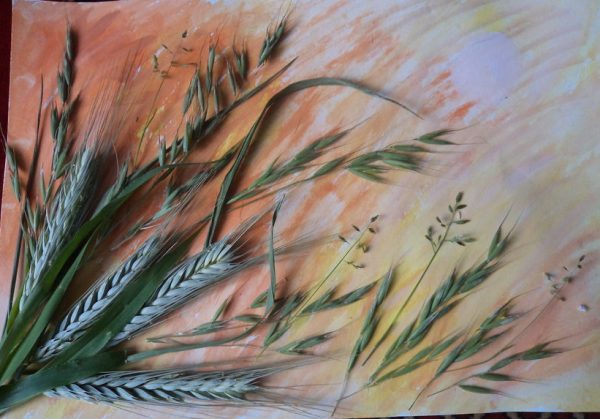
Landscapes of leaves
For a landscape, the background can be painted with watercolors.


Still lifes

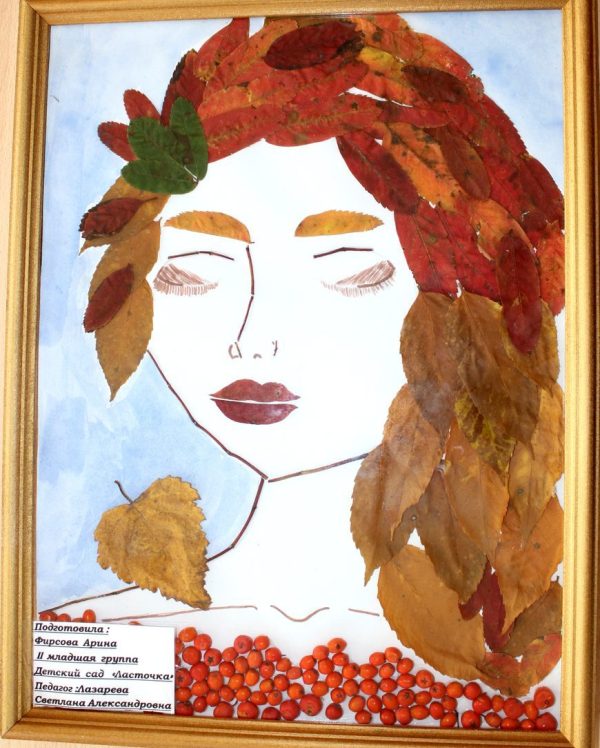
Portraits


The finished application (if it is not voluminous) can be placed under the press so that after drying it remains flat. Store in a dry place, can be framed under glass.
If you do not know what to do with your child in rainy weather, try to do with him. Earlier we talked about how now you can use the resulting material for your crafts. We have collected for you 25 ideas on how to make applications from autumn leaves do it yourself.
Let the children choose the leaves for the applique. They must be of different sizes: more large leaves can be used for the body, and from small ones to make, for example, big ears for animals.
To make the legs, you can use small twigs or narrow leaves, whichever you and your child prefer.
Autumn leaf applications for kids: animals
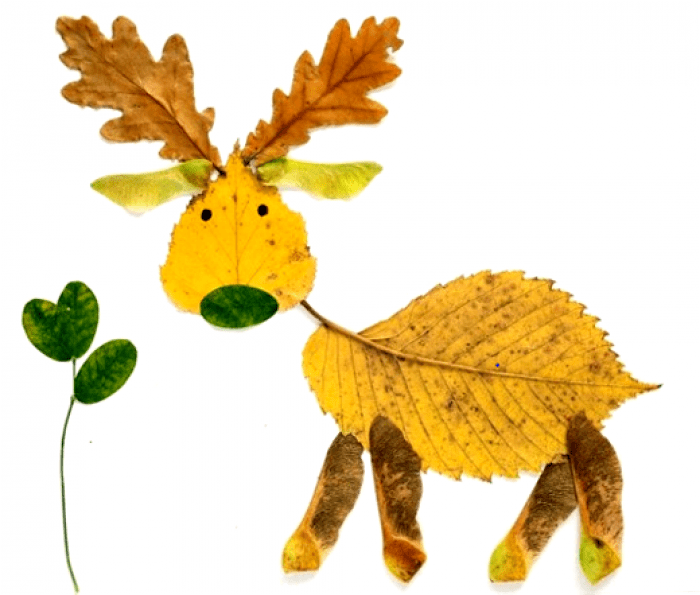
Making animals from leaves with your own hands is one pleasure. Such leaf applications can be done both on a blank sheet and on a ready-made drawing. For example, before you start making a fox, draw a forest for it, a lion - the Sahara desert, an elephant - a jungle, a fish - a sea.
Such crafts will be very useful in kindergarten when toddlers study domestic and wild animals.
Craft from leaves for children: Fox


.jpg)


DIY applications for children from autumn leaves (photo)
Leaf applications and crafts: birds and insects
Butterflies, bugs, chickens, parrots - all these beautiful creatures can also become heroes of children's crafts made from autumn leaves. And just like in the case of animal applications, you can use a plain sheet of paper or cardboard, or a drawing as a base.

DIY applications for children from autumn leaves (photo): Chickens

DIY applications for children from autumn leaves (photo): Parrot

DIY applications for children from autumn leaves (photo): Owls
.jpg)
DIY applications for children from autumn leaves (photo): Owl

DIY applications for children from autumn leaves (photo): Crow
.jpg)
DIY applications for children from autumn leaves (photo): Insects

DIY applications for children from autumn leaves (photo): Grasshopper

DIY applications for children from autumn leaves (photo): Beetles and butterflies

DIY application for children from autumn leaves: Snail
Applications and crafts for children from leaves: people, portraits
Such leaf appliqués will surely appeal to children - after all, these are whole pictures. Take a picture of a person, more glue, autumn leaves - and get creative. To make it more fun, you can use photographs instead of ordinary pictures.

.jpg)


Autumn leaf paintings: crafts for kids
To make pictures of autumn leaves with children, you will need, in addition to the leaves themselves, glue and paper, a little imagination. If you don't have time to come up with a plot, take one of the fall-themed coloring pages and use it as a basis.


Leaf painting: craft for kids

Leaf painting: craft for kids

Leaf painting: craft for kids
Therefore, let's together make funny animals and fairy-tale heroes from dry leaves.
Other such material for leaf applique: bright, different forms and sizes, with interesting tints of colors - there is no need to look.
Autumn leaves - the material is not only cheap and affordable, it just falls on your head and spreads like a carpet under your feet. Do not be lazy! Pick up and create!
We make applications from leaves
For an applique made of autumn leaves, you will definitely need paper and glue... To achieve the desired result, change the shape of the leaves using scissors. Remember, you can only use dried leaves(usually they are dried between the pages of books, or with an iron, covered with paper on top).

The next step is to come up with a picture. With this, I think there will be no problems. Leaves can be used to make fairy-tale characters, animals, various landscapes, or just a beautiful ornament.

What are the applications
When making appliqués from leaves, you can use various techniques to make the craft unique and unique. I will tell You about several of these techniques.


Examples of leaf applications
Hope, sample photos of autumn leaf appliques, which I have prepared specially for you, will certainly help to create interesting images, picturesque landscapes, and your room will always be decorated with a small slice of autumn... It is very easy to make an applique from leaves when there are so many beautiful examples. Mustacheinfantry!


Collecting beautiful leaves on a fine autumn day - fascinating activity... And upon returning home, I want to somehow preserve this splendor or use it to create something beautiful - the material just begs for it! The most interesting thing is to make various compositions and applications from colorful autumn leaves. This type of creativity develops the imagination and imagination of the baby. In it, images can be created from ready-made forms by simply stacking them on top of each other, rather than cutting them out of paper. A color palette falling leaves will plug any largest set of colored paper into the belt!
YOU WILL NEED:
Colorful autumn leaves
Multicolored cardboard or velvet paper
PVA glue (you can use starch glue or rubber glue)
Brush
Scissors
Tweezers
Oilcloth
DRYING AUTUMN LEAVES
Applications can be made from both freshly harvested leaves and dried ones. If you want to preserve the leaves, there are two drying methods we recommend.
The first, well-known, method is to insert leaves between the pages of an old unnecessary book. It is better to lay each leaf on both sides with a paper napkin.
The second method is express drying the leaves with an iron. Just remember that the leaves are not sterile, so it is better to iron them on a surface that you do not mind throwing out later, for example, on large sheets of paper. On top of the sheet before ironing, you also need to put a sheet of newsprint or paper napkin.

APPLIQUE TECHNIQUE FROM AUTUMN LEAVES
Before starting work, cover the table with oilcloth so as not to stain it with glue. Prepare the base - a sheet of cardboard, collected leaves, scissors, glue, tweezers.
First you need to come up with a future picture. Then arrange it on separate sheet... And only then begin to glue the individual leaf parts to the base. It is best to apply the glue in droplets around the edges. If you apply glue to the entire surface of the sheet, it will warp when the applique dries.
The finished picture should be put under the press for one or two days.
Don't forget to make a frame for it!
4.
TYPES OF APPLICATIONS
Overhead applique. Try to get started by coming up with pictures that do not require cutting out any details from the leaves, but created by overlaying the leaves. You can think of a lot of such pictures: butterflies, mushrooms, chickens and other birds ... The missing elements can be drawn with a felt-tip pen or made from other natural materials.
Having gotten used to simple pictures, children can begin to come up with multi-tiered images. In this technique, the leaves are glued on top of each other in layers. The application will turn out to be bright and cheerful if the leaves differ in color.
5.
6.
Silhouette applique.
In this type of applique, the extra parts of the leaf are cut off to get exactly what the little artist intended.
7.
8.
9.
10.
11.
12.
Modular application (mosaic).
Using this technique, a picture is created by gluing many leaves of the same or similar shape and size (or, for example, maple seeds). So you can make the scales of a fish, a cock's tail or a firebird.
13.
Symmetrical appliqué.
It is used to create separate images or whole pictures with a symmetrical structure, as well as to obtain two completely identical images (for example, reflection in water). To do this, you need to select similar leaves to get an image with its "reflection" or symmetrical in itself ("Butterfly", "Dragonfly", "Landscape with a lake", "Boat on the river").
14.
15.
Tape applique- a kind of symmetrical applique.
Its difference is that it allows you to get not one or two, but many identical images - ornaments. It turns out whole "round dances" of trees, flowers, mushrooms, butterflies, etc.
In conclusion - a small selection of pictures collected from different parts of the Internet - to awaken the first associations in you and your baby. One has only to show the child how to do this, and his imagination will allow you to create more and more new pictures from this amazingly beautiful natural material- autumn leaves!
16.
17.
18.
19.
20.
21.
22.
23.
24.
25.
26.
27.
28.
29.
30.
31.
32.
33.
34.
35.
36.
37.

Source: http://allforchildren.ru/article/autumn01.php

And these samples of work are taken from
1.
2.
3.
4.
5.
6.
7.
8.
9.
10.
11.
12.
13.
14.
15.
16.
17.
18.
19.
20.
21.
22.
23.
24.
25.
26.
27.
28.
Target: to teach how to make a handicraft "Maple Leaf", to arrange the work.
Application: The work will be of interest to educators, teachers and schoolchildren.
Purpose: decoration of the interior of the classroom, the festive hall of the school, a gift for Teacher's Day, medals for the Autumn Ball, work for an exhibition.
Equipment: colored double-sided sheets (A-4), product template, PVA glue, scissors, pencil

.jpg)
The song from the film "A Little Favor" performed by N. Karachentsev is played
It's time for the birds to go,
Birds dream of the south
Yellow maple leaf yesterday
He sat in my palm.
Let someone say to me in response:
"There is nothing like that here",
Yellow leaf like a bird yesterday
He sat in my palm.
Maple Leaf, Maple Leaf,
I dream about you in the middle of winter
Dream at that moment when the blizzard
Shakes snow outside the window,
The moment everything was covered with snow
And my soul is white and white,
I dream about you
Red maple leaf.
Dream, dream
Red maple leaf.
Step-by-step workflow:
1. Fold the sheet in half. Attach a template to the fold line and circle it with a pencil.

2. Cut the workpiece according to the template and open it like a book

3. Fold the workpiece into a strip - an accordion


4. Fold the strip in half with long leaves in the middle

5. Glue the middle to make a maple leaf

6. Similarly, we make two more leaves.

7. We collect three leaves into one large sheet, glue them together

8. The final stage: we choose the background of the cardboard, glue the maple leaf, the spine, and draw up the work from the cut-out remains of paper.

Like an intelligent master
This pattern was collected by:
Leaf to leaf strictly
I picked up the colors