Making a soft toy manufacturing technology. Soft toy production technology
Master Class: Soft Toys Making Technology
1. To study the technological sequence and labor techniques to perform a soft toy.
2. Develop creative thinking, aesthetic taste, independence in the selection of materials, tools and fixtures.
3. To bring up independence, accuracy, thrift, responsibility for the work performed.
Equipment
1. Distribution material:
Plan-abstract of the manufacture of soft toys;
Approximate sketches of none sketches;
Types of seams connect details.
2. Materials, tools, fixtures for use of soft toys: leather, fur, fabric, cord, thread, scissors, needle, chalk, glue PVA.
- Organizing time.
- Studying a new material.
- Summing up the theoretical part of the classes.
- Occupational Safety and Health.
- Performing practical work.
- Summarizing. Exhibition of work.
Travel course:
1. Organizational moment
Greeting students, checking attendance and readiness of students to occupation, appointing duty. Message Topics, setting a goal, acquaintance with the course of classes.
2. Studying a new material
Fallen toys of novels
No one - so we call toys that you can come up with ourselves on the basis of simple geometric shapes. No one is not a beast and not a man. It can perform any role that you want.
Make such a toy is very simple. Even beginners will be able to try their strength.
Take a piece of fur or fabric, take two blanks from it. Parnigitly sew the details and bring the workpiece. Now place it - attach eyes, nose, mouth, abnormal and any other decorations.
None can be performed in the image of a kolobka toy, i.e. Head and torso are single, made of one detail, and can be sewed torso separately. By changing the sizes, the forms of the parts, combining them between themselves and draw up differently, you will get a huge number of all sorts of funny novels.
If desired, you can make the knobs and legs of any shapes. Start with the easiest: Circles, ovals. Then try to complicate their shape. Handles-legs can be sewed to the body, like kolobkov, just to the torso or mounted on rope rates and then sew to the body. A very funny toy will be released if rope-rope stretches through the torso, without fixing them. To do this, it is best to use a story. It turns out a none dergunchik. His handles and legs can be pulled in any direction.
Selection of materials
Drap and artificial fur with a long and short pile are the basic materials for the manufacture of homemade toys. With their skillful combination, toys are very expressive. For example, from Drapa - basic details (head, torso, paws, feet); Fur - small details (ears, abnormal, breast, forehead, tail).
Selecting the material for work, you can use small bright pieces of felt. Fetra is especially good, the beaks, noses, ears, feet and other small, but important details of toys. It can be used in the operation of felt. After washing, it becomes fluffy, and with the cutting edges, it does not appear. Of the cried pieces, it is good to make the elongated details (hands, legs, paws), a variety of decorations (aprons, collars, ties, hats, etc.). From knitwear, bikes, syntheps, fur with a short pile, you can make a lining on the face toys. White-white woven sintepon, if necessary, can be painted in the desired color of gouache, watercolor or paint "Fantasy". Colored pieces Use for the manufacture of small details: lining, lips, ears, puddles, palms, etc.
Disproduction of details
Put the pattern on the outfit side of the material and circle it with a handle or pencil. Lines make accurate and thin so that there is no distortion. If the parts are paired, turn the pattern to the other side and circle it again. In order not to get confused, mark the "mirror" parts 1 and 2 numbers.
First circle large details, then smaller. Try to use the material and place the details to each other.
Soft and tight cloth Cologain, widely sprinkling the handle of scissors, then the slices line are obtained smooth and smooth.
Fur details Cutting with scissors' tips, cutting only a fabric foundation so as not to damage the pile. Watch out for its direction indicated on the pattern of the arrow, otherwise the toy may not be expressive.
When laying parts from the synthetone, they should not circle a handle. It is better to push the detail of the pattern with a pin to the material, and then, holding the hand, carefully carve out, not hurt.
Connection of parts
Large items from any material first get away from the wrong side, and then sew with looped with hands or step on the typewriter. In an invisible place, leave a hole with a size of 3-4 cm for turning and packing toys.
Small details from felt, felt, drape cross the face with the face of the looping sut. The seam should be very neat, the hole for packing is minimal (1-1.5 cm).
Do not forget to sew pair parts of toys (paws, wings, hands, etc.).
Then remove all the details by helping yourself with a wand or a blunt side of the pencil. Do not use scissors, tweezers or other sharp tools, as they can break through the seams and the fabric of the resulting detail.
Afterverting all the workpieces, carefully straighten them to make the items taken correctly.
Demonstration of labor techniques when performing various seams.
Seam "Forward needle" is used to descend large toys details to then perform the main seam more accurately, without displacing parts relative to each other.
Seam "Back needle" applies when the parts are rapidly becoming the tissue.
Seam "Through the edge" is convenient in the manufacture of linings.
Peting seam is the main seam in your work. They are best sewing toys details. If a toy of fur or fur and fabric, then cross the parts from the wrong side. Carefully make sure that the fur does not get into the seam. If a toy is small made of dense tissue, then stitch parts follows from the front side. Carefully performed looped seam will decorate your toy.
Seam "Zig-Zag" is often used when appliquational works with a dense cloth, oilcloth, leather, when a detail of a smaller size is applied to a part of a larger size and, thus, the role of decoration.
The docking seam is used when crossing fur with the front side, as well as the screw holes and when assembling toys (sewing heads, paws, ears, lining, tailings). On the front side of the product, this seam is absolutely not noticeable.
A bearing or counted seam can also be used when assembling toys or when stitching the edge of the product from bulk fabrics.
Putting toys
The best material for packing is pieces of syntheps or kapron stockings and tights. The toy should keep the form, but not to be solid. Such parts of the toy as paws, torso and tails stuff gently.
Details of the face (nose, cheeks) indicate expressive - gain them denser. In the brushes, ears, flippers, the wings of large toys put the minimum amount of packing, and in similar details of small toys - do not put at all. Help yourself tweezers or chopsticks.
Final finish
Eyes can be made from a synthetic film from inflatable toys, from the covers of books and diaries. They are expressive, but fit larger toys. And small animals of the eyes can be performed from beads, beads, buttons on the legs.
Artificial leather is useful for work. It takes the noses, claws, collars and other parts adorning toy.
3. Summing up the theoretical part of the lesson
Frontal survey of students:
- What materials can be used to perform a soft toy?
- What is the peculiarity of cutting out parts from fur?
- What must be considered when cutting out parts from fur and why?
- Repetition of labor protection rules.
- What parts need to fill the most tight and why?
- How to carve out the details?
- How to fill the toy?
- What seams can be applied to connect toys details?
- What is included in the final finish of the toy?
4. Repetition of labor protection rules
5. Implementation of individual practical work
Students independently perform a sketch of toys, pick up materials, cut out the details and draw up a toy at will and in accordance with their capabilities. Using the summary, Appendix 1 and Appendix 2.
6. Summing up and exhibition of work
Students demonstrate their work performed, tell the technological sequence of performing toys and what materials, tools and fixtures they used in their work.
Evaluation of students' work.
Soft toy, stitched independently, will be an excellent gift for expensive and close people. After all, a person will be pleased to understand that when you made a toy, you thought about it. Below you will see different patterns and toy schemes. Let's start, perhaps, here with such a cute Tigrenka:
You can sew this wonderful bear-angel,

the pattern of which is attached:

Also attached assembly scheme:

Or, for example, you can sew a mixer crumb. Its pattern is quite simple and suitable even for beginners.

But the cute kitten Gav, who is also simple in the sewing.


Consider cool toys that can be sewn alone.
Hedgehog


Flagsonok.


Owl


Large soft toys love every child, so what's there, even the girls come delight from such gifts. Usually a favorite soft toy is a bear, and what if you sew the White North Bear? Especially since the pattern is available.
Patterns on the following photos:


On the same pattern was sewn this bear:
Soft toys do it yourself in Tilde technique
Tilde toys are very simple. Try yourself - and you will make sure that.
Bunny


This is pretty simple in the sewing toys.
Deer


Doll


You can sew these toys from the fabric, the patterns of which are not needed. We need only one pattern, on which they are sewn. Since they have the same torso, only ears and tails are changing.


Sew soft toys can even be socks.
Soft toy with your own hands "Bunny"
To understand how to sew soft toys with your own hands, the patterns of which are not needed, see the master class.
Let's make a bunny of socks.

What is necessary
- Pair of socks;
- Sintepon;
- A piece of velvet (for the nose);
- Button or bead;
- Slices of fur.

Remove the sock inside out, put up the heel and cut off the gum (2.5 cm). Cut the sock in half, ranging from the fingers, not renewable to the heel 2.5 cm.

Remove the second sock inside out and put up the heel. Cut the gum - 6 cm. Cut your fingers. Cut along, not coming up to the heel 4 cm. Rounded corners on the ears. Cut the part with a rubber band in half (future 2 front paws). Cut a piece for the tail of fingers.
Take the detail of the tail with a thread through the edge, fill with syntheps and fasten. Like you can make a nose from black tissue. Switch "Through the edge in the loop" to sew ears. The head is turned on the front side and fill with Singypruna. Hang the hole and sew in a circle.

Like to sew a torso.

Sew the seam "Through the edge in the loop" foot and twist.
On the head, pull the thread vertically to the thread, then crush one part of the heel, tighten. It will be 1 cheek. Make a second. Through stitch to pull the bridge.

Drawings made of threads to make fingers on the legs. Bend the bottom of the legs and make secret stitches for the formation of the feet.

Second stitches to sew tail.

Fill the front paws with syntheps, pull the hole in a circle and sew. Make fingers just like on legs.
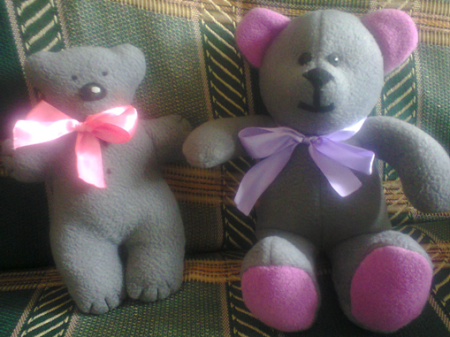
What a soft toy will not find today in the store - the choice is just a huge. But you see, the toy made by your own hands will be a unique, valuable and even more "spiritual." What soft toy is popular and girls and boys? Of course, a bear! I propose not to postpone in a long box and sew one or even a couple of cute beables.
Popular patterns for sewing soft toys
Bears at all times among soft toys enjoyed the greatest demand.
Traditionally, cubs sew from plush or any other fabric with a mild pile.
A classic teddy bear can be sewn through this pattern:

Fans of cartoons about Winnie Poha, I propose to sew this funny bear in our Soviet

or Disney version.

If you have your own rich fantasy, you can independently come up with the pattern of your own bear.
Master class on sewing soft bears with their own hands
For the manufacture of soft toys, I like the fleece most. This gentle and pleasant to the touch material. Moderately stretching, it is easy to cut, not thrown during the backlash.
In addition, the seams are less noticeable on it and look neat.
I suggest your choice to sew one of the proposed bearings.
One of them is very simple - even a beginner needlewoman will cope with him, the other is a little more complicated.

Necessary materials
For the simplest and light bears, I needed:
- Fleece.
- Two pieces of felt black and white.
- Singry procession for packing.
- Scissors.
- Needle and threads.
- Four black beads.
We take the pattern, if necessary, increase or reduce it to the desired size

and cut out two identical details, not forgetting to retreat at the edges a small distance for seams.

Step 1. Invorate the pattern, leaving the distance to the seams
After we cut both parts, we sweat them by manually thread.
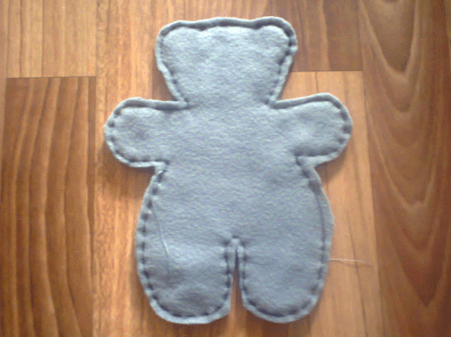
Step 2. We connect two parts and flash the mixture suture
After that, we sew both details. Better of course use the sewing machine,
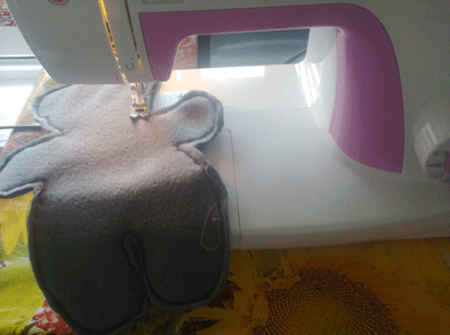
Step 3. Stand up on the upset
but you can and gently sew manually.
Stitch not to the end. Do not forget to leave according to the pattern, a small hole on the side so that you can then turn the workpiece.
Soak bear on the front side, carefully and carefully straighten.
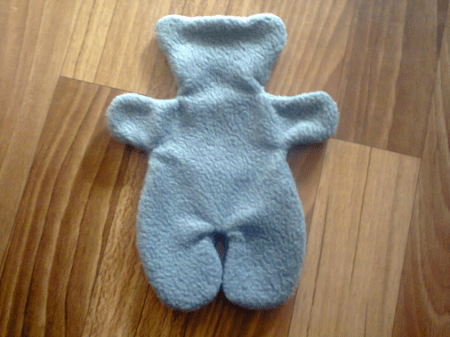
Step 4. Soak the workpiece on the front side
Then take a sintepon and stuff a toy.
Instead of syntheps, you can use the foam rubber, cotton, holofiber or any other filler that you will have.
It is very important to carefully and evenly fill the toy, try to avoid the formation of thickens or the opposite of too loose places.

Step 5. Fill the bear by Sinypplion
After stuffing, we sew the remaining opening of the secret seam.

Step 6. We sew a hole with a secret seam
Cut from the black felt oval - nose, from a white very small speck on the spout, and sew or glue with special glue for the fabric.
I used glue the moment of the crystal.
Black threads embroider legs.
Send beads - eyes and buttons.

Step 7. We flash the paws and make face
We will cover a beautiful bow of satin ribbons, girlishing cheeks. Bear is ready!
The second bear is already a little more difficult.
For its manufacture, I took advantage of this pattern and took my favorite fleece again.
You can use the material that more you like. It may be: artificial fur, velvet, wool, velor, terry fabric or even knitwear.

I took the fleece of two colors (a small pink piece I needed for the ears and legs of the bears), threads, needles, scissors, syntheps or any other filler, two buttons or two finished glazing (they are sold in needlework stores).

Material for the second bear
Prepare all the necessary patterns for which we cut all the details of our bear.

Step 1. We make the pattern and cut all the details
Now we start to sew.
First, they cross the head: ears, two backs of the head, two front. Then we collect all three of the resulting item together according to the pattern.

Step 2. Stick your head
We proceed to the body.

Step 3. Collect the torso
It turns out such a workpiece:

Step 4. There should be the same billet and you
We sew the upper paws and sew them to the body. Also sew pink feet to the lower legs.

Step 5. Seer upper and lower paws
We attach my head, leaving the hole in order to fill the toy.

Step 6. Send your head, leaving the hole
Equally and carefully fill it.
From a piece of black felt, cut out the nose and two stripes for forming a face and sew them.

Step 7. Put the bear and sew face
Then sew your eyes. Once again we check the uniformity of packing and sew the remaining opening of the secret seam.
Toys do it yourself: simple master classes, the best patterns, interesting ideas.
As the Great Coco Chanel said "Handmade things are luxury. It is not necessary to have them at all. The one who wants to have them makes them or pay the master for his work. "
Soft toy - First Association Teddy Children's Bear. But after all, the concept of a soft toy is laid much more. This is the interior toy Tilde, and funny toys in the car, and a lot more. This article contains a variety of soft toys, as well as their techniques and step-by-step master classes.


Soft toys do it yourself
Such toys can be divided into several subspecies: for children and adults, interior, with practical use (for example, needle).

Also, toys can be divided according to the type of material used: fur, with cotton or linen fabrics, with felt, with fantasy tissues.


Folk toys, as well as soft toys, made in the national appliances of needlework, were specially popular.
Soft toy from fur with your own hands
Fur toy, created by her own hands especially warm and beautiful. For its sewing, you can use both natural and artificial fur. With artificial, of course, it is much easier to work, but deciding to sew a toy from natural fur you will get a unique author toy! First you need to decide on the pattern of the toy, the more the finished product, the easier it will be in operation. Small details are especially hard to begin with beginners.


Circle the items and cut with a 0.5 cm reserve on the seam. Unlike fabric in working with fur, scissors are best not to use. If there is no special tailor knife, use a sharp stationery knife. Draw sharp short movements, do not enter the knife deep to not cut the fur.


Seam fur, you need to apply two front-facial sides to each other and correcting the fur out. Stitching the toy must leave a small hole through which the toy turns out and stuffed with a filler. Previously, toys were stuffed with cotton, pieces of tissue residues.
But this packing will dry for a very long time when washing and often after cleaning the toy was thrown out only because the packing did not bother and the mold appeared inside. Modern fillers are made of synthetic materials (synthetic trees and others), which are quickly and well dry, are not knocked up and retained. Putting, it remains to sew a secret seam.


Last barcode - eyes, spout and mouth. You can draw yourself alone, but you can buy finished fittings in the store.


Video: offended cat / soft toy do it yourself
Video: Warm cats toy, master class soft toy
Soft toy from felt with their own hands
Today, felt toys are most popular on children's master classes and needlewood circles. But they appeared not so long ago, and even there is an accurate date of their appearance.
 Margaret Steff and her first dolls
 An enterprising German Margaret Steffers filed an idea in a magazine for housewives to sew a soft toy with her hands from felt. In the magazine, Margaret published absolutely free, published a pattern and detailed master class. But in the note reported, exactly where you can buy a felt for such toys.
Such a move in 1879 allowed only a few years to establish the toy empire. The nuance was that toys as sewed in the factory, and sold blanks for toys that could be sewed alone. She left the Empire to children and grandchildren, and the world presented a fashion to the soft toy.


Master class felt dog


To work, it will be necessary: \u200b\u200bbrown, white and black felt, scissors, needle with thread, beads or eyes for toys and a gun with hot glue.

Print the pattern, cut out and stitch every detail.

Depending on the seam type, you can create completely different toy textures.

If the parts are connected to the glue, the toy can be cleaned only with a dry way. When wetting, the details are disconnected.


Soft toys do it yourself from the fabric
Fissure toys appeared much earlier than fetras. But with the appearance of fur and teddy toys, they were unjustly forgotten for a while. With the advent of plastic, even children's toys from the fabric came out of everybody. But today with a new wave of popularity on manual work, the popularity of the tissue toy was revived. The most popular interior toy today is Tilda.


When looking at Tilde's doll, there is a feeling that the roots of this toy go far away in the Middle Ages. By no means. The appearance of the tilde was in the 90s of the last century by a young designer Tony Finnanger. The girl was full of ideas and one of the many ideas was Tilda. Today without it it is impossible to imagine a gentle, home interior. And the craftsmen of the whole world are just in love with the idea of \u200b\u200bTony and create prototypes to their taste.

 Tilda angels
 Video: Master Class Tilda
Soft toys animals do it yourself: chicken, fox, horse, penguin, pig and others
With the advent of crumbs, I want to change the world for the better, to create a special atmosphere at home. And the child - he is perfection itself, and so want him to play unique toys filled with mother's love.
Toys do it yourself - just. We collected a master classes of a variety of toys, animals from a wide variety of materials. Note that the kids up to 2 years pull everything into the mouth. Therefore, the material should be natural, preferably without a pile. Wonderful fur toys best give life on the third year.


The pattern of the chicken, it can be sewn as for the baby and invest the teas of testicles. And you can create a miracle basket for Easter.
Video: Learning to sew copyright soft textile toy elephant


Video: how to sew a finger toy penguin
Alefthing pig pattern.


Pattern of the giraffe and his company.
 Pattern of cheerful giraffe
 Pattern of floral elephant


From the output of the cartoon, I changed the world of toys forever. Yes, everything, as before, love bears, but at the sight of Milon Mighton kids and adults come delight. At the exhibitions the first mighty toys are diverged. Want to sew a child yourself? As easy as pie! It remains to choose your favorite hero to your baby.
Video: Master class sew Mignon
Simple soft toys do it yourself

For newcomers, many details may seem too difficult and the desire to do will gradually disappear. For newbies, we picked up simple patterns, with the connection of which they will cope and children. These patterns are particularly relevant in creativity lessons in schools.


Bouquets of soft toys do it yourself photo
 Bouquets of soft toys of bears
 Nature defenders have long fought for the sale of live flowers, until someone has introduced bouquets from candy or toys. Now this global trend is so popular that in some countries the sale of living colors has been halved.

 Bouquets of soft toys Kitty
 Gathered for the holiday? Make a bouquet of soft toys yourself! This is a unique gift that will take a long time in the bedroom of the birthday girl for a long time.
Video: Bouquet of toys. Master class for beginners
Soft toys pillows do it yourself

 Toy Pillow Garfield
 Well, touching the world of toys is impossible not to remember about toys-cushion filling sofas of all needlewomen. These are your beloved things like families and guests. Please note that there are few people sitting on a sofa. Do not stretch your arms and touch the half-top toy. And the kids are happy to travel with your favorite soft toys, falling asleep under the noise of roads.


Video: Toy pillow Owl
Video: Pechwork "Toy-Pillow"

Flat toys are the simplest in execution, most often performed from the felt. But there are various variations. Such toys attract crude prostate and conciseness, interesting textures and the opportunity to take with them everywhere.
Video: Soft toys do it yourself. Master class, sew cats
Soft toys do it yourself patterns for beginners
Beginner needlewomen do not necessarily spend a lot of funds for flap and tools. Sometimes enough simple tights or socks to create beauty.
We also collected the simplest patterns for beginners.
 The simplest patterns of toys for newbies kitten
 Simplest patterns of toys for beginners monkey pattern Smeshariki
 Video: Soft toy "Sand of a sock"
It is impossible to stay indifferent at the sight of a charming soft toy, especially if she is stitched with her own hands. For the baby, she will become an excellent friend who will want to hug before bedtime, and for an adult man is just a wonderful individual gift.
Do not be mistaken if you do not have a sewing education, one desire is enough to create a needle with a thread. Immerse yourself in childhood, making a soft toy, show creative and get a lot of pleasure from the work done!
Simple soft toys do it yourself for beginners
So, it was already decided that the toy created by its own is much more valuable than purchased. To easily make such a unique thing, it is worth only:
- Get acquainted with the simple algorithm of its manufacture.
- Select the necessary materials.
- Correctly form and cut out the pattern of future toys.
Experts of the Internet Purchased patterns of a wide variety of soft toys, but you can find them not only there. I will not be superfluous in shops for needlework , children's departments for creativity (Here you can buy huge sets and benefits for the manufacture of toys alone), book benches. . If there are old and already worn soft toys in stock - they can be resurrected and to circle parts on a having circuit - this is a ready-made pattern.

Connect to the process of work on the manufacture of toys of your child, it is very important! Such leisure adds kid to work and discipline, will teach to be careful in his actions. Work with different matters and small accessories contributes to the development of small motility, attention and creative potential.
But do not forget - security primarily! Give your child to work scissors with stupid ends, do not let the sewing machine without adult supervision.
Fabrics used to sewing soft toys
- Tricat , dignity - easily stretches.
- Artificial fur with a pile of different lengths - Suitable for the creation of cushions in the form of animals.
- Silk - Enough capricious material, but it is indispensable in sewing and decorating dresses for dolls.
- Cotton - Differs the variety of colors.
- Wool - dense, darous matter.
- Velvet and velor - The presence of a small pile allows you to sew soft toys - animals, imitating their wool.
- Felt - A huge amount of crafts can be performed by felting.
Soft toy manufacturing technology
- Pick up the materials and prepare them for work. The cloth must be wrapped, stroke, sip crumpled places.
- Remove all the necessary details.
- Discover the fabric on the outlined contour.
- Purge all parts of the details on the outline.
- Vat the middle of the toy, use cotton, sintepon, foam rubber.
- Collect all parts of a soft toy and place them together.
- Finishing processes in the design of the shared type of toys.
Best for making patterns, use a dense cardboard. Such stencils easier to circle on the fabric, they will last longer to create more identical toys. Just attach a template to the possession of the fabric, circle, tightly pressing the matter.
So you got acquainted with the Aza sewing soft toys with your own hands. To extinguish skill, use such simple examples:
Patterns and schemes for soft toys do it yourself
The patterns of these cute animals are quite simple and do not require additional explanations.
Soft toy do it yourself: photo master class
Soft toy "Mouse"
Let's try to sew a wonderful little soft toy. It is perfect for the Groach games, age up to the year. The baby will already be able to grab such a bright and interesting model, and will gladly show interest in it. This will help him develop his tactile sensations. Having mastered the basics of making such a light toy, it will be possible to start working more complied with work.
- Use the proposed pattern, it is ready in the desired size.
- Best with bright flap of fabric and contrasting threads, so the finished product will simply attract views.
- Be original - connect the parts not from the wrong one, but from the front side using the loop (revision) seam. It is for this purpose that bright threads are chosen.
- Attach the ears, spout and eyes to the body.
- Will the toy filler and attach the tail.
- Sustrate the details of the head and paws, fill it loosely fill with foam rubber or syntheps, will also fit wool if nothing else turned out to be at hand. In the same way, create a tail, just not need to fill it.
- Sew round loskuts, forming a shell, leave the holes for packing and connecting the paw and head.
- Collect all the details in one whole, using a secret seam. The last trick of the tail.
- Give the toy eyes, and the wonderful turtle pillow is ready. You can not only play with her, but also sleep.
Bouquet of soft toys: manufacturing technology with photos
This kind of gifts appeared relatively recently, and are now at the peak of popularity. A similar bouquet will not start as living flowers, but will please our owners for a long time. You can buy a bouquet of soft toys, spending a lot of money, but you can create yourself, well, saving.
Prepare for work:
- Little soft toys of bears - 3pcs.
- Corrugated paper, organza.
- Ribbons, sticks, mesh for bouquets, other decorations.
- Adhesive pistol.
Master class on the manufacture of a bouquet:
- First prepare the basis on which the bears will be attached, they will be located on chopsticks. Cut out of the organza two squares per wand, form a flower out of the pickens and attach a hot gun to a chopstick in two layers.
- Do the same from a special grid for bouquets and secure over organza. There should be peculiar flowers, as shown in the photo.
- Next, it is worth the design of toys. Get rid of the bears from labels, tags, and other factory identification signs. You can simply glue the bottom of the bears to the recently formed flowers on the stick, and you can imperceptibly sew. The second method will allow, if necessary, "disassemble" a bouquet, without spoiling toys. Now proceed to the collection of all bouquet. Tightly tie all sticks with toys with ribbon, you can still bore them with several drops of glue.
- Take the remaining organza and wrap it with a bouquet, fasten the fastening of the sticks themselves. With the help of corrugations, create another case for a bouquet, you can hide all working moments. Lock all the product bow. Correct your hands all the irregularities where you need to create folds.
- This toy is easy to perform, the basis for her will be the usual sock. Do not use old, worn socks: This is a myth that bright and colorful things are obtained from the loss things. But, for sure, there is one attractive sock in the house, losing his pair, here and apply it.
- Before starting work, decide how the cat would you like to do - thin or thoroughly. Based on this, cut the sock in a specific place. If you want to get a cool toy - cut off the part of the sock covering the foot, and the upper part of the gum move away.
- Fill the toy with padded material, in this case - Singypruna. The torso should be larger than the head, so fill it tightly. After, the loose hole, bend insight and secure needles. Sew cut and stretch edges, forming ears.
- Press the product with your hand, make the ears fighter. Slide the contrasting thread the face of a pet on a previously drawn stencil. Use the seam "Back Neck".
- Decorate the cat with a bright accessory - scarf, a bow, gale, butterfly.
Soft toy rooster with her hands
Let's make a small soft toy - a felt pendant, it is possible to decorate the New Year tree, and you can just hang in a prominent place as a kind of charm. Consider two options.
Heart-shaped rooster.
- Cut two parts for the heart from Fetra, choose white, gray, black, or other muffled color. On his background, a multicolored tooth will be best distinguished.
- Consider closer to the picture, all other parts of the body Cockerel are also cut in the form of hearts.
- At one part of the body, attach the wing and eyebreaker, and then carefully sew with another part of the body, placing the tail, scallop and keyboard in the places for them. Fill a little toy syntheps and secure the loop.
Snow rooster.
- For this, the decorations will need less bright colors than for the previous toys, but the easierless.
- From a white felt, cut the caller in the form of a wide eight and wings, as in the figure.
- Switch on the face toys a joyful image on the face, use black threads, also treat the edges of the wings.
- Make a red scallop and yellow paws with a beak.
- Sust all the details of the toy, fill with Singrytec and make a loop.
Soft toy Owl with her hands
Here is such a sovice-beauty you can create yourself, if you have under hand trimming from the tissues of different colors.
Step-by-step performance
